In March of 2017, I joined in with the StencilGirl creative team for a collaboration with Walnut Hollow. This was a fun project as it gave me the opportunity to try something entirely new with my stencils; I knew as soon as I saw these decorator plaques from Walnut Hollow that I wanted to make a diptych and do some wood burning with my Versa-Tool.
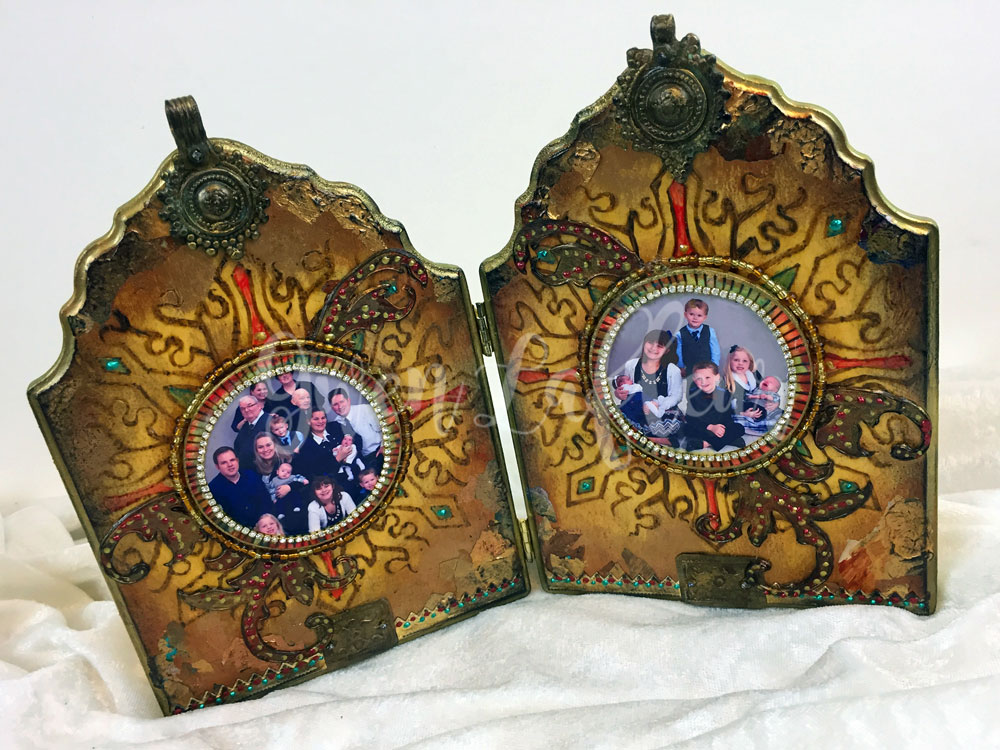
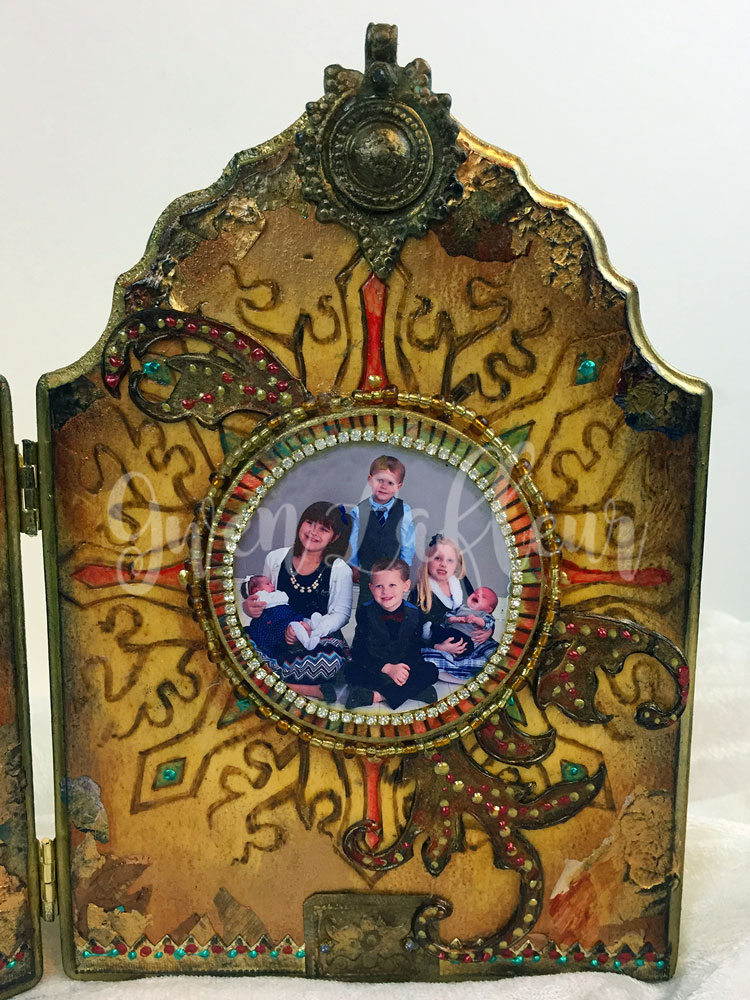
Here's what I made - a diptych photo frame that works as a fun and unique way for me to display family photos in my home.
Here's what I made - a diptych photo frame that works as a fun and unique way for me to display family photos in my home.

I took pictures of the steps along the way so that I could share how it all came together. Ready to get started?
First I started by stenciling each plaque with my Decorative Medallion stencil using a light color of brown ink. I knew I was going to trace over this design with my Versa-Tool so I wanted to make sure that the color I used wouldn't interfere with the beautiful burned wood color that was coming next.
First I started by stenciling each plaque with my Decorative Medallion stencil using a light color of brown ink. I knew I was going to trace over this design with my Versa-Tool so I wanted to make sure that the color I used wouldn't interfere with the beautiful burned wood color that was coming next.
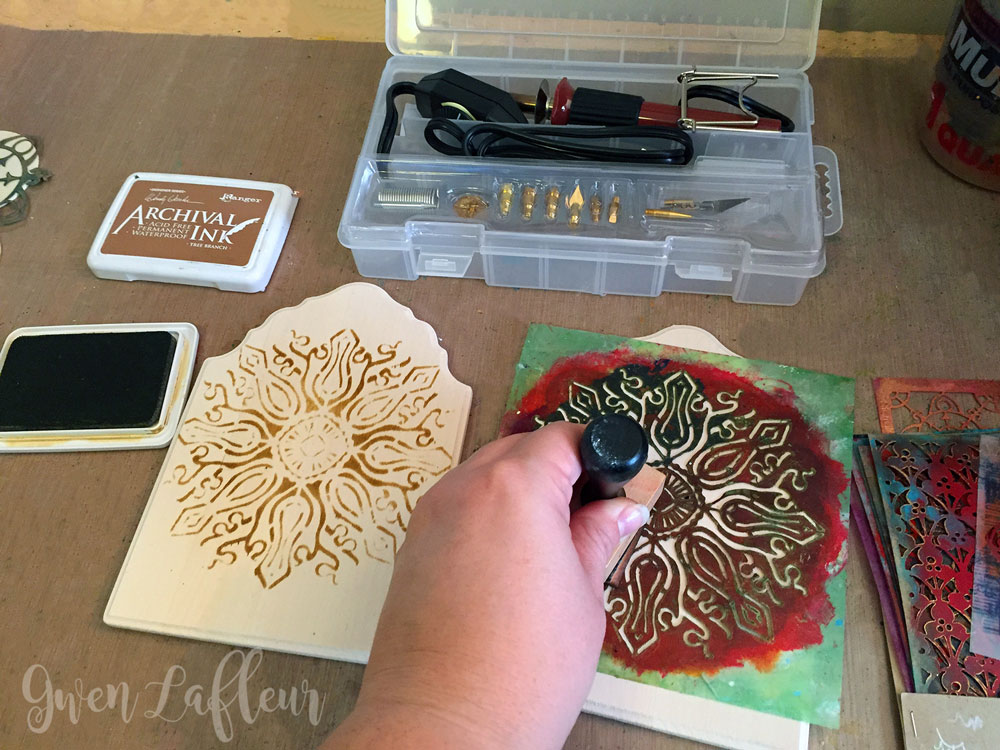
The next step takes a while, so make sure you're comfortable... I pulled up a chair and turned on a hockey game while I patiently (or at least with an attempt at patience) traced over the stenciled lines with the detail tip of my tool. I really wanted that dark brown wood-burned color and I love the way that it created almost a debossed effect as I worked over the design. You can clearly see the difference in color and texture as each section was burned. Beautiful!

In the photo above you can see a circle drawn in the center in pencil - I knew that I was going to cover up the middle with a circular element, so why waste time burning sections that would be covered up? This was my line to tell me where I could stop since it would later be hidden.
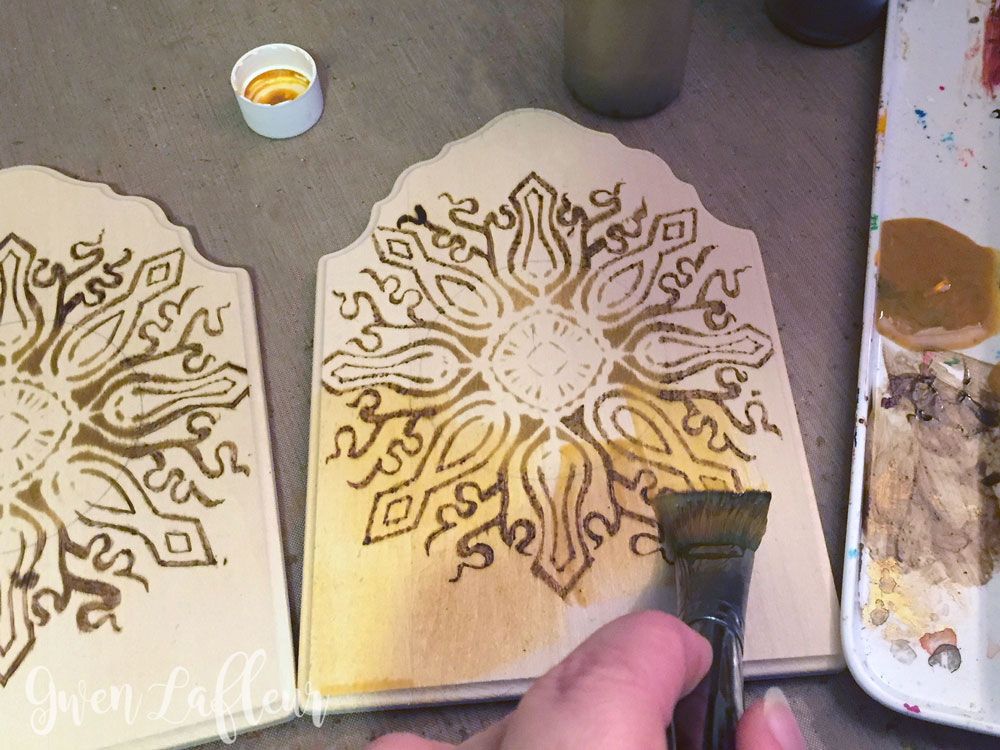
Once the burning was done, I didn't want to cover any of it up with paint so I coated the plaques with a glaze made from polymer medium, Transparent Yellow Iron Oxide fluid acrylic paint, Micaceous Iron Oxide, and Gold Interference paint. (All from Golden.)
Once the burning was done, I didn't want to cover any of it up with paint so I coated the plaques with a glaze made from polymer medium, Transparent Yellow Iron Oxide fluid acrylic paint, Micaceous Iron Oxide, and Gold Interference paint. (All from Golden.)
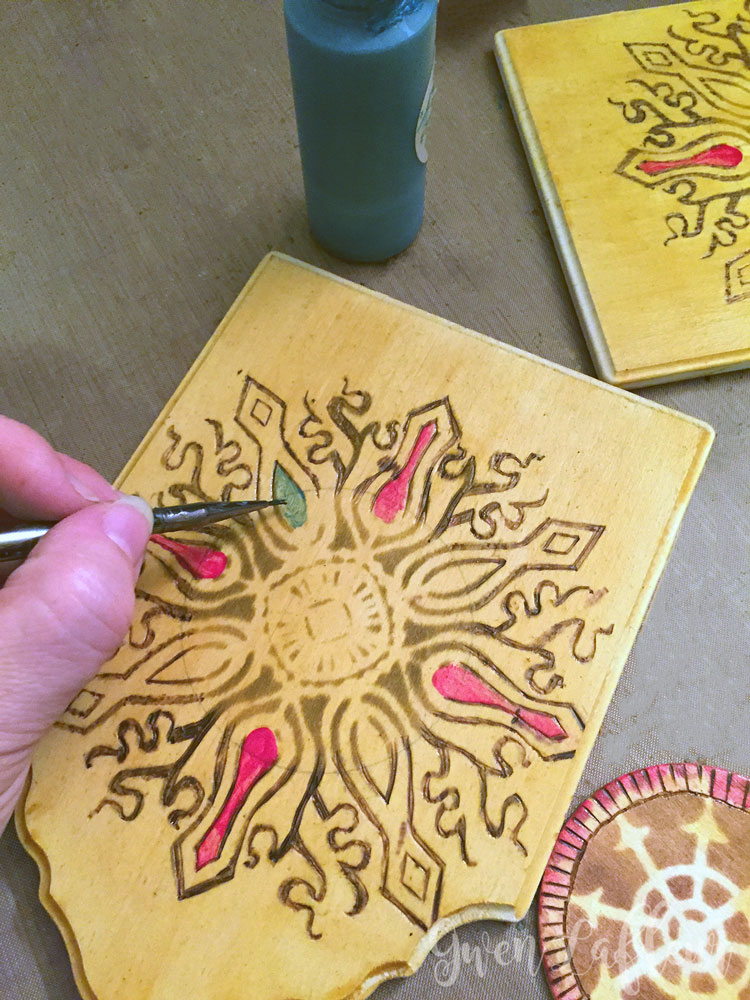
I also have several ready-made glazes in a variety of my favorite colors that I keep in small bottles; I used those to add a few touches of color to some areas of the design. (The ones I used here were Cobalt Turquoise and Pyrrole Red, both mixed with polymer medium.)
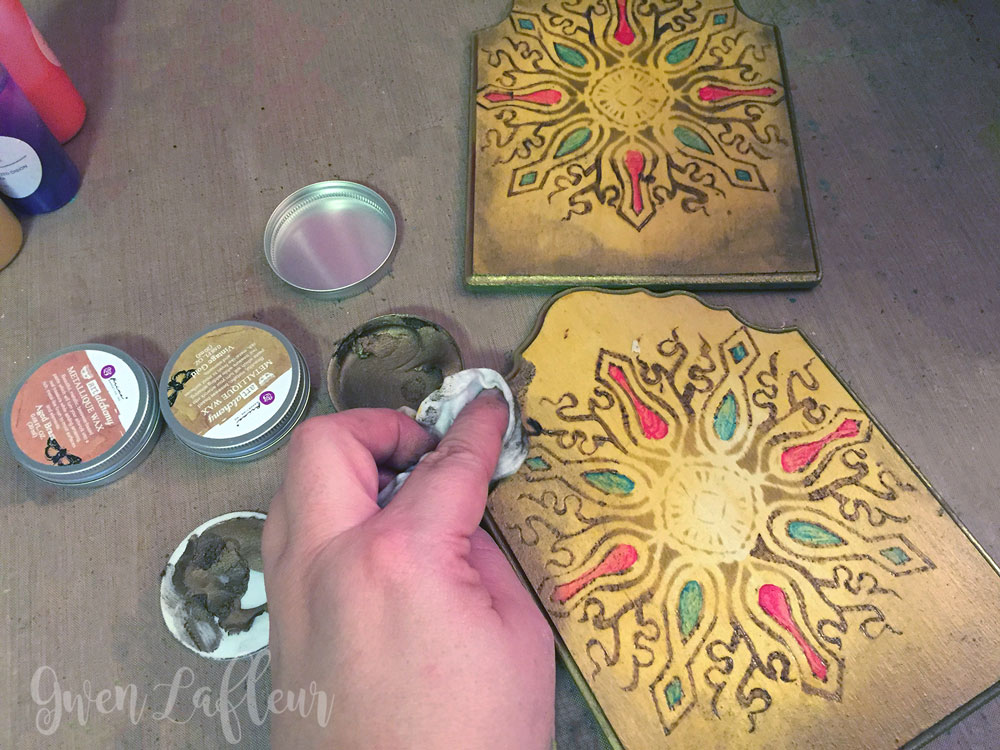
Next I used some metallic waxes around the edges of each plaque to frame the design and add a bit more depth:
At this point everything was still feeling very flat and "blah" to me (keeping in mind that in my mind, more is usually more.) My palette was sitting on the desk next to me so I randomly started peeling off sections of dried gold paint and sticking them around the edges of my plaques. I really liked the effect - it looked a bit like gold leafing, so I kept doing it and then sealed it with Gloss Medium.

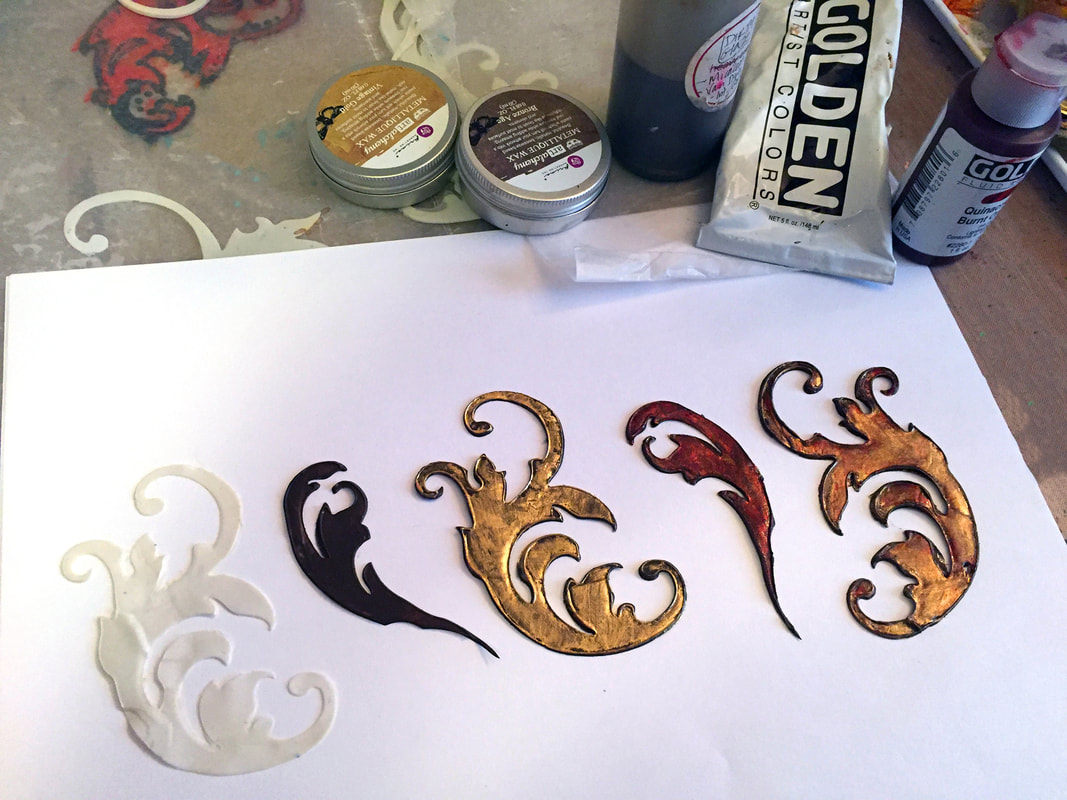
I still felt like the piece was missing something so I pulled out some molding paste skins I had made several months ago and then didn't use. These were done using the Damask Borders stencil by Michelle Ward.
(To make a molding paste skin, you just put molding paste through your stencil onto a non-stick surface like a Teflon of silicon craft mat, then set it aside on a flat surface and let it dry completely. The "skins" will peel off and work great as dimensional embellishments. I stored mine in wax paper until they were ready to be used. As always, make sure to clean your stencil immediately after using any kind of texture paste.)
Here you can see the steps I took to paint them - I wanted them to look a bit metallic so I used several layers of paint and finished with a bit more wax.
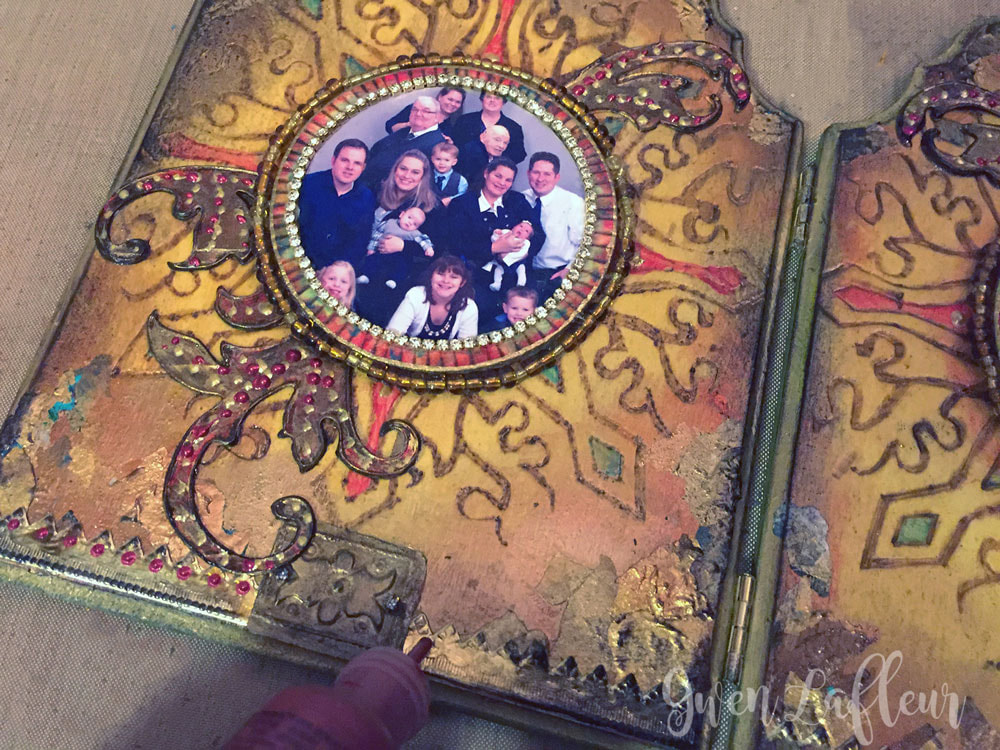
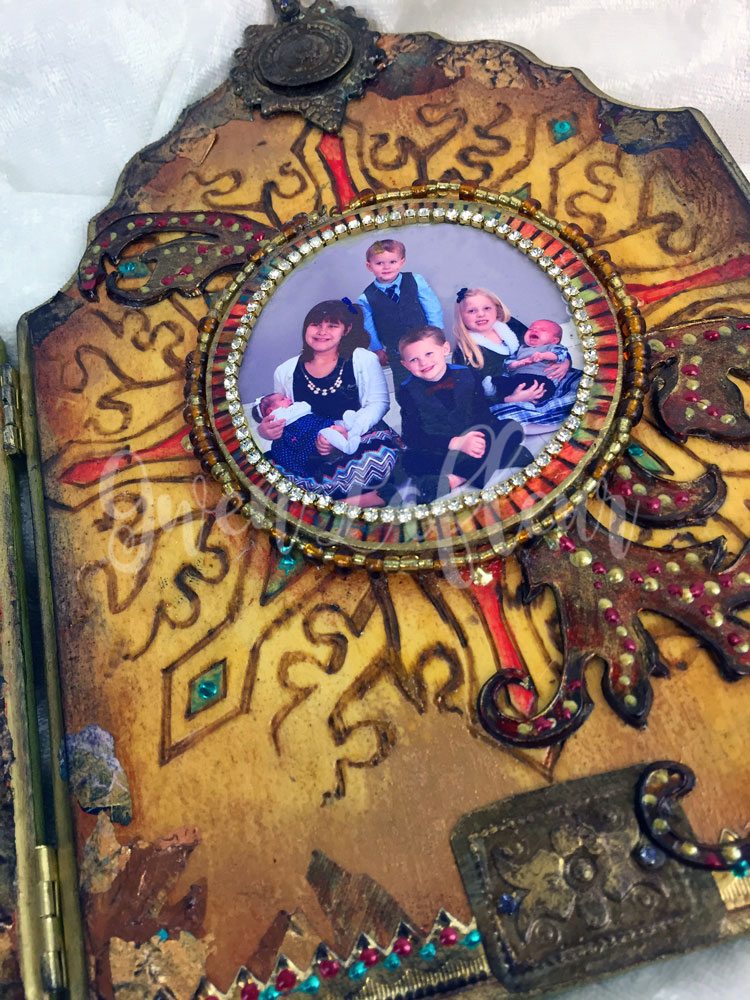
I picked out a few other embellishments to use with my flourishes; some Dresden border trim and some really cool vintage Turkmen jewelry findings. I adhered everything into place and let it dry.
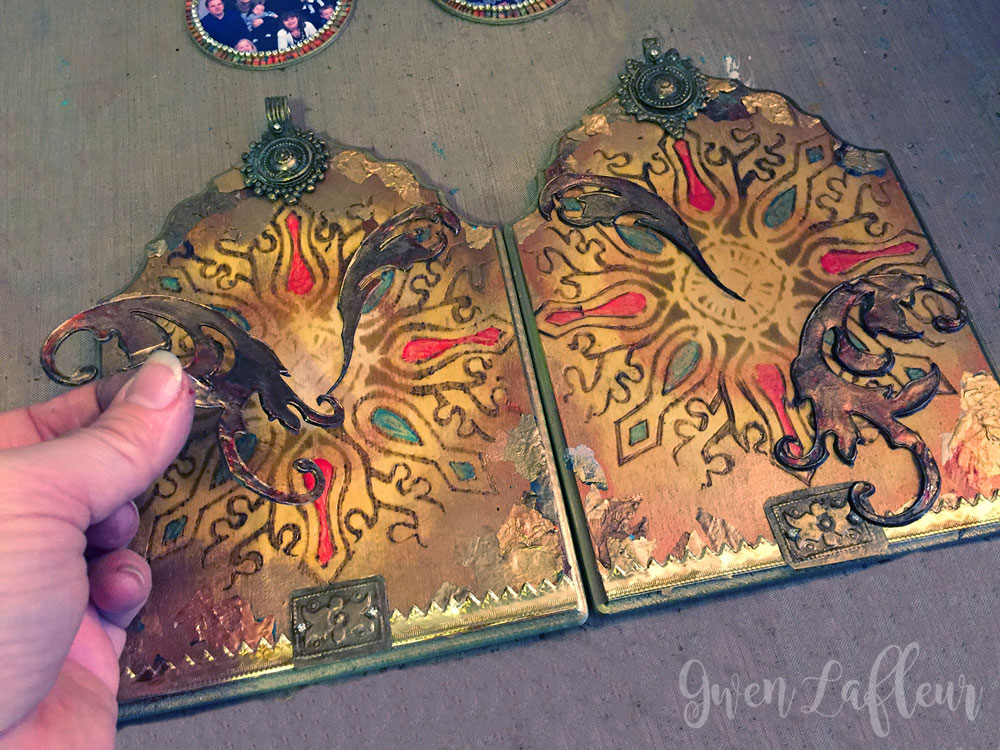
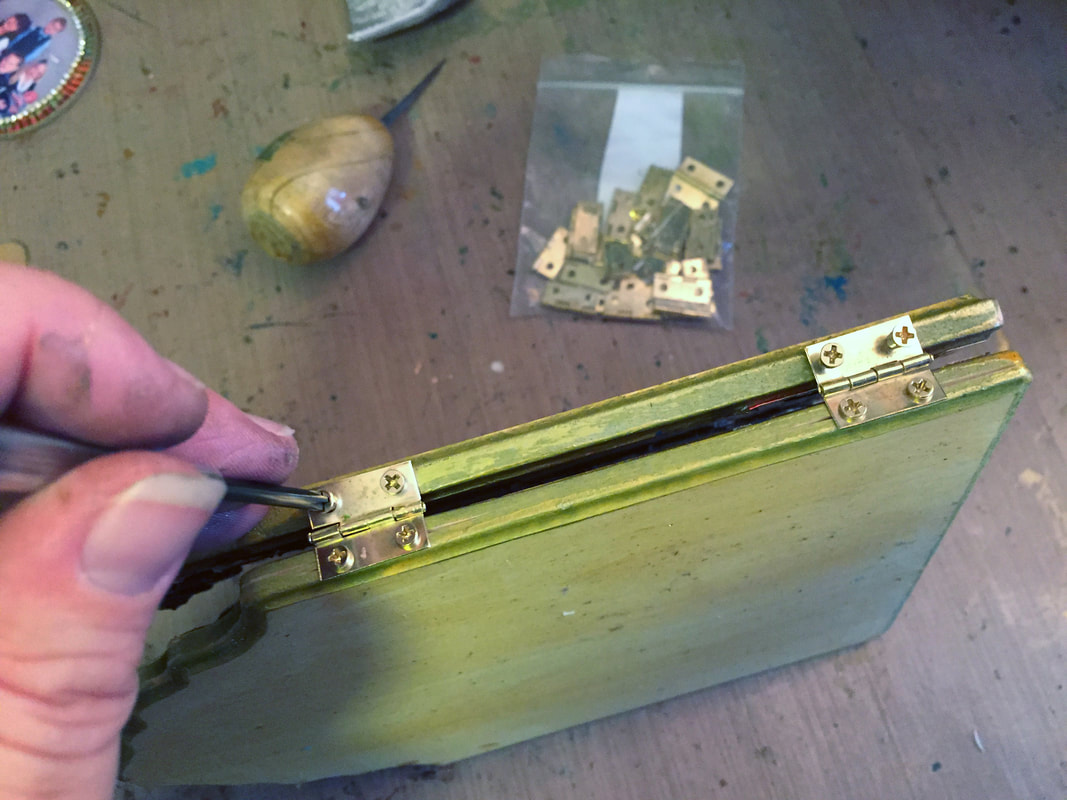
From here I used some small hinges and mini screws to connect my plaques together in order to make them into a diptych.
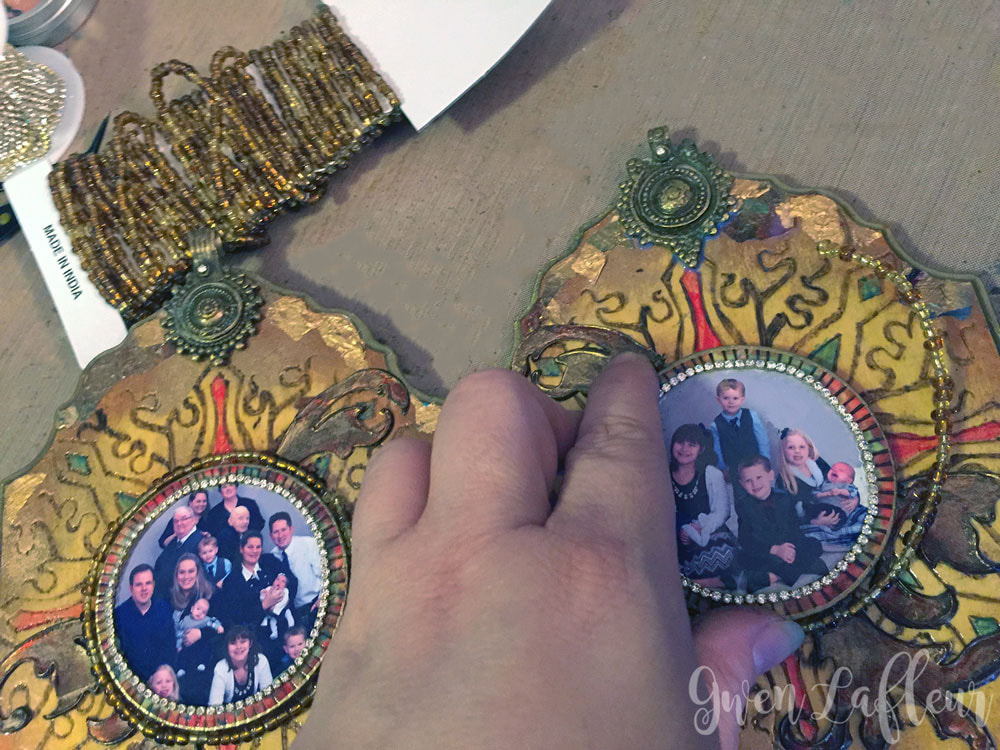
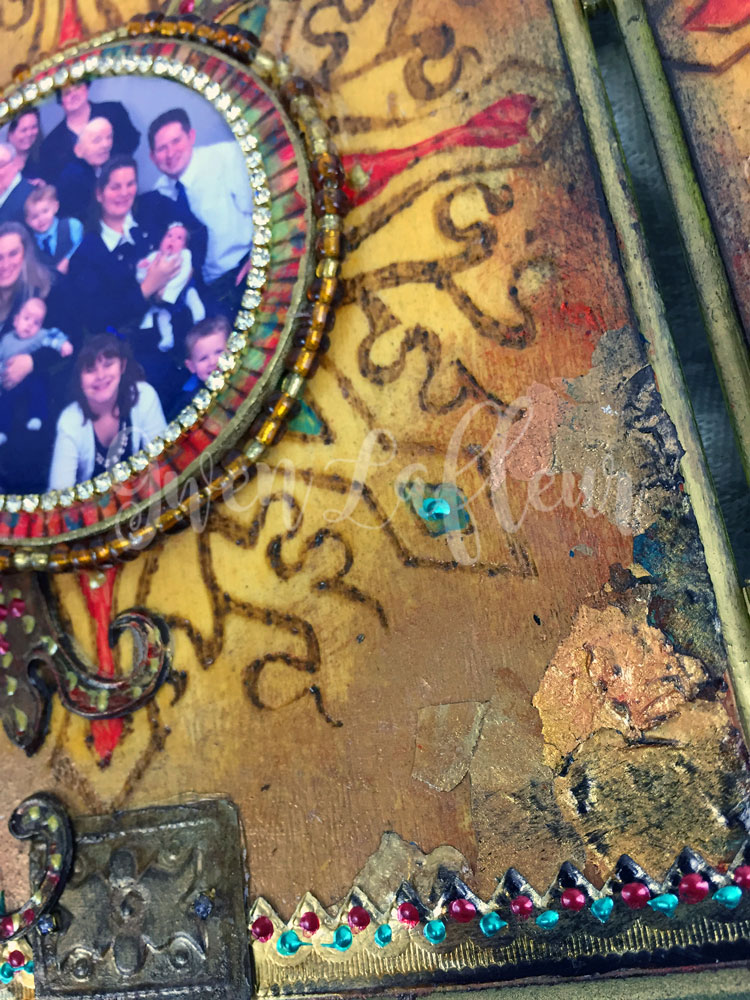
To create the focal points I took a few family photos and resized them in Photoshop before printing them on photo paper; I used a large circle punch to cut them out. I mounted the photos on some wood circles. (Before mounting, I burned a pattern around the edge of the circles with my Versa-Tool and I really like the effect.) I edged the photos with strands of rhinestones and then adhered the embellished photos in the center of the medallions on either side of the diptych.
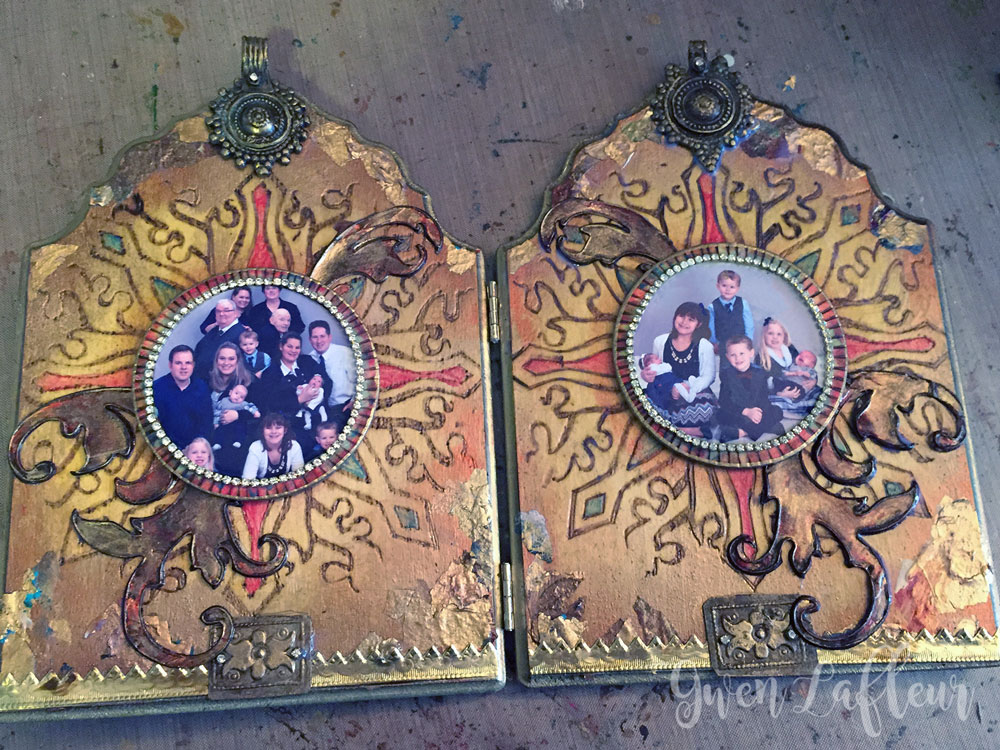
At this point you might think that I'd be done, but as I said earlier, in my book more is more! I took some gold and brown beads pre-strung on wire and adhered those around the circles - this helped cover up gaps between the circle and the plaques to create more of a bridge between the raised circle and the background.
For the final step I took out some Liquid Pearls and added dots along my Dresden border to bring the colors out from the focal areas of the piece and onto the edges to add more unity and continuity.
Finished! If I were to do it again I'd leave off the Liquid Pearls and find another way to tie in the colors from the center - maybe alcohol ink? But in any case, I hope you enjoyed the tutorial and picked up a few new ideas for creating with stencils.
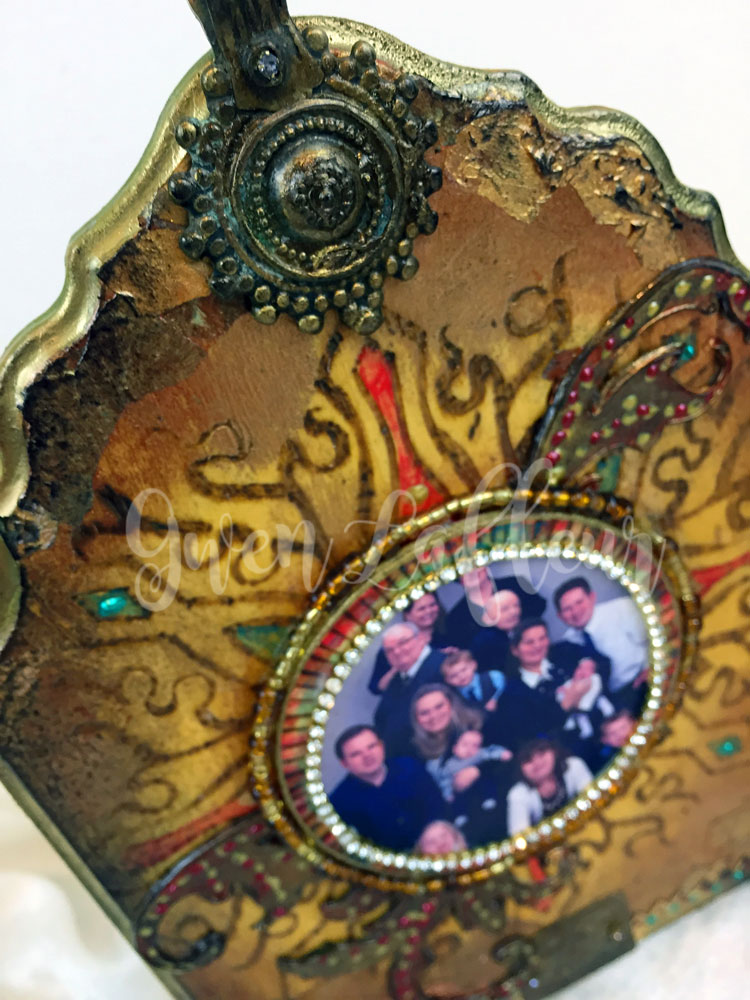
Below you can see more photos and close-ups of the finished piece:
Below you can see more photos and close-ups of the finished piece:

Thoughts, questions, or comments?
|
|
You might also like...