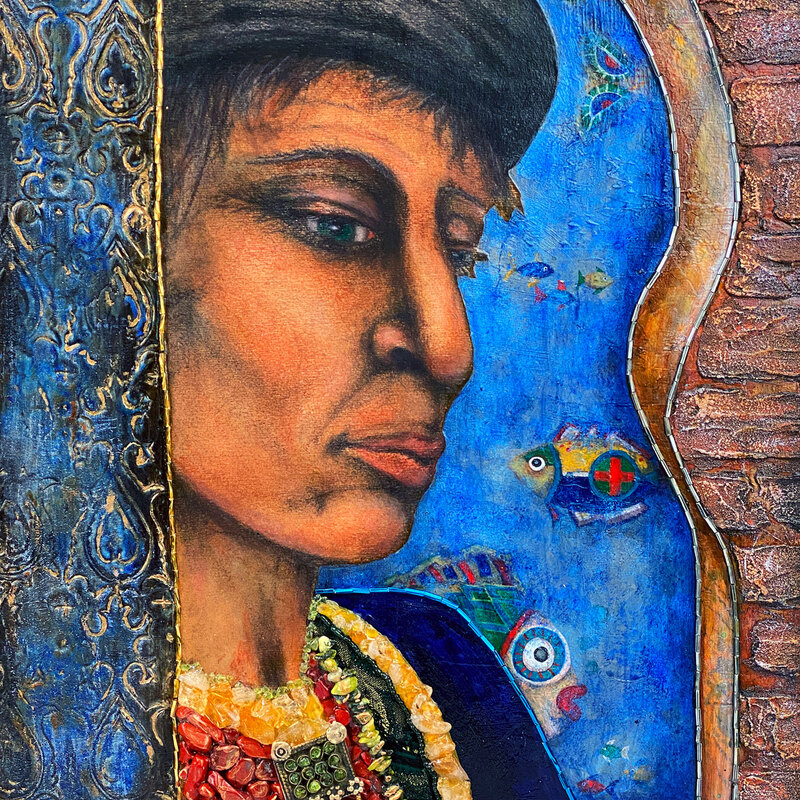
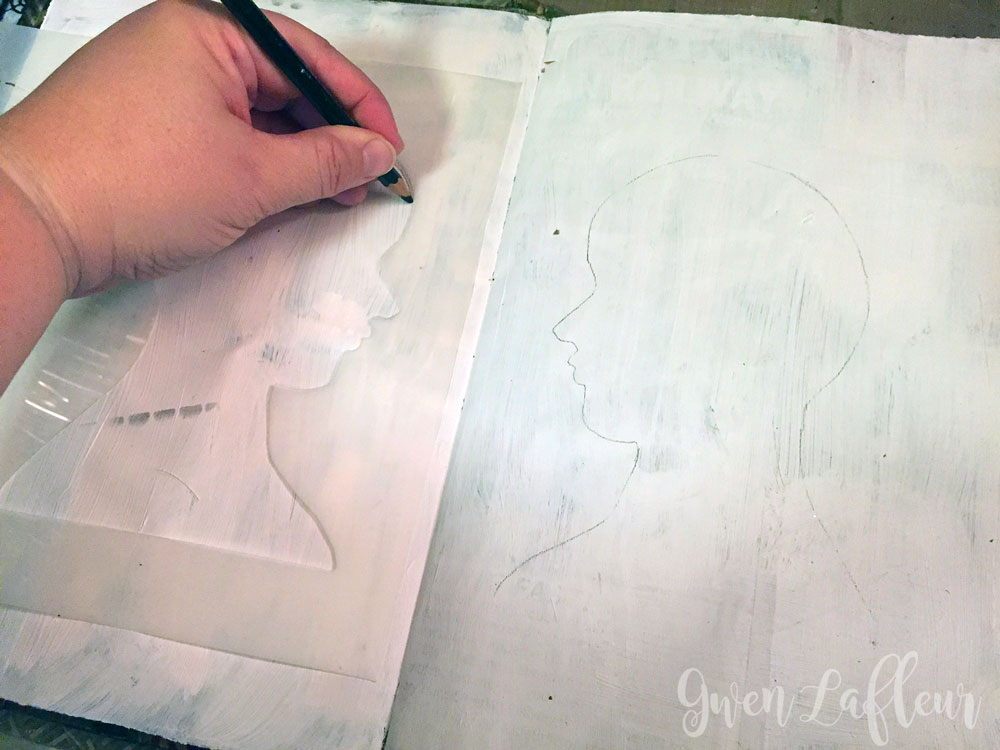
I love stencils - they're one of my favorite art supplies / tools, especially for art journaling. After watching a stellar video by Anne Bagby (Collage, Paper, Patterns, & Glazing,) I wanted to take some of the techniques I'd learned and apply them in my own work. I had the idea to do some kind of face-to-face concept in my journal, so I took out the Face Map Side Version 2 stencil by Pam Carriker to use as my starting point.
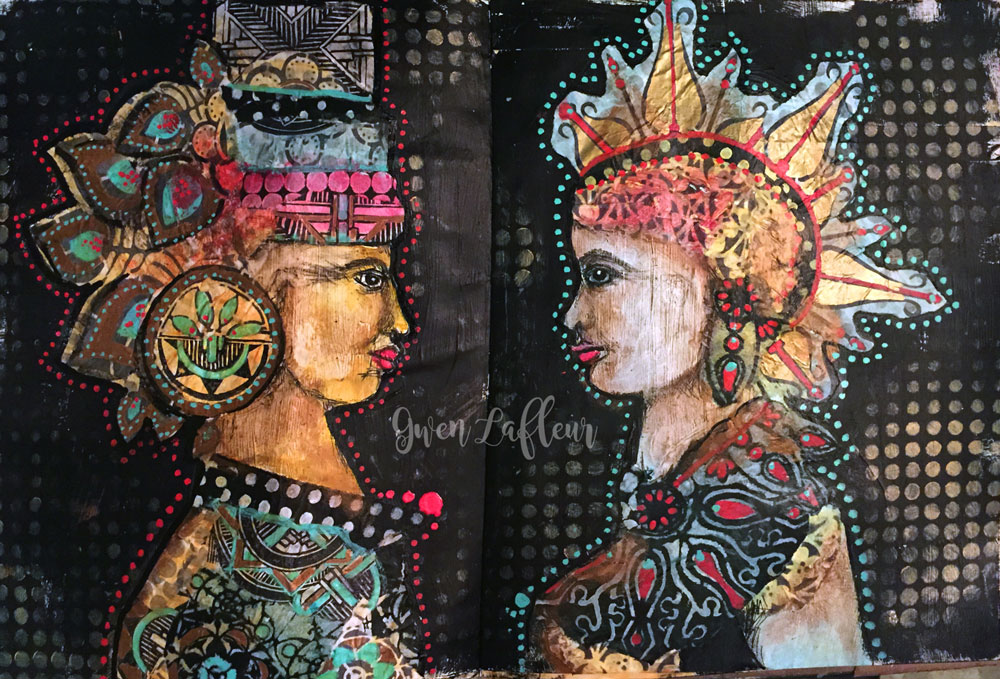
Here's where I ended up:
Here's where I ended up:
I took photos of the various steps along the way so that I could share the process... it was really a lot of fun!
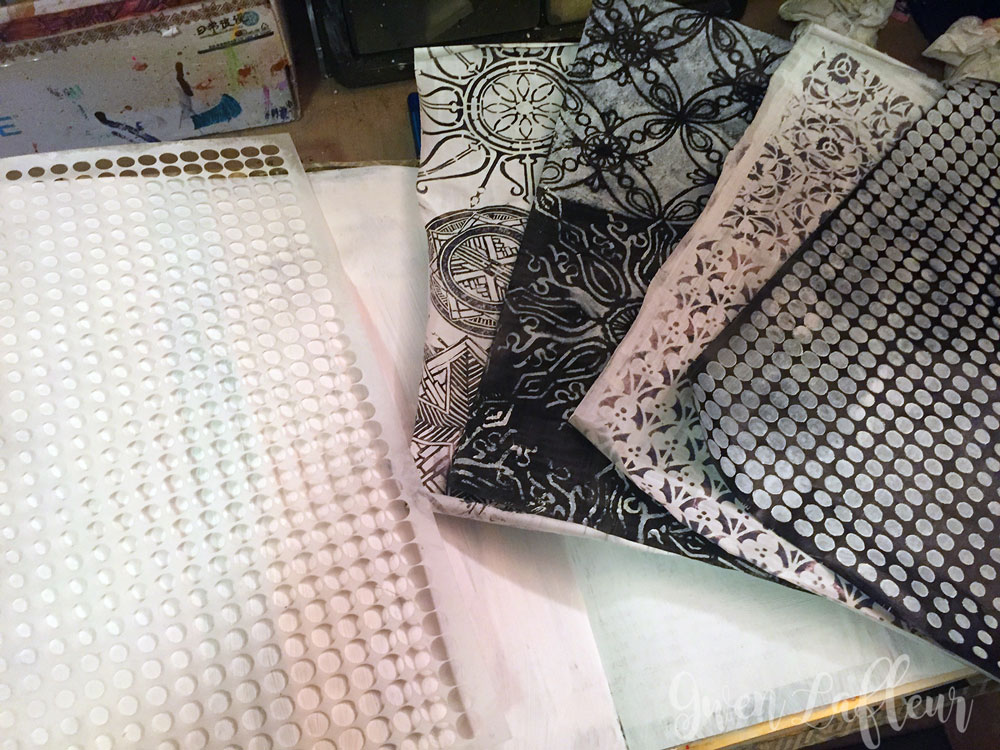
To start, I took one of the techniques from Anne's video and started by making some black and white collage papers using my stencils, the Fade Circle stencil by Michelle Ward, and some of my hand-carved stamps. To do that I painted sheets of deli paper with either white or black gesso, then stenciled on top with the opposite color (black permanent ink on the white papers, white gesso on the black pages.)
To start, I took one of the techniques from Anne's video and started by making some black and white collage papers using my stencils, the Fade Circle stencil by Michelle Ward, and some of my hand-carved stamps. To do that I painted sheets of deli paper with either white or black gesso, then stenciled on top with the opposite color (black permanent ink on the white papers, white gesso on the black pages.)
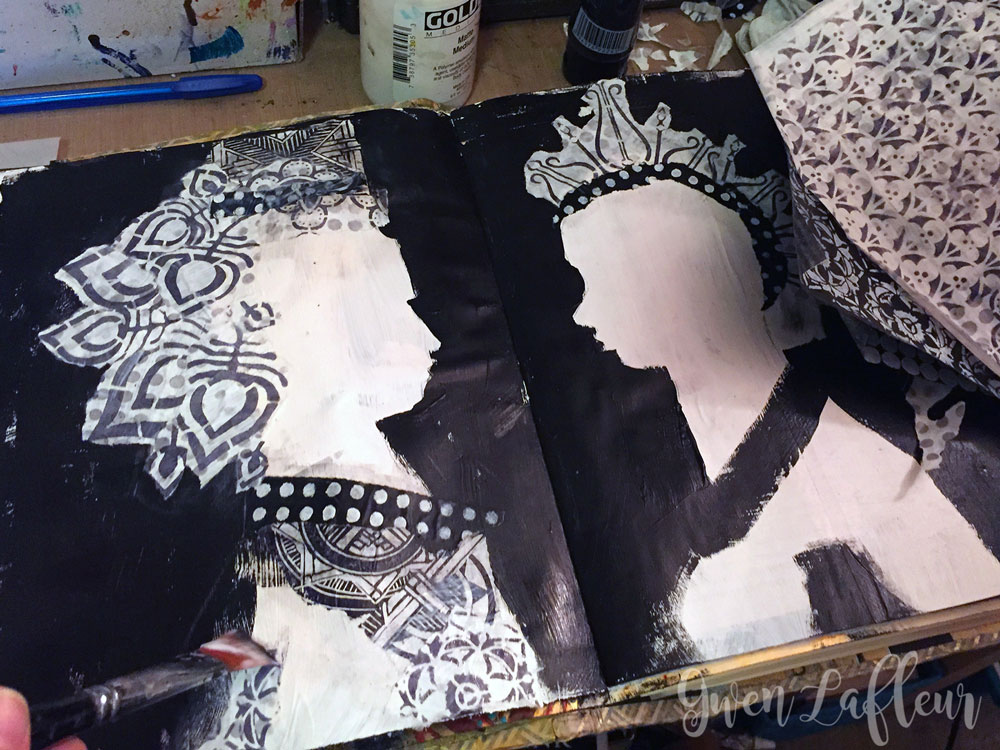
Next I used the stencil to trace the outline of the heads on the gessoed background in my art journal. I flipped the stencil for the second one so that they would face each other across the center of the spread.
Following Anne Bagby's lead from her video, I blocked in around the figures with black paint, leaving areas as I went to embellish the figures (no plan for what they would look like, I just went with what I was feeling at the time.)
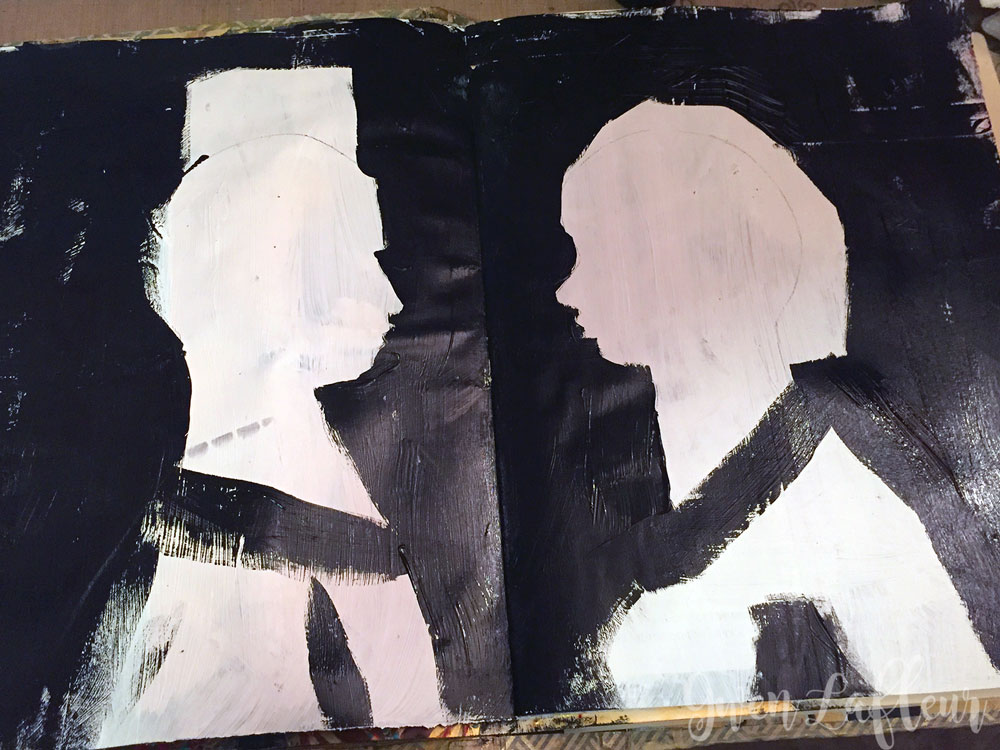
This is the point where I deviated from the video and started just doing my own thing. I began by tearing up pieces of my collage papers and adhering them in place with matte medium. I tried to do it quickly without thinking too much, but I was still considering where everything would work best - I just didn't spend forever overthinking every choice.
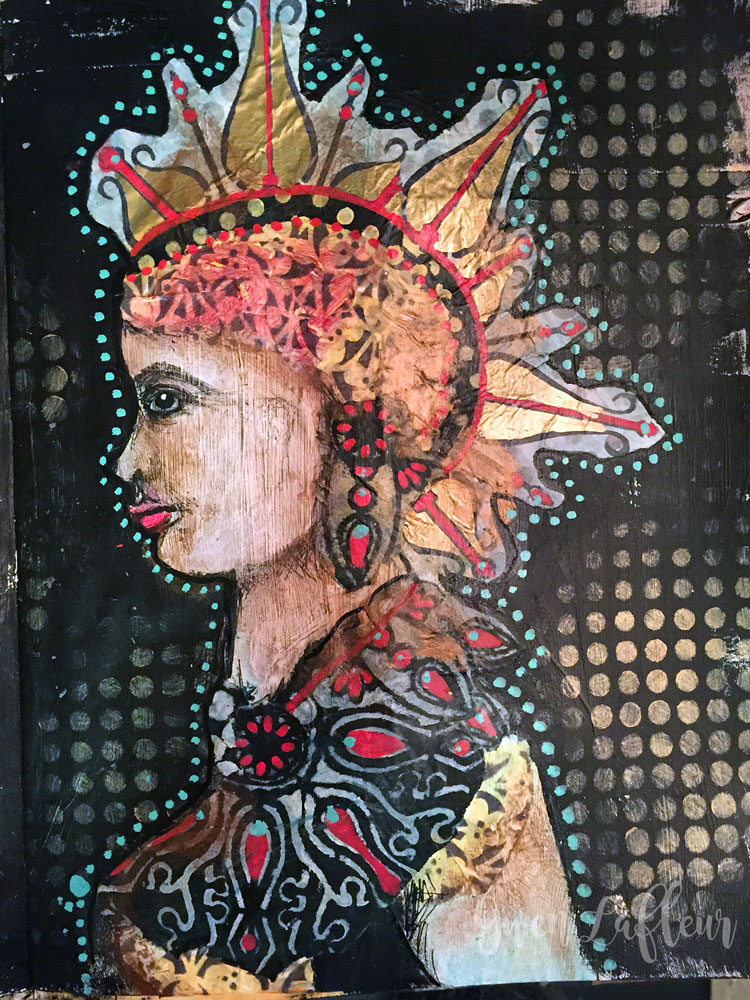
Moving quickly and just going with my instincts and impulses led me in a kind of unexpected direction, but I found myself loving it very quickly. The hair on both of the faces ended up being my favorite part. I have no idea where the idea for the spikes came from, but I kind of adore that part of the collage.
Moving quickly and just going with my instincts and impulses led me in a kind of unexpected direction, but I found myself loving it very quickly. The hair on both of the faces ended up being my favorite part. I have no idea where the idea for the spikes came from, but I kind of adore that part of the collage.
|

|
With the collaged portion complete I seriously considered just stopping here and calling it done. I loved it. And of course you could follow along to this point and just leave it black and white. However more is more, so naturally I kept going.
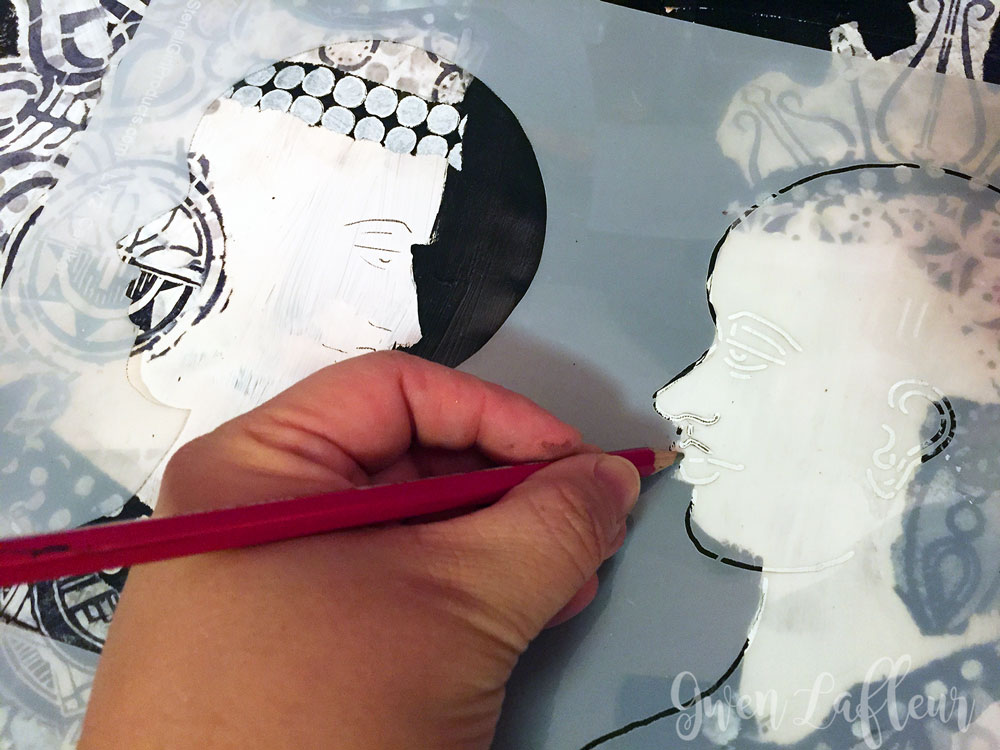
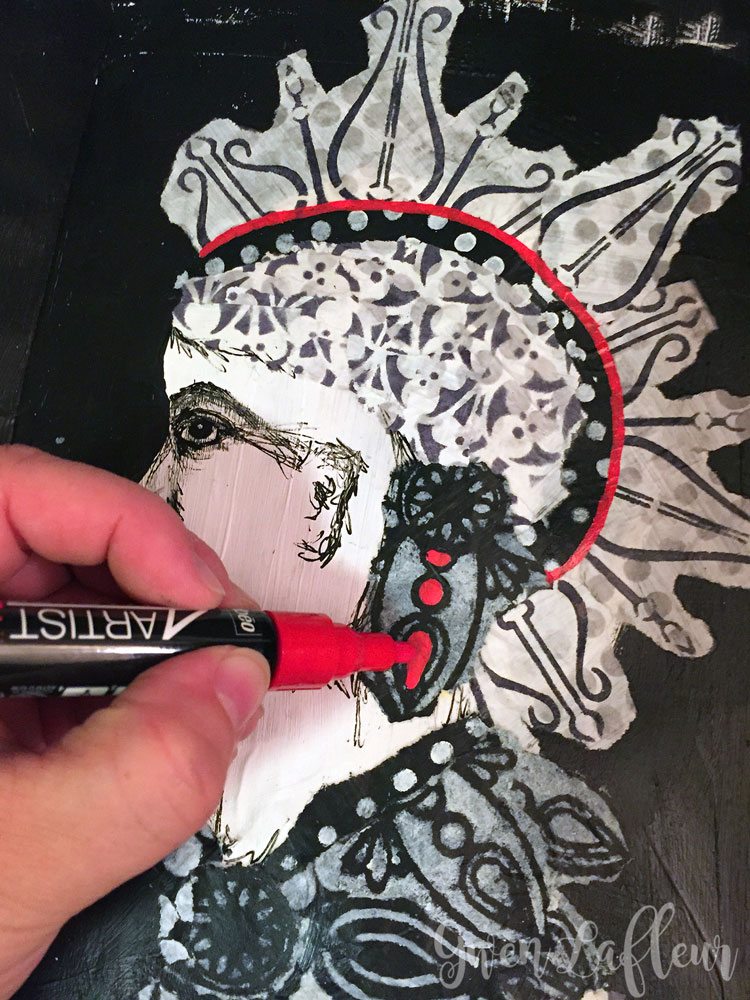
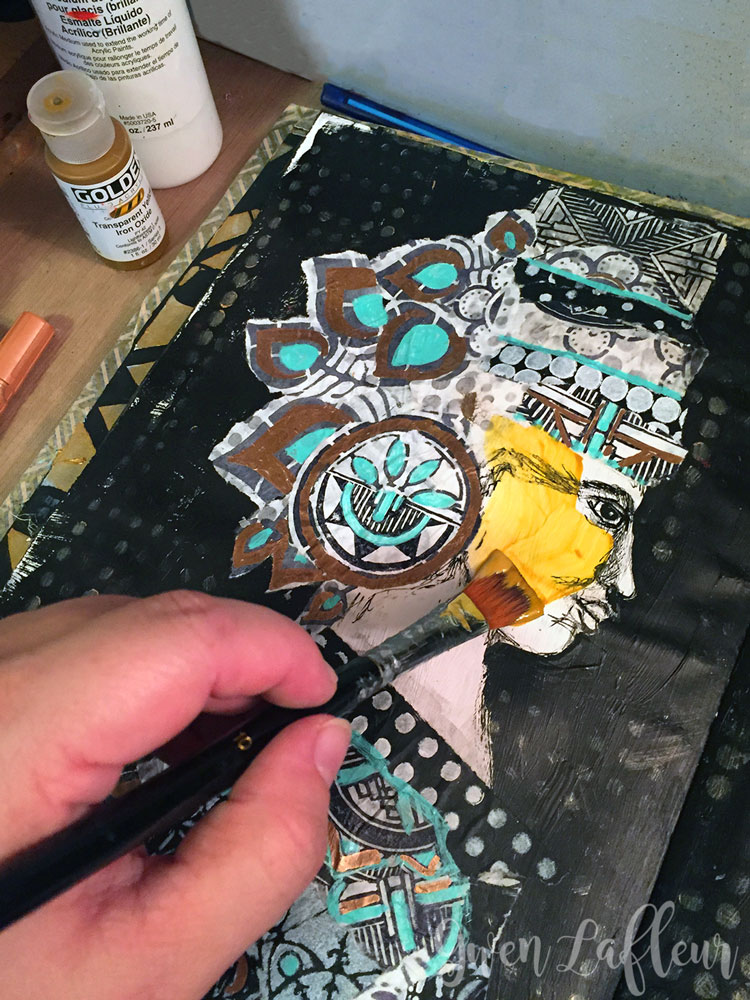
The next step was to use the stencil to pencil in where the facial features would go. I lightly sketched in how I wanted features to look and then layered on top with a permanent pen. From there, I pulled out some paint markers and started adding a few spots of really intense, glossy color.
The next step was to use the stencil to pencil in where the facial features would go. I lightly sketched in how I wanted features to look and then layered on top with a permanent pen. From there, I pulled out some paint markers and started adding a few spots of really intense, glossy color.
|
|
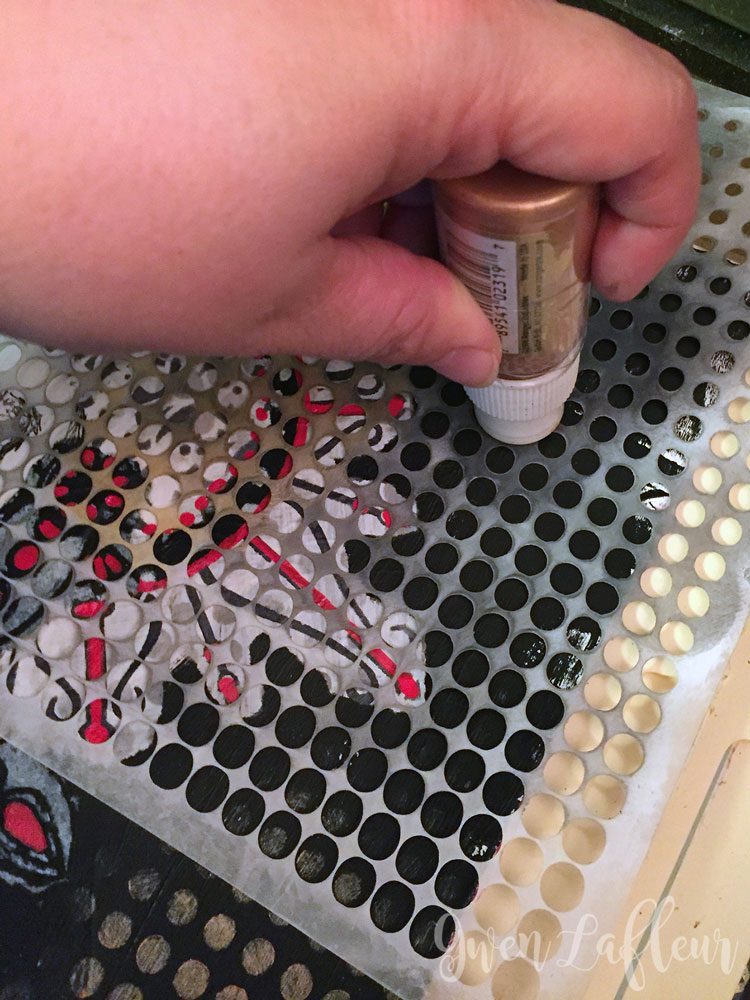
I wanted to do a bit more to tie in the background of the spread, so I pulled out the Fade Circle stencil again and used some bronze paint to add pattern onto the background. Normally I don't use the bottle directly through the stencil this way, but this one wasn't very juicy so it worked well (although be careful since you can tear up the applicators on your paint daubers by stenciling directly through the stencil this way.)
I continued to add more color to the figures with paint pens as well as some transparent paints and glazes. I followed this with some more straight bronze paint to add a bit of depth.
I continued to add more color to the figures with paint pens as well as some transparent paints and glazes. I followed this with some more straight bronze paint to add a bit of depth.
|
|
I used my paint pens again to add lots of dots for some finishing detail, and then called it done.
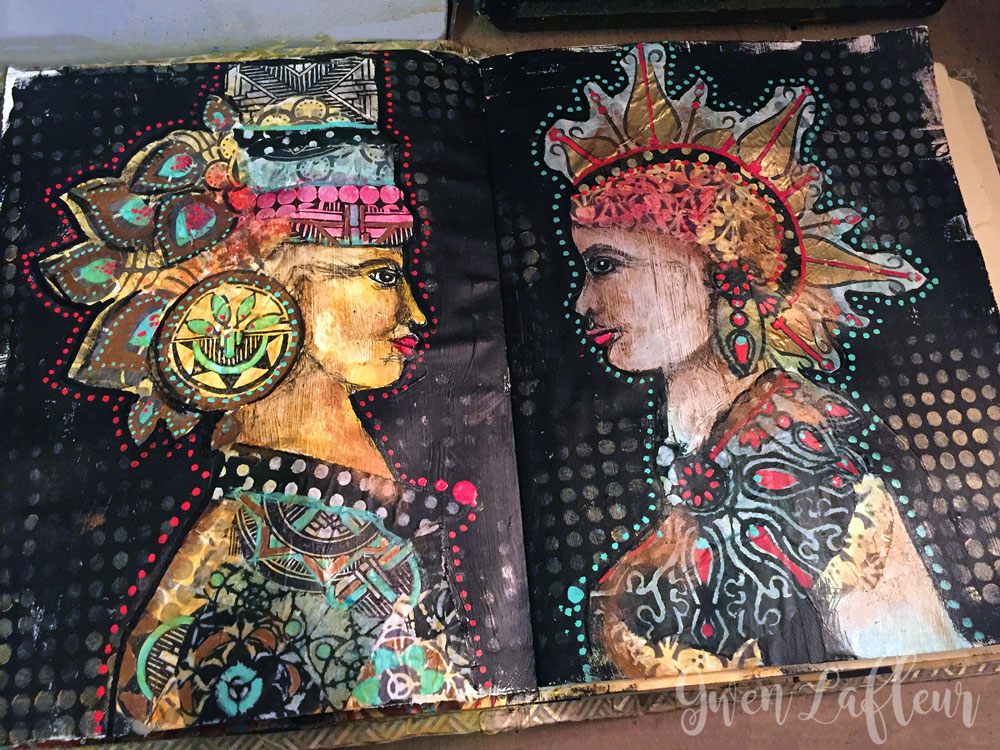
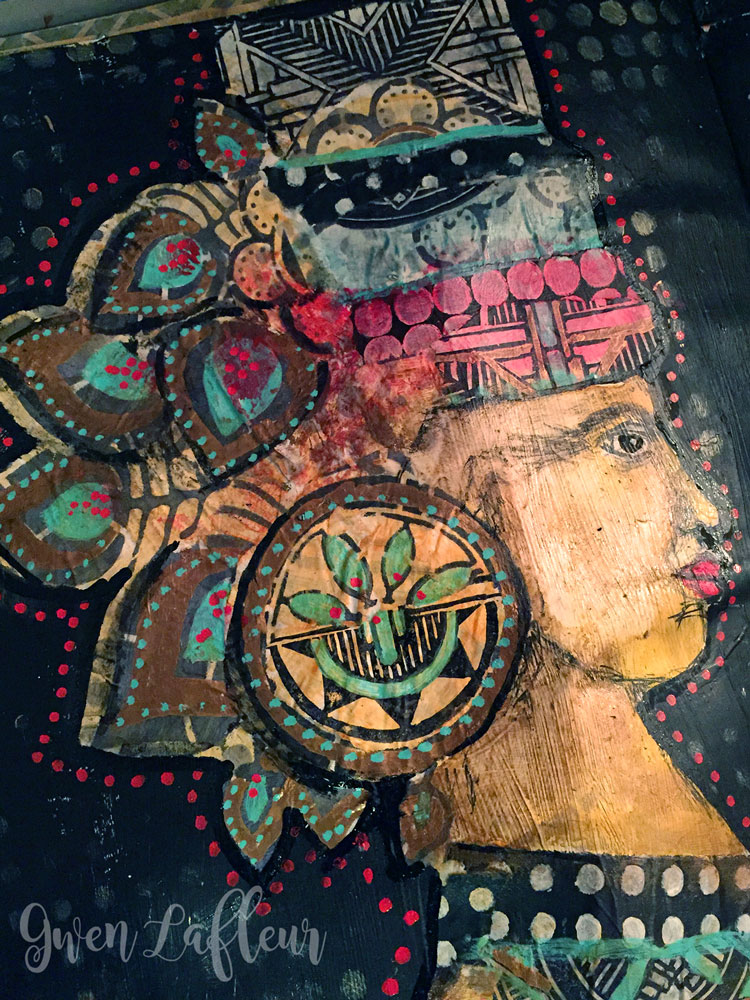
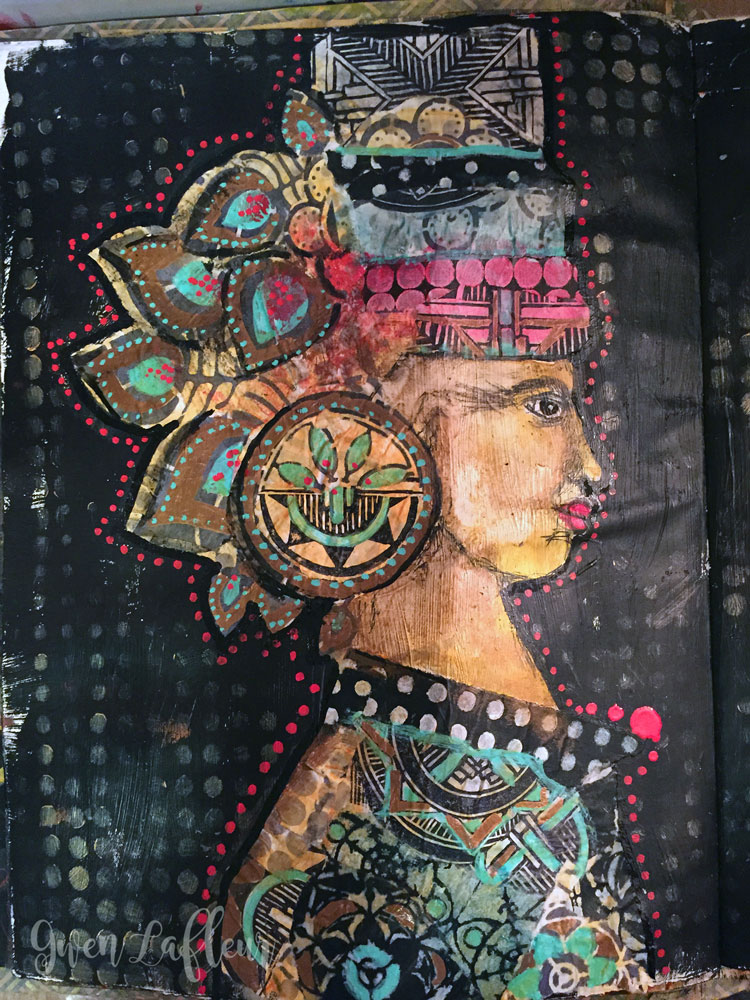
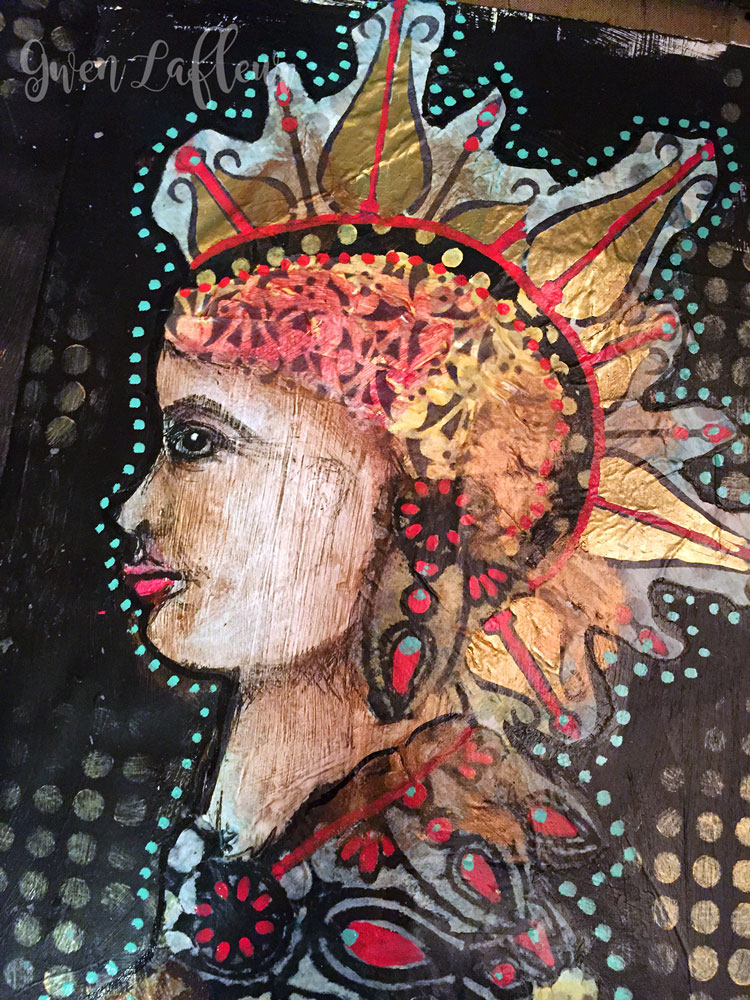
Here you can see more of the completed pages with a few close-ups - just click any of the images to see the whole thing.
Thoughts, questions, or comments?
|
|
You might also like...