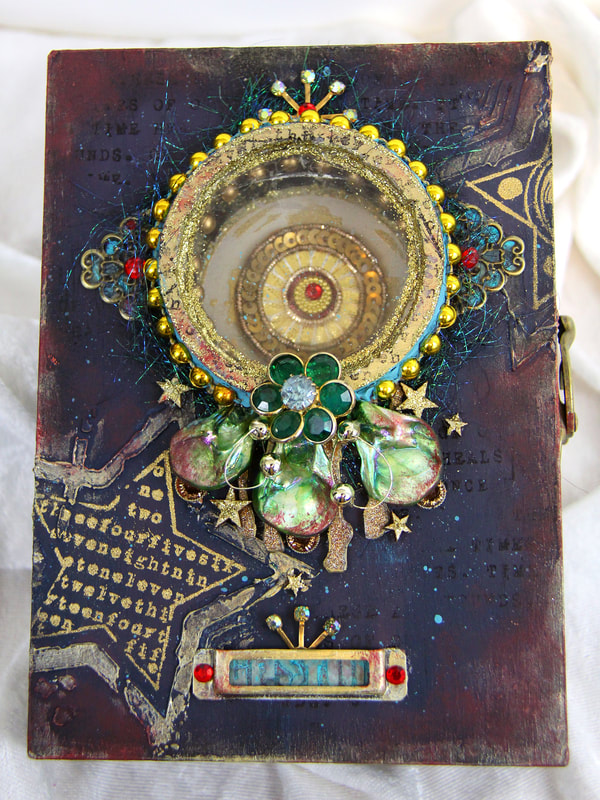
In January 2017 I was lucky enough to be asked by Seth Apter to create some projects with his new stamps and Wood Chips from PaperArtsy as well as his coordinating stencils from StencilGirl. For these projects, I thought it would be fun to take inspiration from the Library of Memories masterclass I took with him in 2015 and to make a new version of that class project.

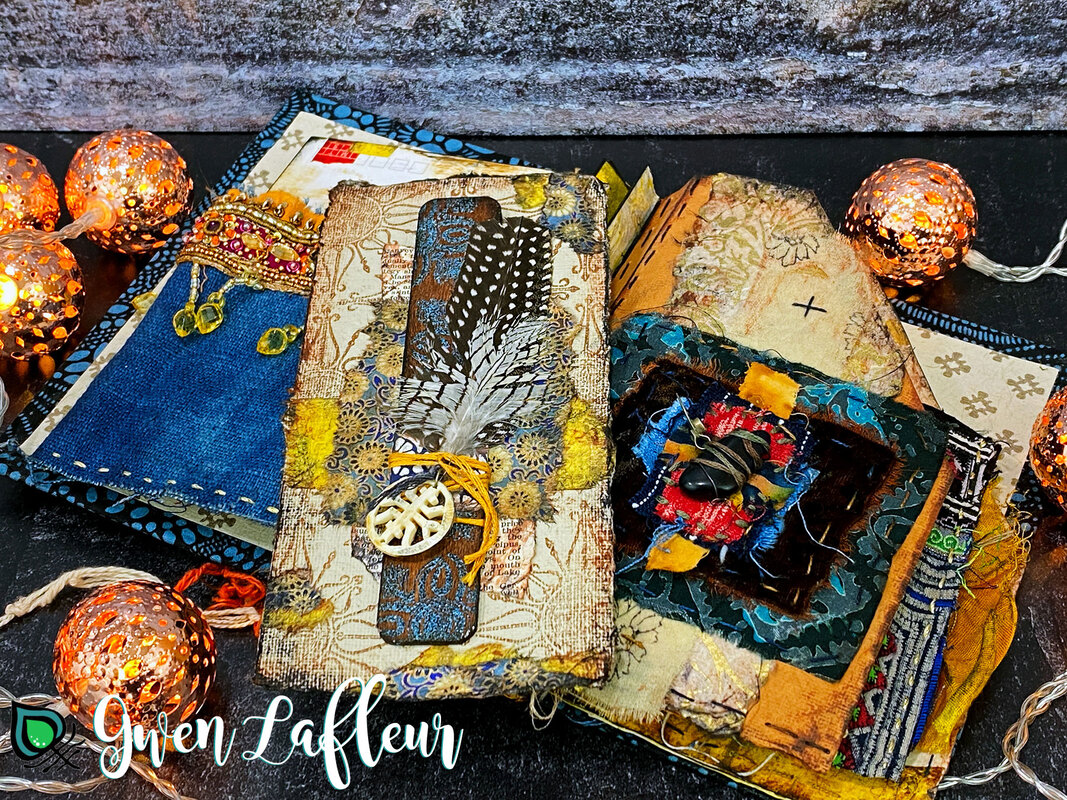
These two projects are made to fit together - you can see how it looks when you put the book inside of the case both opened and closed...

|
|
There are lots more pictures and some short tutorials and process descriptions over on StencilGirl Talk, but that post is so packed full of photos and information that it was too long to include everything that I wanted to share from this project. Instead I created a bonus tutorial showing my process for making my own collage papers using Seth's PaperArtsy stamps and paint as well as his stencils to create and embellish the pages inside the handmade book.
Here are the finished collage papers:
Here are the finished collage papers:

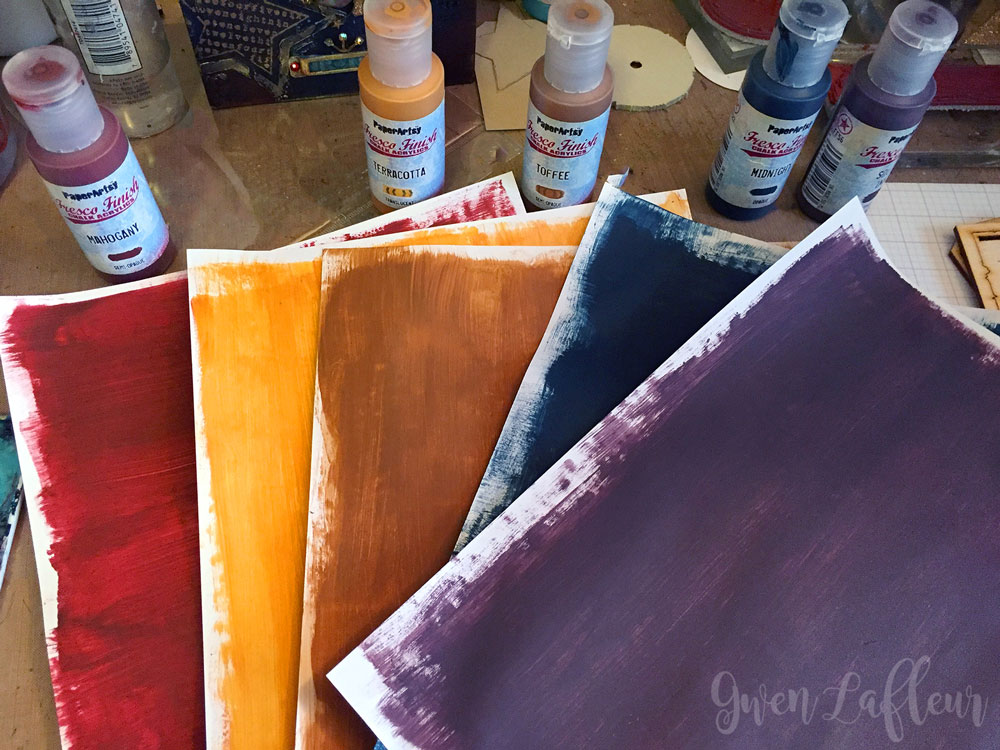
To make them, I started by taking five sheets of 28lb copy paper and painted the backgrounds with different colors of Seth's PaperArtsy paints. (I liked using this paper weight because it's sturdier and a nicer quality than regular copy paper, but it was still thin enough to use for making collaged backgrounds in my book.)
I used paints from Seth's original PaperArtsy paint kit, as well as a few other PaperArtsy paint colors. From left to right I used Mahogany, Terracotta, Toffee, Midnight, and Squid Ink.
I used paints from Seth's original PaperArtsy paint kit, as well as a few other PaperArtsy paint colors. From left to right I used Mahogany, Terracotta, Toffee, Midnight, and Squid Ink.
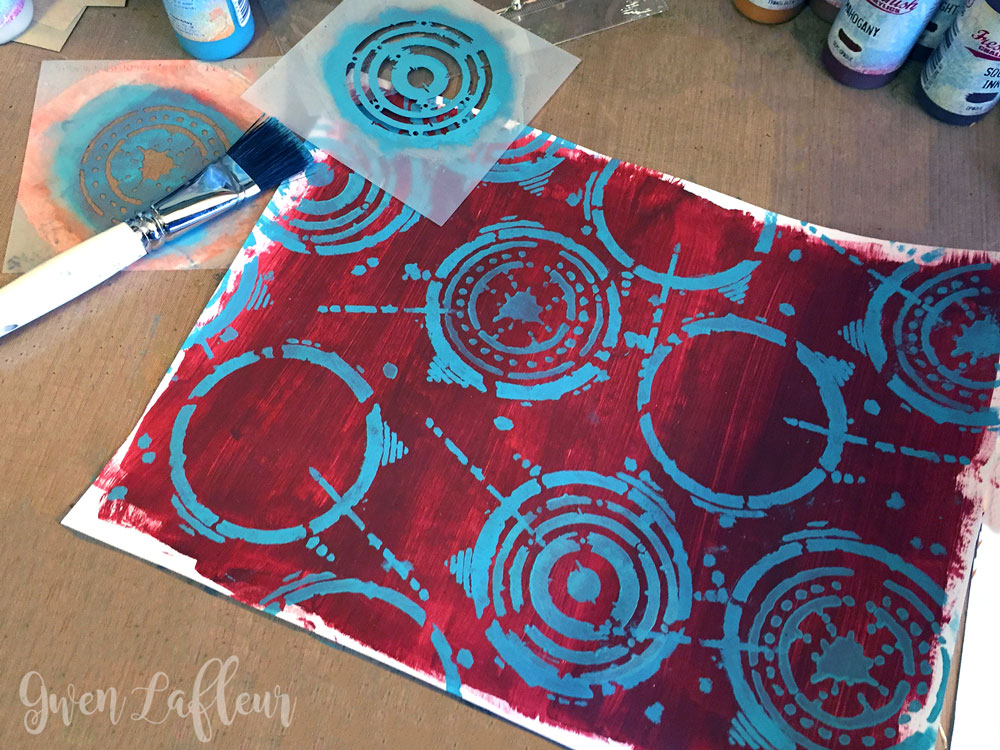
When the backgrounds were dry, I went back through and used the Urban Outsiders Stencil to begin adding some repeated shapes. I decided that each piece of paper would use a different shape and I started with circles with PaperArtsy Turquoise paint.

Next I used the Urban Insiders Circle Stencil and the Techno Insiders Circle Stencil and added patterns inside of some of the outlines.
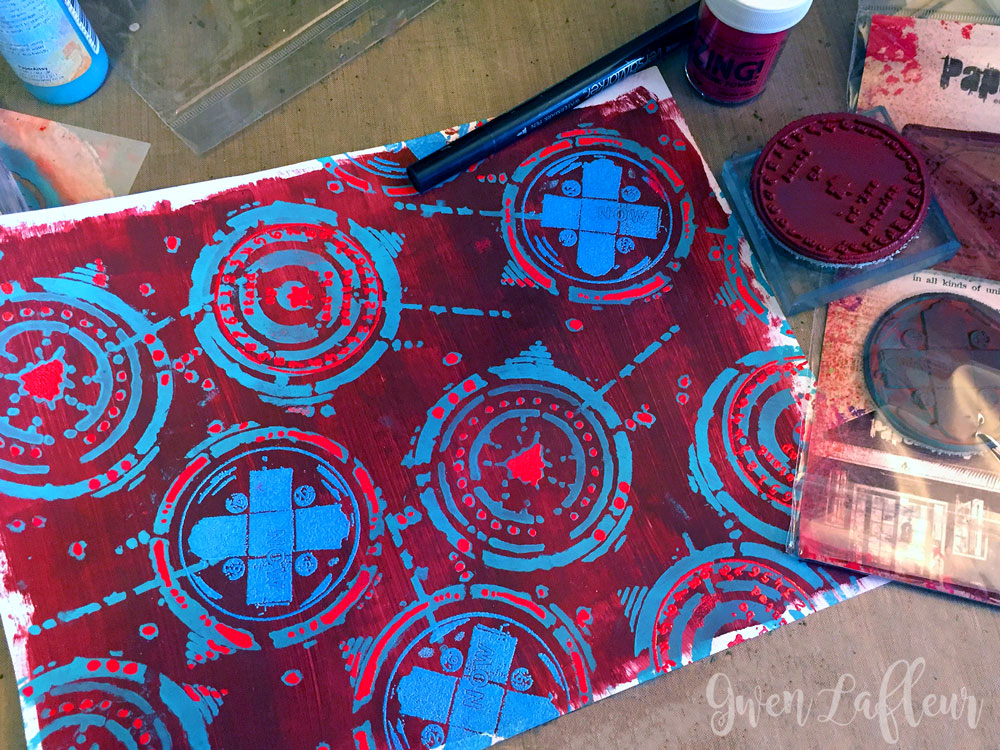
I repeated the process using stamps instead of stencils - I used the circle stamp images from both of Seth's new stamp sets. ESA 03 and ESA 04 (part of the PaperArtsy Eclectica collection.) I stamped these with teal and red pigment inks and heat embossed with teal and red embossing powder. I also used a VersaMarker to draw in a few places and then heat embossed that as well (it's a fun way to add some extra details.)
Note that in some places, I stamped on top of the stenciling - Seth designed the stamps to work with his stencils, so they layer perfectly.
Note that in some places, I stamped on top of the stenciling - Seth designed the stamps to work with his stencils, so they layer perfectly.
I just repeated that process with the other four shapes until I had five full sheets of patterned paper. In the end, I used every stamp in both the ESA 03 and ESA 04 stamp collections and I also used all of the following stencils to complete the other four collage papers:
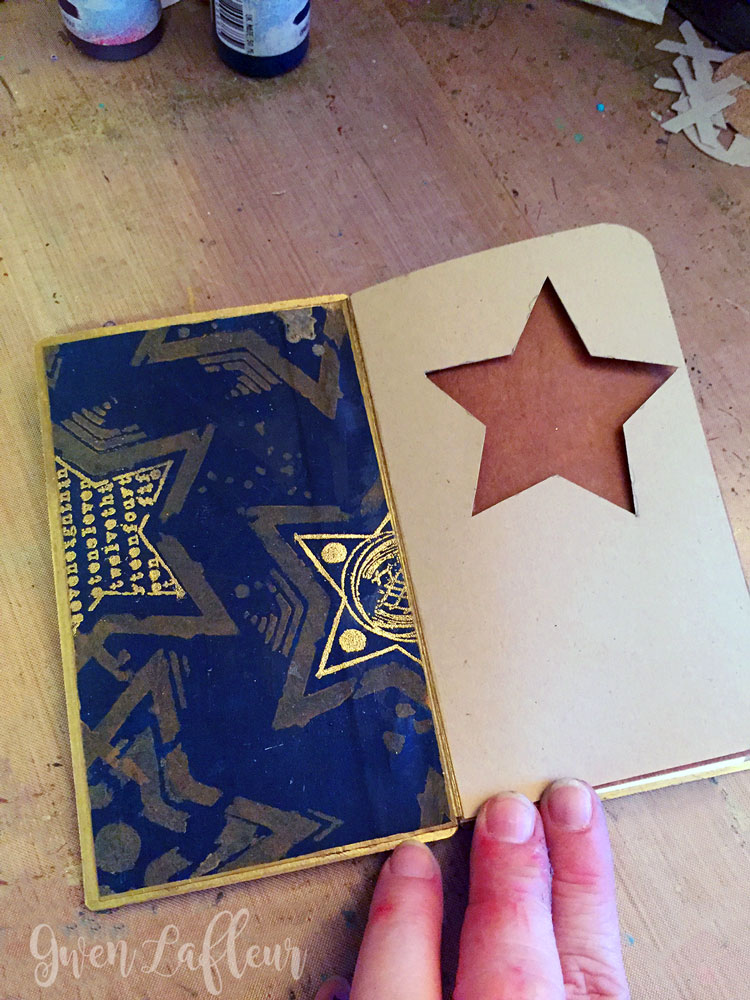
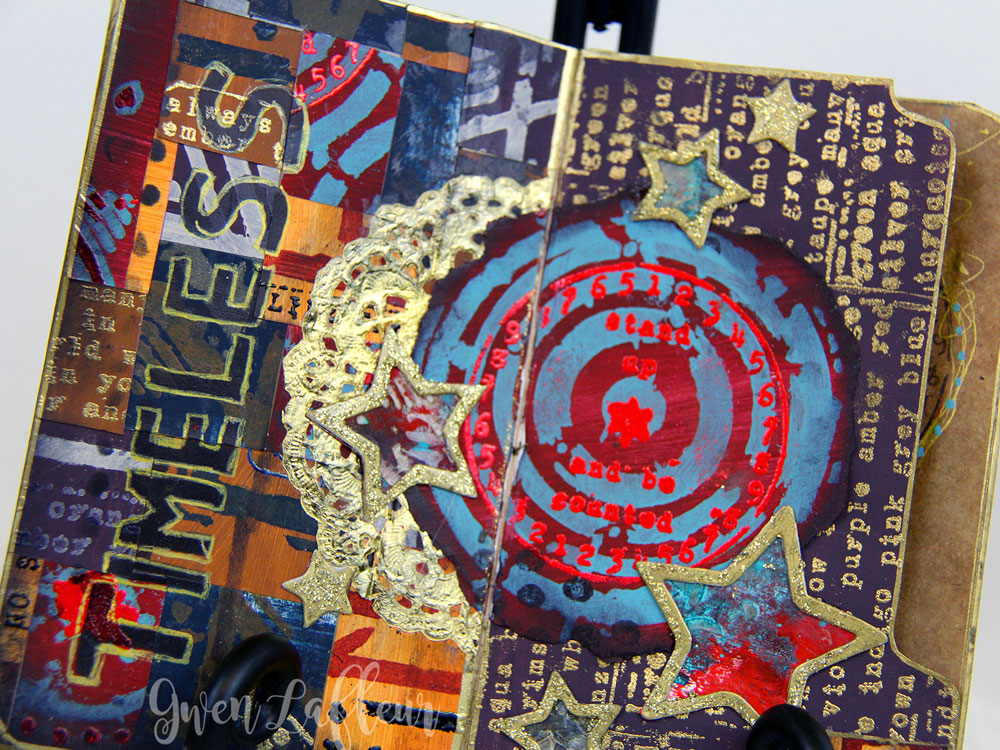
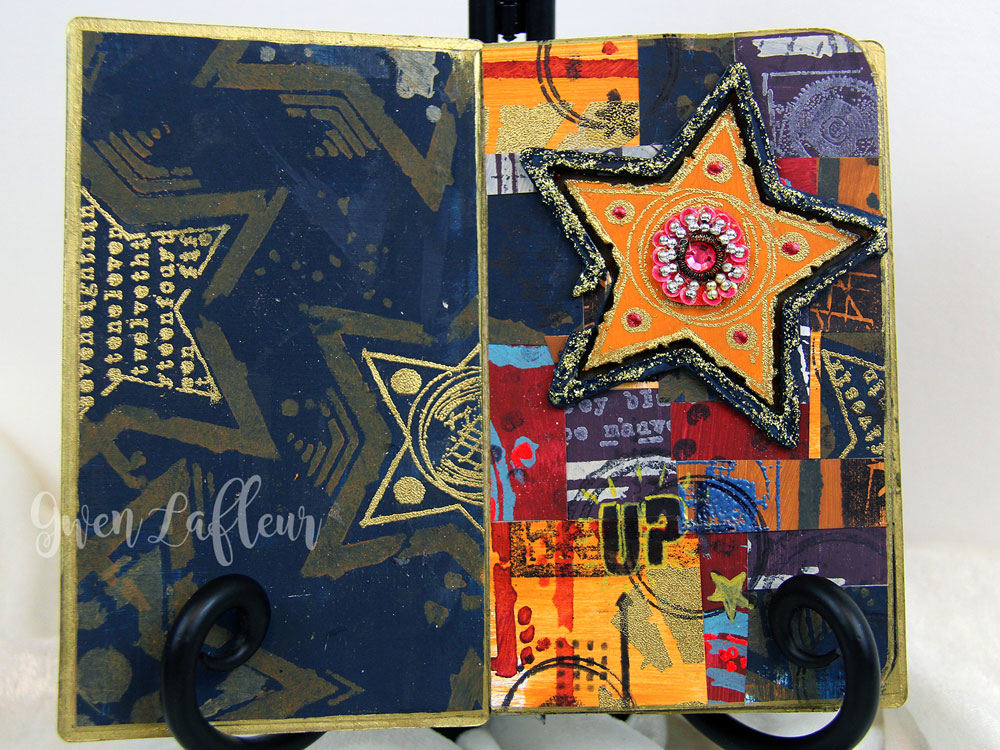
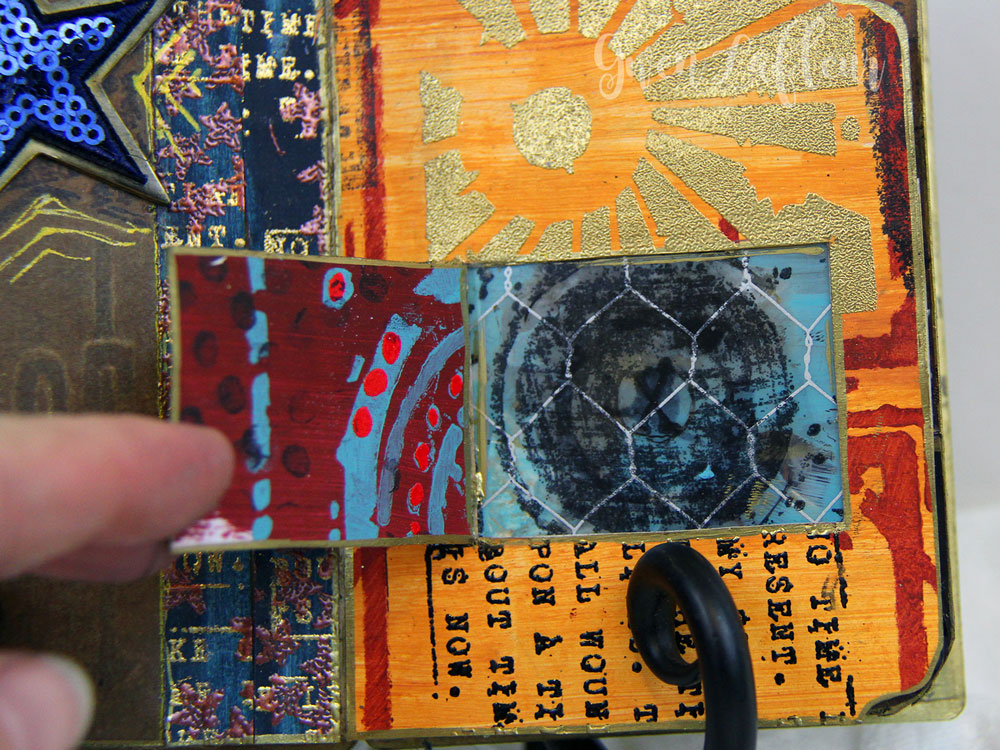
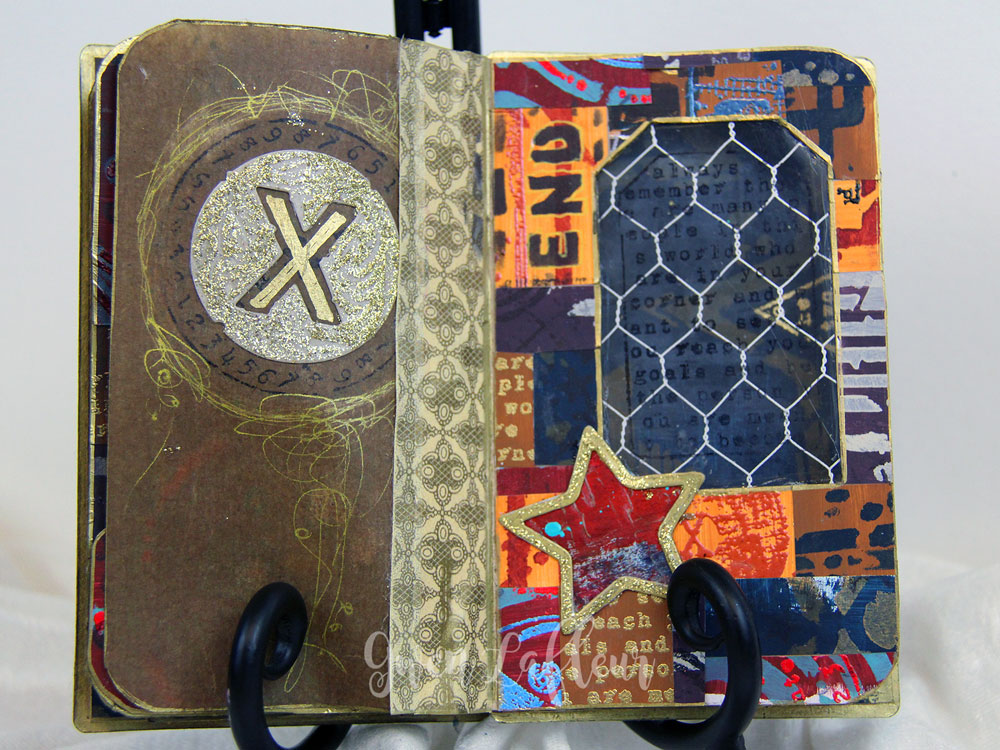
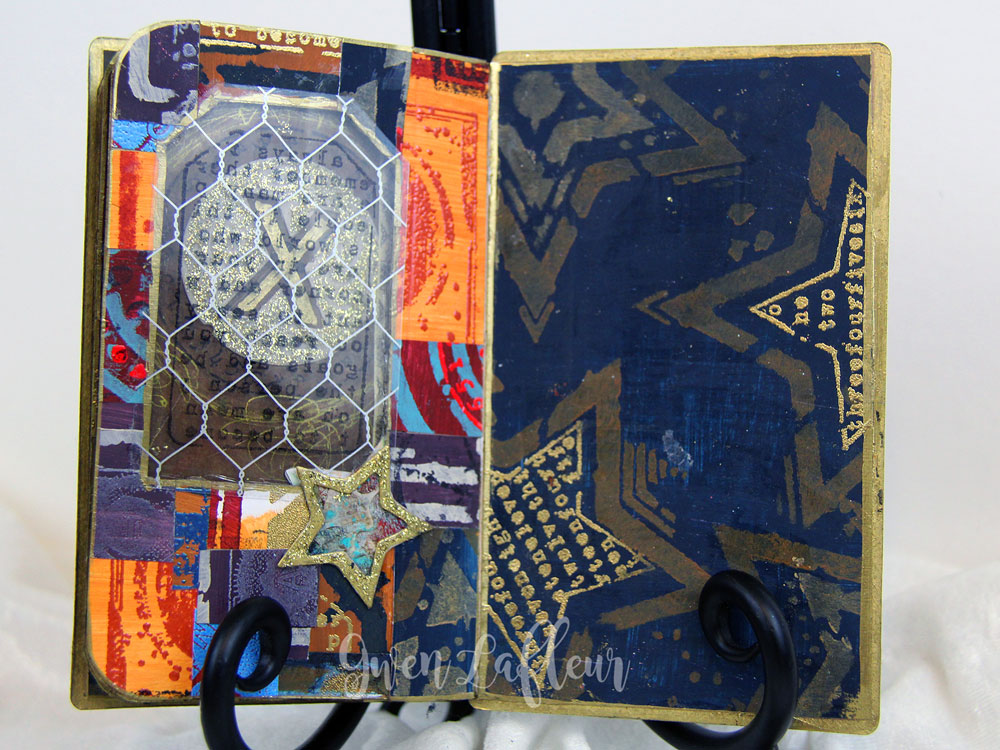
From there, the collage papers were ready to be cut up and used to make a variety of different backgrounds in my book, including a patchwork-style background I'd learned in the Library of Memories class.
- Urban Outsiders Stencil
- Urban Insiders Square Stencil
- Urban Insiders Star Stencil
- Urban Insiders Tag Stencil
- Urban Insiders Bar Stencil
- Techno Insiders Square Stencil
- Techno Insiders Star Stencil
- Techno Insiders Tag Stencil
From there, the collage papers were ready to be cut up and used to make a variety of different backgrounds in my book, including a patchwork-style background I'd learned in the Library of Memories class.
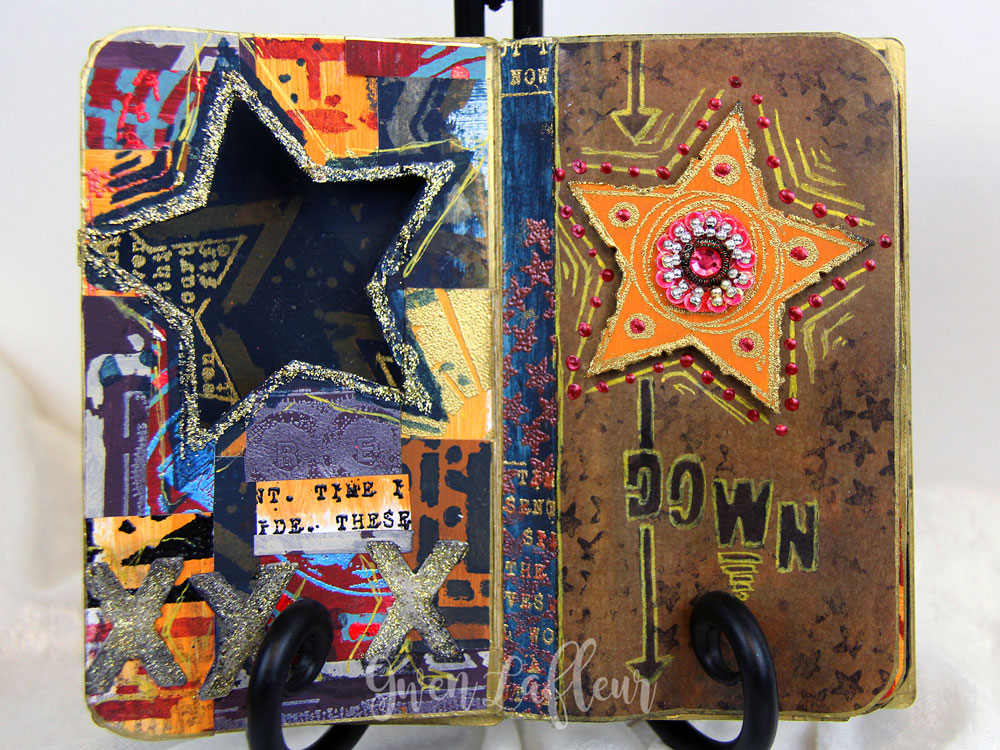
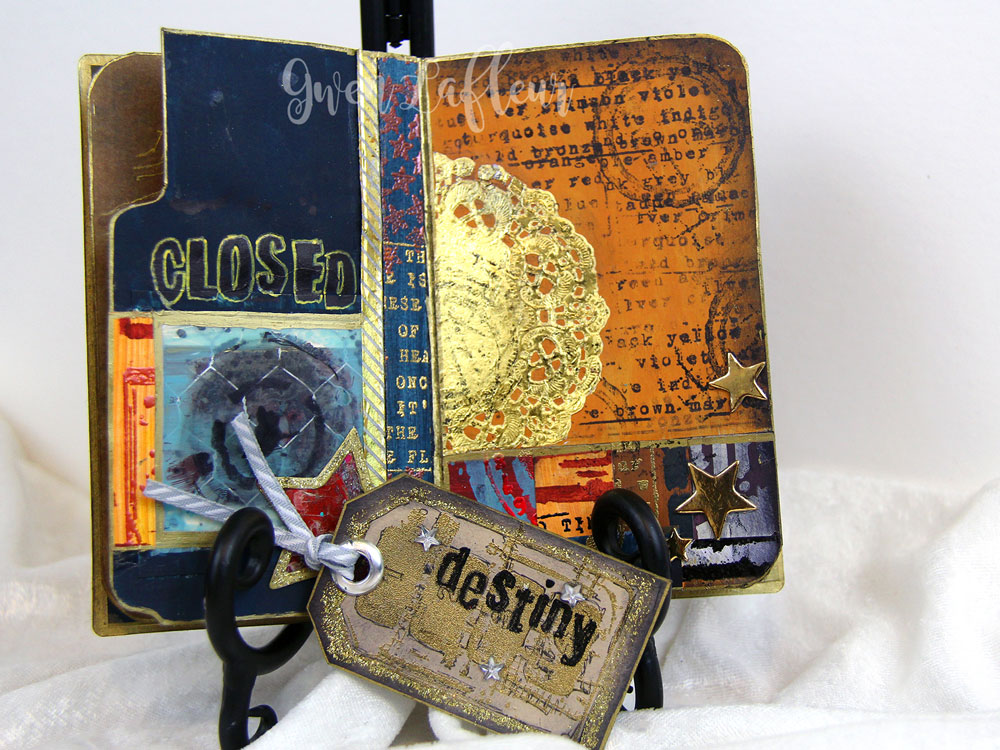
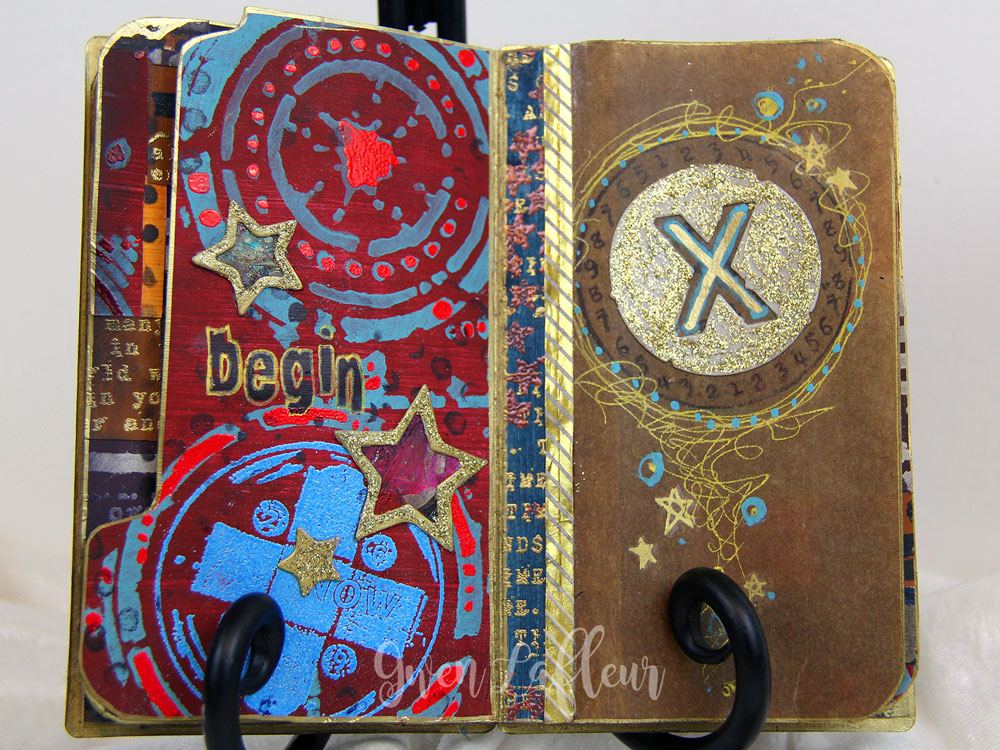
In addition to the patchwork pages, I used pieces from these sheets to make the end papers for my handmade book, I cut out larger sections to be used as focal points on some of the pages, and I also used some of them to make backgrounds and covered the entire page.
|
|

|
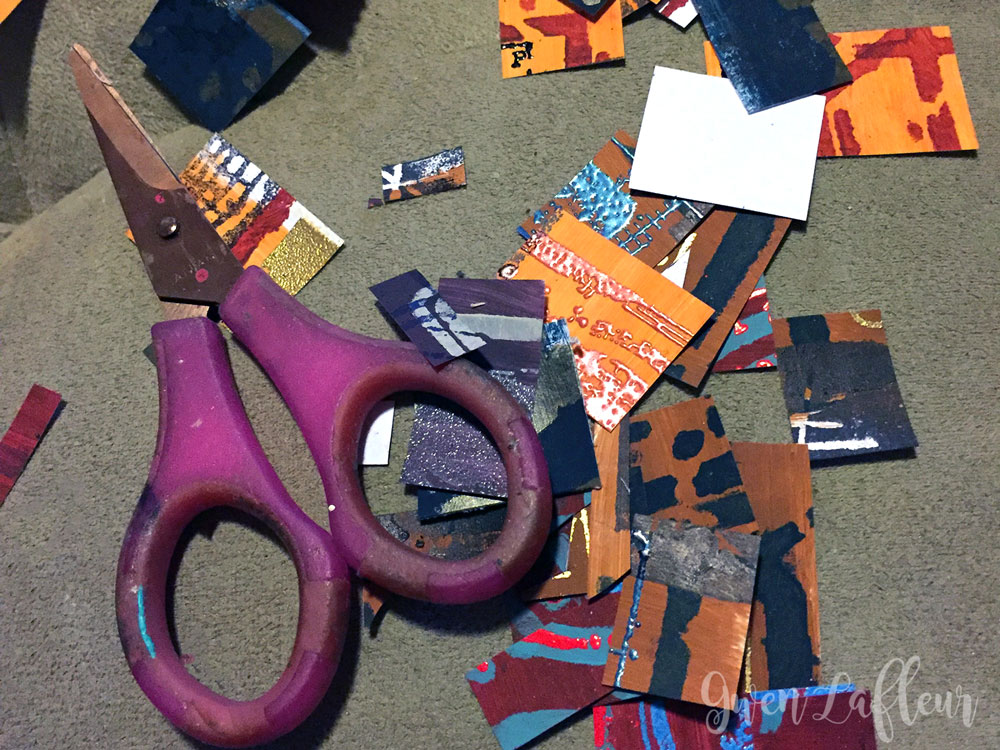
These handmade collage papers give you quite a bit to work with; after finishing the entire book I still had quite a few scraps left over. I tucked them all away with the rest of my collage fodder to use on future projects.
Here are all of the inside pages from my book - you can see how much you can do with just a few sheets of collage paper. They're fun to make and extremely versatile.
Here are all of the inside pages from my book - you can see how much you can do with just a few sheets of collage paper. They're fun to make and extremely versatile.


That's it for the collage paper tutorial, but you can also head over to the main post on StencilGirl Talk to see my full project and more tutorials, plus more projects and tutorials from other artists.
You might also like...