In April 2018 I was able to participate in a blog hop between StencilGirl and Lindy's Stamp Gang where I created and shared a tutorial for a handmade mini art journal using lots of stencils and Lindy's products. They work perfectly with stencils and had been on my "to-try" list for quite a while, so it was a fun project for me to make.
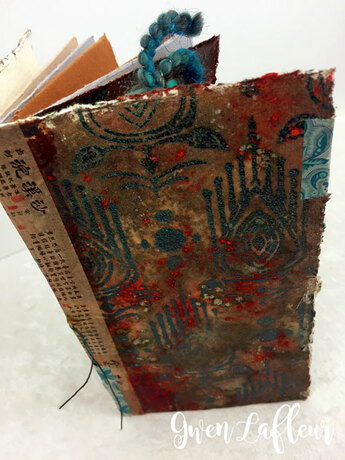
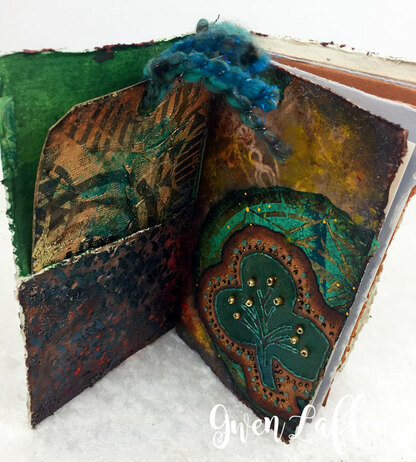
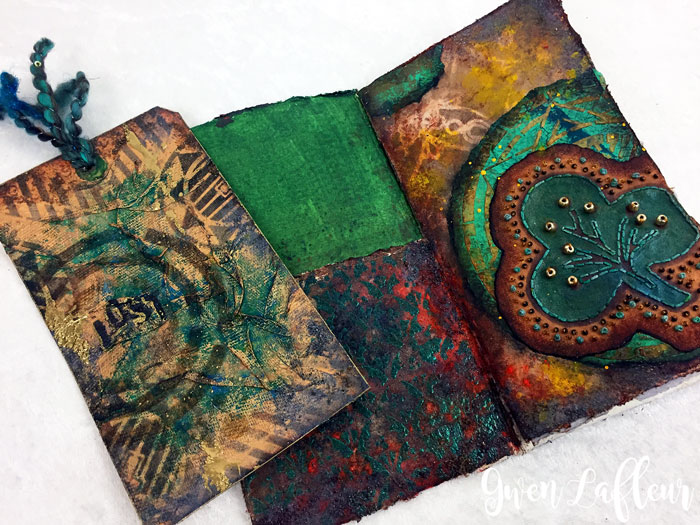
I chose a mini art journal as I thought it would be a great way to showcase several fun techniques in a single project. Here you can see the outside of the book as well as the inside of the front cover and the first page:
I chose a mini art journal as I thought it would be a great way to showcase several fun techniques in a single project. Here you can see the outside of the book as well as the inside of the front cover and the first page:
I really loved the effects I was able to get as I experimented!
I made the book using Indian cotton rag paper and bound it with the pamphlet stitch. In the past when I've used this binding I've had lots of requests for a tutorial, so this time I took pictures of the process so that you can see how to bind your own book. It's fast and easy!
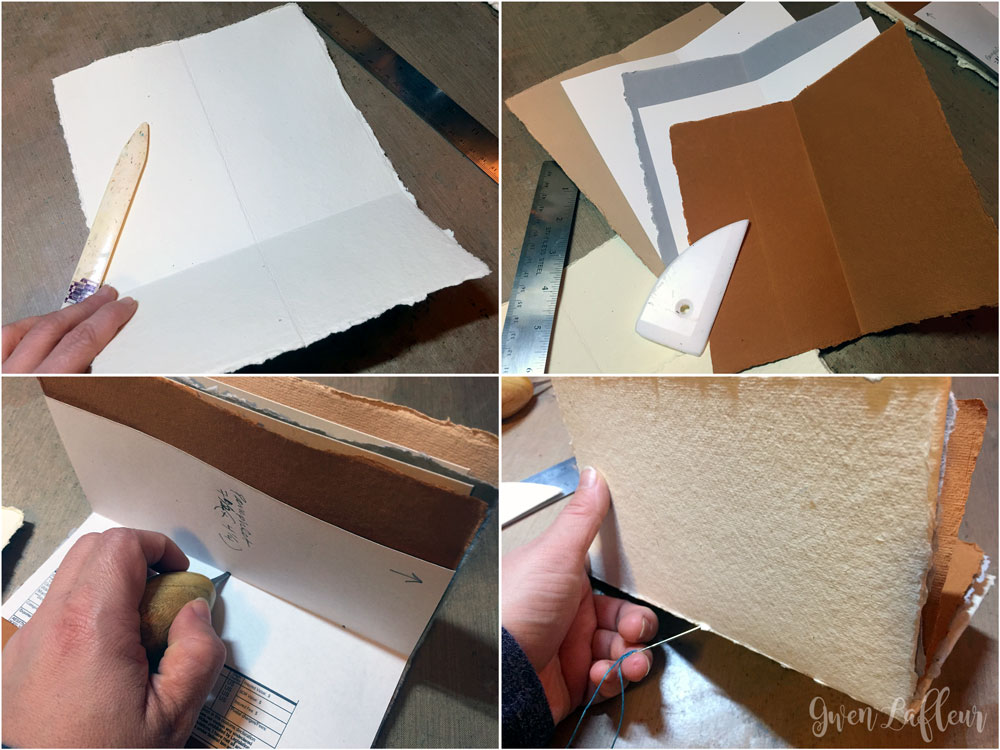
To start, I took some very heavy-weight cotton rag paper (640 gsm, but you could also use chipboard) and measured and then folded so I'd have creases for my "cut" lines. (I took a class at SAIC in Chicago from a printmaker who impressed upon us that one should never cut the papers... you always tear them with a bone folder. Sometimes I ignore that advice, but because the paper had deckled edges I tore so that it would match all the way around.)
I left it a few inches longer than I wanted the book to be so that I could fold up the flap to make pockets on the inside covers. Then I tore and folded five sheets of paper to make my book block, making sure to crease each one with my bone folder. (I don't generally like to do more than five sheets in a signature, especially with this kind of binding and the thickness of the paper I used - otherwise it doesn't lay as flat as I want it.)
Next I made a jig (above left.) I just took scrap paper and cut it to the height of my book pages, folded it in half, and marked where the holes were going to be. This is the template you use to make sure that your holes are always in the same place. Technically you don't really need to do this with a single signature like this, but force of habit, I guess!
I nested the folded papers, lined up the jig inside, and used my awl to poke the holes. (A traditional pamphlet binding has an odd number of holes, and this one just had three.) I generally place the awl and then let the pages fall so they're laying over my hand before pushing it through; this helps ensure that the tip of the awl will come out in the crease... if you poke the holes with the pages open, it's more likely that the awl will come out to one side of the crease instead. (Hopefully that makes sense!)
Then it was time to start binding. I took waxed linen thread and cut the length to about 2-1/2" to 3 times the height of my book and then threaded it onto a tapestry needle. For this method, I start in the center hole and stitch from the outside in, leaving a tail of about 3-4" hanging out of the hole. (Bottom-right photo above.)
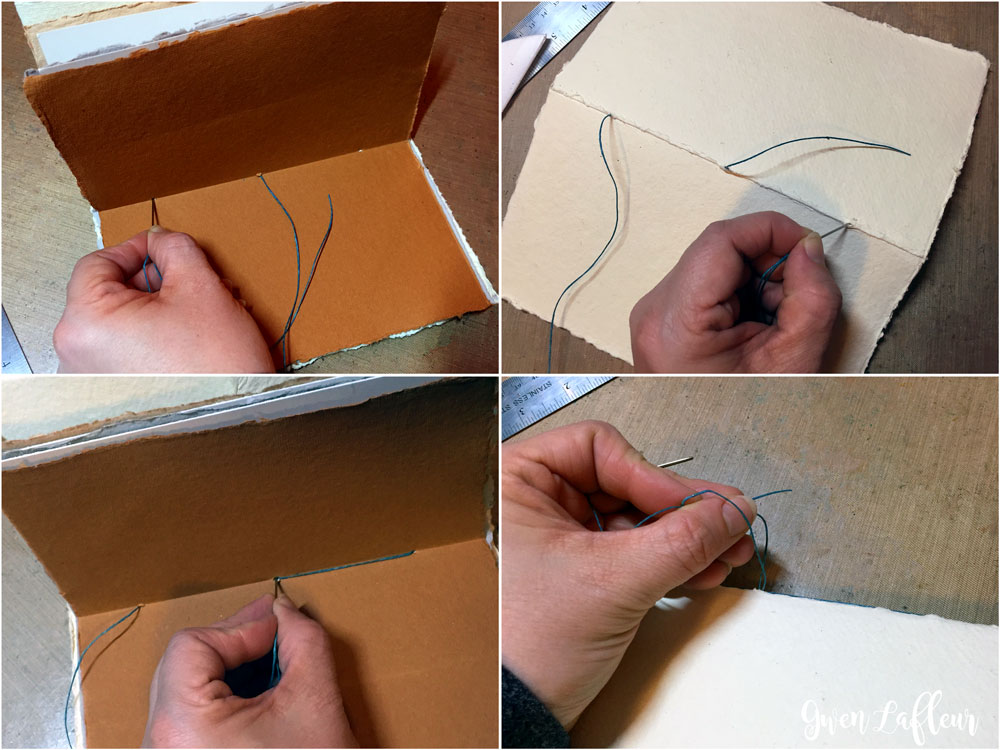
For stitch 2, go from the inside out (top left photo below,) then on the outside, bring your needle across to the other hole and go back inside (top-right photo below.)
Finally, on the inside you go back out through the center hole (bottom-left above,) and then tie it off on the outside... this way you don't have any gaps in the thread on the inside or the outside so it looks nice and clean. That's all there is to making your own art journal with a pamphlet stitch... I did say it was easy, right?
Now, on to the techniques with stencils, powders, and sprays!
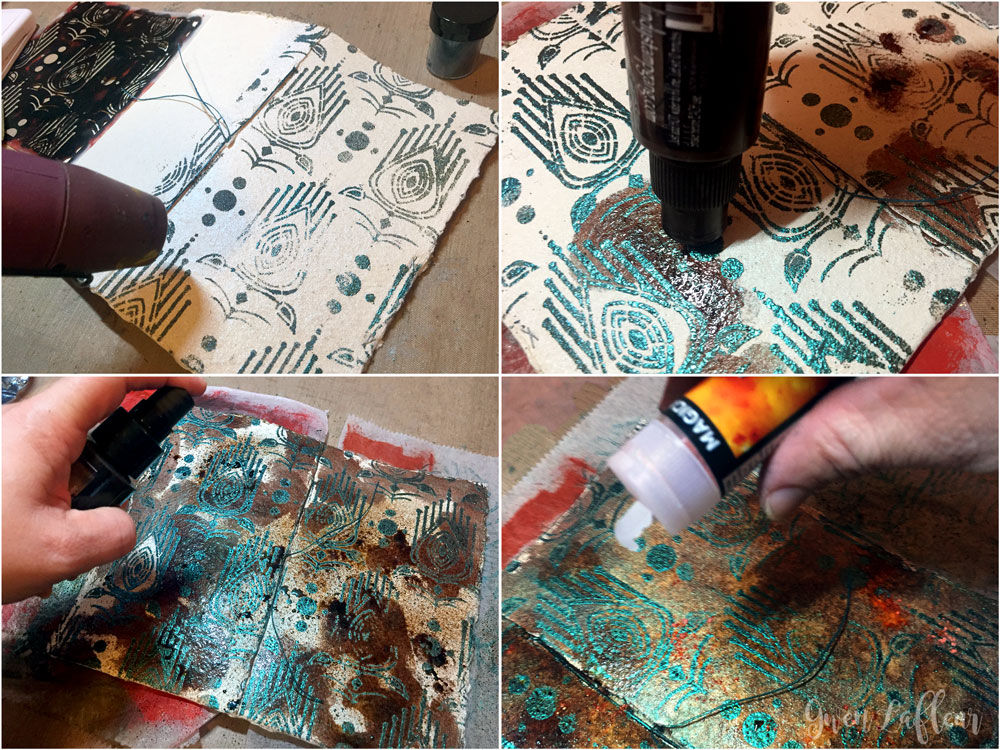
For the covers, I used one of my favorite techniques - embossing powder resist. To do this, I took my Art Deco Peacock Feathers stencil and stenciled with clear embossing ink all across the covers (the stencil repeats so you get a seamless pattern.) Then I heat embossed with Lindy's Midnight Teal embossing powder and followed that with the Dark Chocolate Truffle shimmer spray using a dauber cap to add color in spots around the covers... the melted embossing powder will naturally resist the dye so you only stain the paper.
I followed up by spritzing with Mystic Malachite vintage spray, and then sprinkled some powder from the Oktoberfest Orange Magical Shaker and spritzed that with water to activate it. I added enough water that it would spread, but not so much that it would completely dissolve all of the powder - I wanted a bit of texture on the surface.
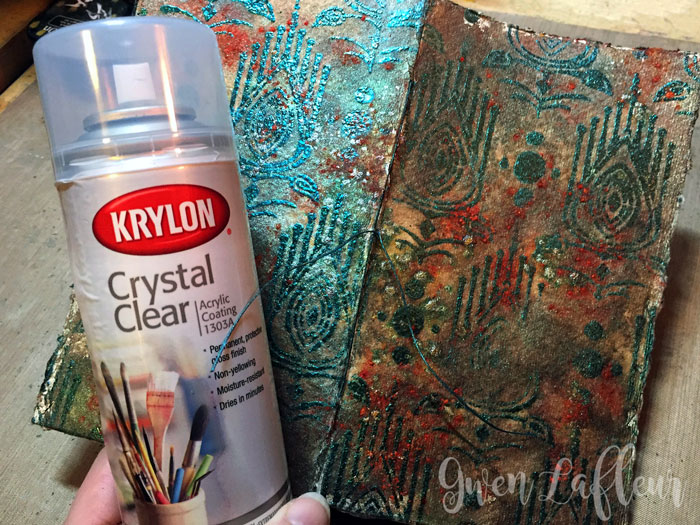
When everything was dry, I sprayed the cover with Krylon Crystal Clear acrylic coating and left it to dry overnight. This sealed anything that was water reactive so that I could work on top with wet mediums if I wanted to add more layers, and also ensured that great texture from the Magical Shaker wouldn't rub off.
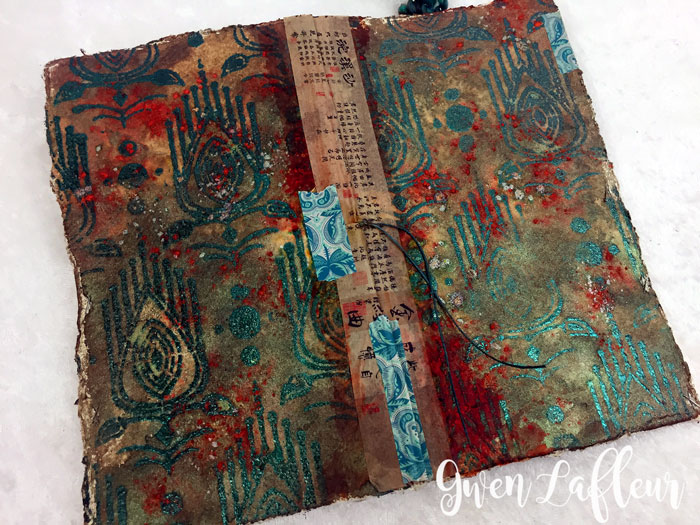
I added some washi tape on the spine and a bit on the edges for a decorative touch, and the covers were done!
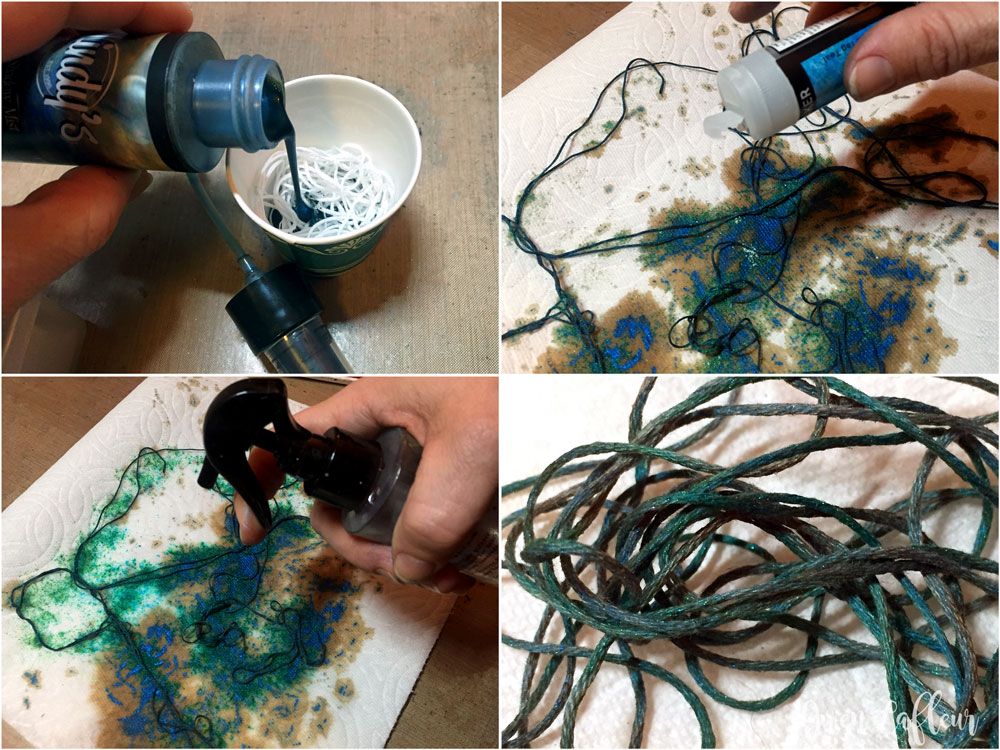
While I was in the groove, I decided to go ahead and start working on the inside pages of the book. I thought it would be fun to add some stitching and maybe custom dye my thread while I was at it! I started that step first and poured some of the Buccaneer Bay Blue vintage spray into a small paper cup, then added a few yards of regular 6-strand white DMC embroidery floss. I made sure it was totally submerged, then let it soak for a bit.
After the color was strong enough, I pulled out the dyed thread and spread it on a paper towel, then used my Guten Tag Teal magical shaker to get a little more color in spots... I spritzed that with water to activate it.
After the color was strong enough, I pulled out the dyed thread and spread it on a paper towel, then used my Guten Tag Teal magical shaker to get a little more color in spots... I spritzed that with water to activate it.
Voilà! Custom dyed thread!
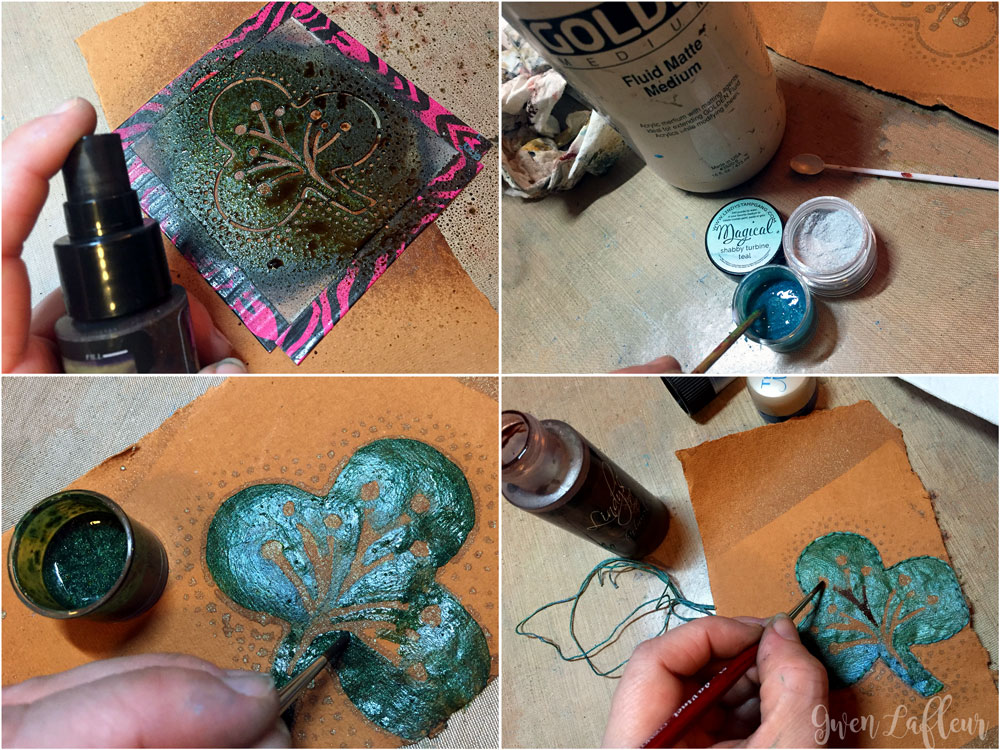
With that done, I was ready to prep the shape I was going to embroider, so I took out my Ornamental Embroidery stencil and used the Mystic Malachite vintage spray to get the pattern onto the paper. Then I mixed up my own fluid acrylic paint using Shabby Turbine Teal and Rusty Lantern Lime from the Industrial Chic Shimmer Magicals set along with some fluid matte medium.
With that done, I was ready to prep the shape I was going to embroider, so I took out my Ornamental Embroidery stencil and used the Mystic Malachite vintage spray to get the pattern onto the paper. Then I mixed up my own fluid acrylic paint using Shabby Turbine Teal and Rusty Lantern Lime from the Industrial Chic Shimmer Magicals set along with some fluid matte medium.
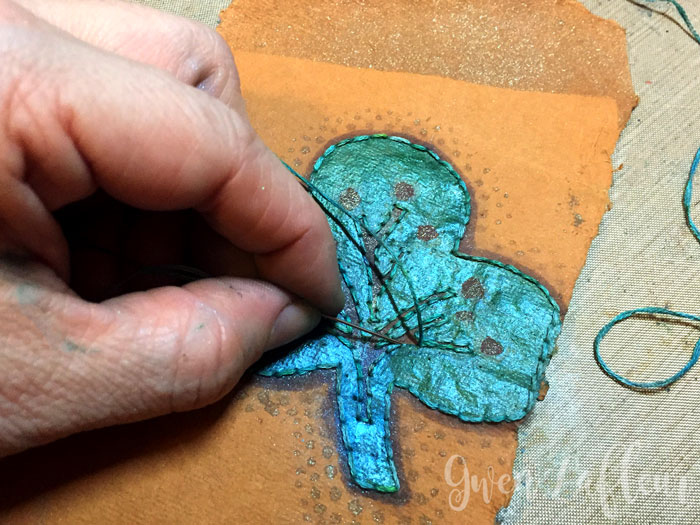
I painted the center of my stenciled design with my custom color, then used the Dark Chocolate Truffle shimmer spray as a paint to add the details. Finally, I took my dyed thread and just back-stitched around my design and then added some gold seed beads.
My embroidered embellishment was done, so on to the background! I took my Ornamental Petals Screen stencil and then stenciled with the Dark Chocolate Truffle shimmer spray and a sponge so that it wouldn't be quite as dark and I could get crisper lines.
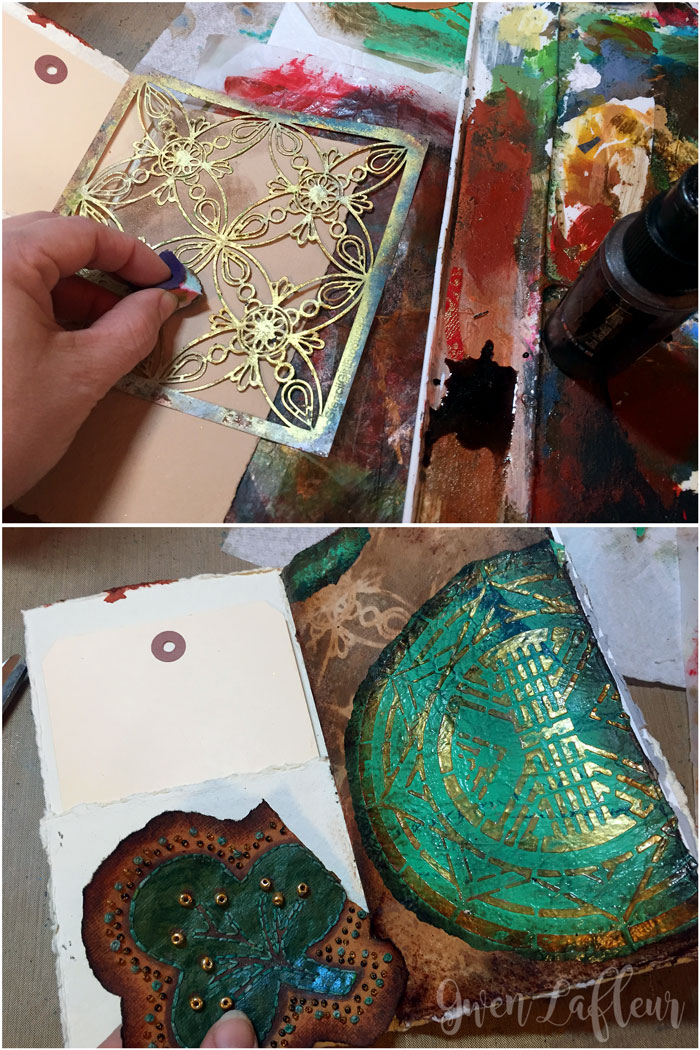
Next, I found some collage paper in my stash that was the perfect shade of green and already had my Art Deco Medallion stencil applied on top with gold texture paste, so I tore that out and adhered it to the background, then tore out my embroidered embellishment, inked the edges with brown and black ink, and glued that on top. I also sprinkled some more Oktoberfest Orange Magicals on the background and spritzed with water - love that color!
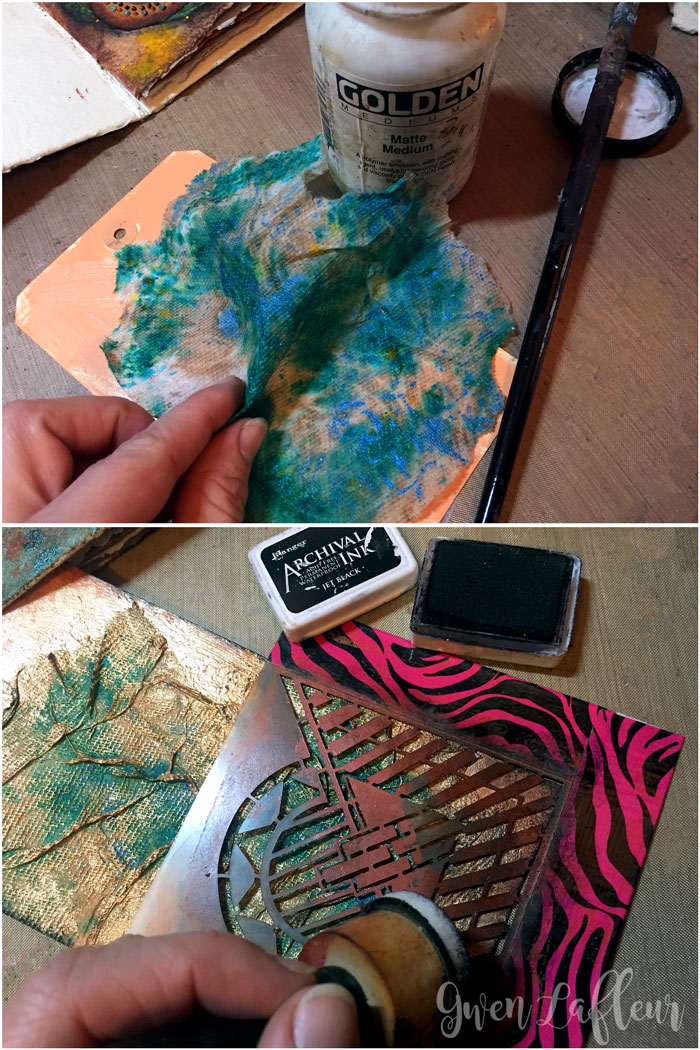
Remember that paper towel I used earlier to lay out my dyed thread? There was no way I was throwing that out... it was too cool looking! So I took a large shipping tag (the perfect size for the pocket on the inside of my cover,) and used some matte medium to adhere the paper towel to the tag. I scrunched it up in places so I'd get some nice texture.
Remember that paper towel I used earlier to lay out my dyed thread? There was no way I was throwing that out... it was too cool looking! So I took a large shipping tag (the perfect size for the pocket on the inside of my cover,) and used some matte medium to adhere the paper towel to the tag. I scrunched it up in places so I'd get some nice texture.
From there I brushed on some gold paint to highlight the texture and integrate the paper towel into the background, then stenciled parts of my Art Deco Sun Medallion Repeating Corner stencil onto the tag with black ink.
I wanted a focal point on the tag, so I took the Retreat Circle stencil by Seth Apter and stenciled that, again with black ink, and then stenciled the word "Lost" from Seth's Text and Texture Transform stencil in the center of the circle. (I want to use "found" as the word on a tag in the back pocket.)
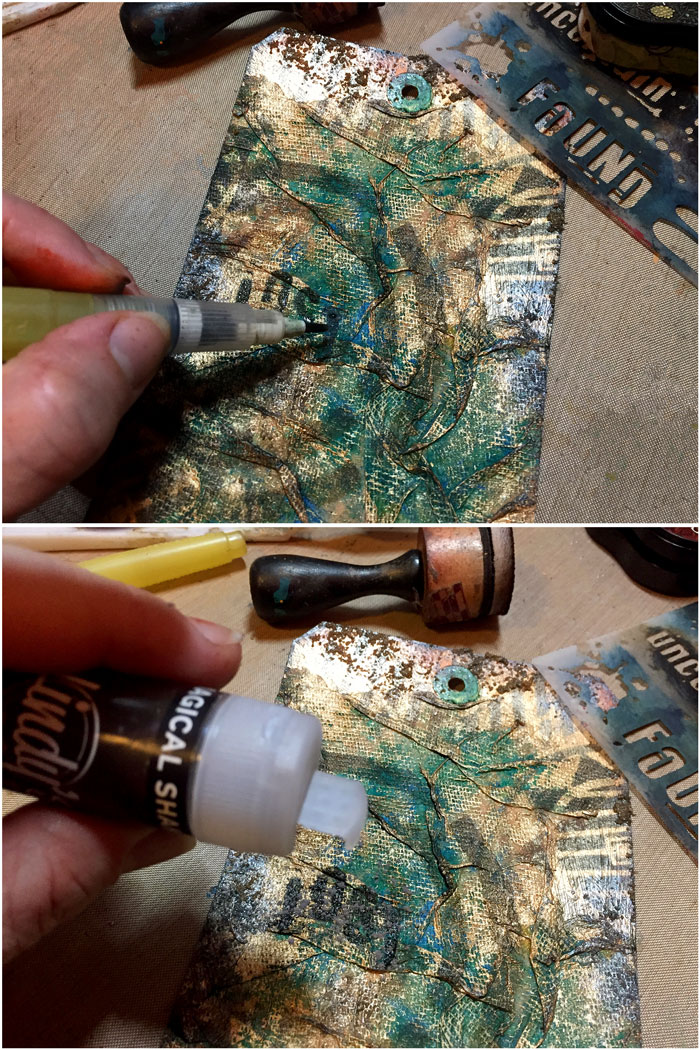
To make the word stand out a bit more, I traced over it with a water pen, and then sprinkled pigment powder with the Black Forest Black Magical Shaker, then flipped the tag over and tapped off the excess. I was worried that it would bleed a lot, but it worked really well!
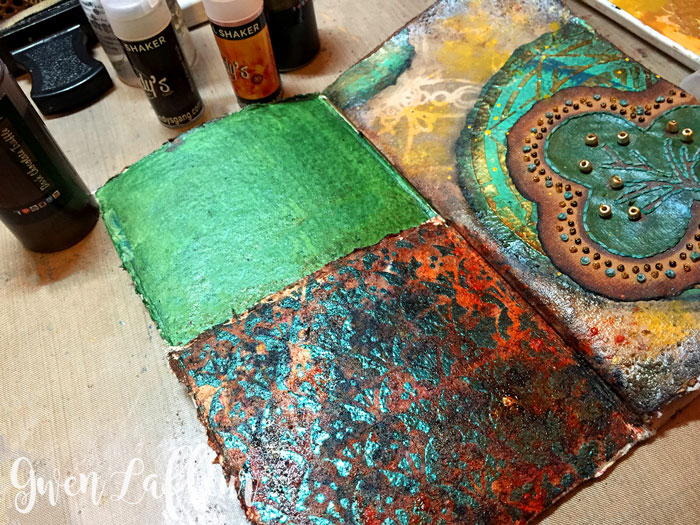
For the finishing touches, I used my custom fluid acrylic paint to paint the inside cover above the pocket, then used the same technique from the covers along with my Ornamental Floral Screen stencil to embellish the pocket.
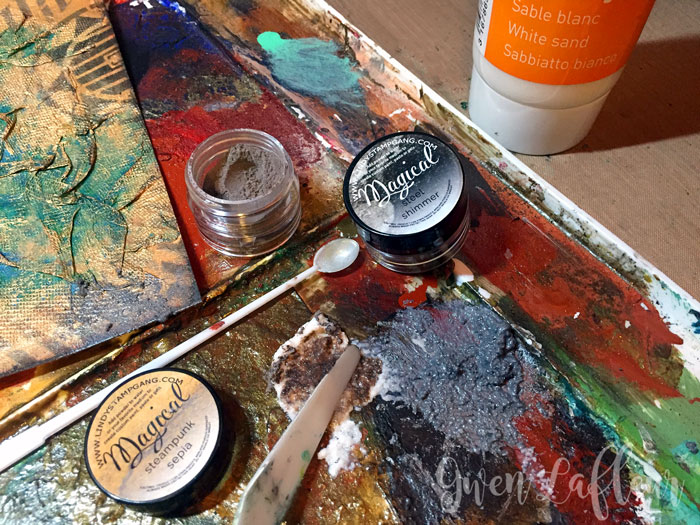
Finally, I mixed some of the Steel Shimmer and Steampunk Sepia powders from the Industrial Chic Shimmer Magic set with some sand texture paste to make my own grungy finish to put on the edges of my tag and on the covers.
Finally, I mixed some of the Steel Shimmer and Steampunk Sepia powders from the Industrial Chic Shimmer Magic set with some sand texture paste to make my own grungy finish to put on the edges of my tag and on the covers.
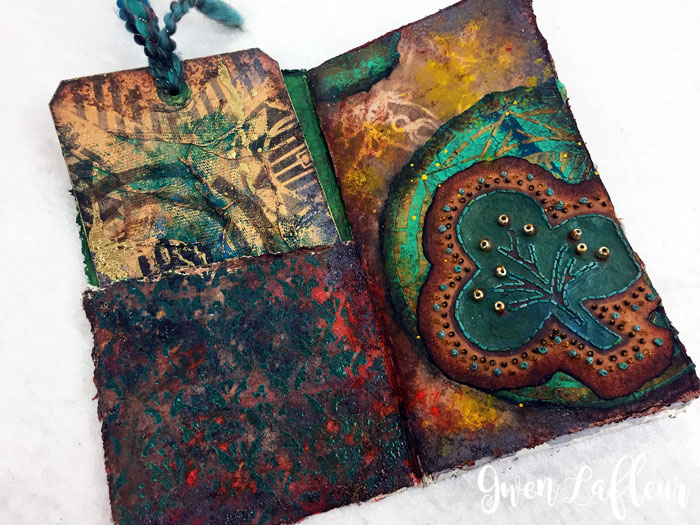
Whew... that's it the tutorials. I'm looking forward to continuing to work in my new journal, but in the meantime, here you can see how the tag and first page turned out:
You might also like...

