In November 2018, I teamed up with Eileen Hull and Emerald Creek for a fun blog hop challenge to kick off the Winter season and holiday festivities with the theme of "Warm Winter Wishes."
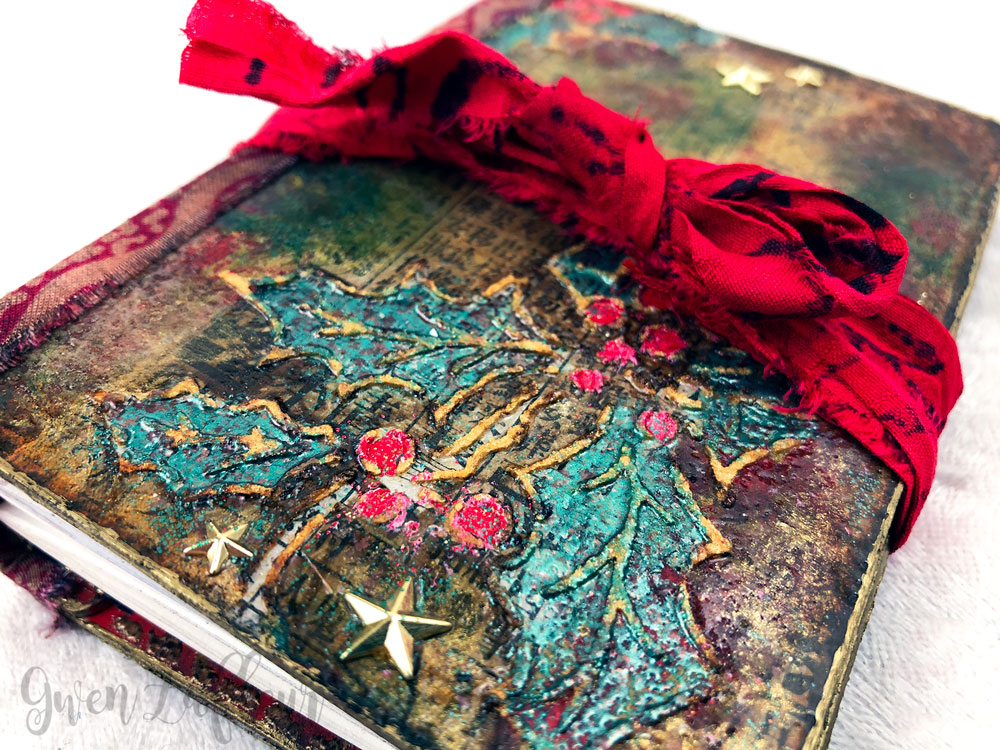
For my project, I created a winter-themed mini art journal using one of Eileen's Scoreboard Dies and plenty of embossing powder.
For my project, I created a winter-themed mini art journal using one of Eileen's Scoreboard Dies and plenty of embossing powder.
To show you more about how I made my journal, I've put together a little tutorial.
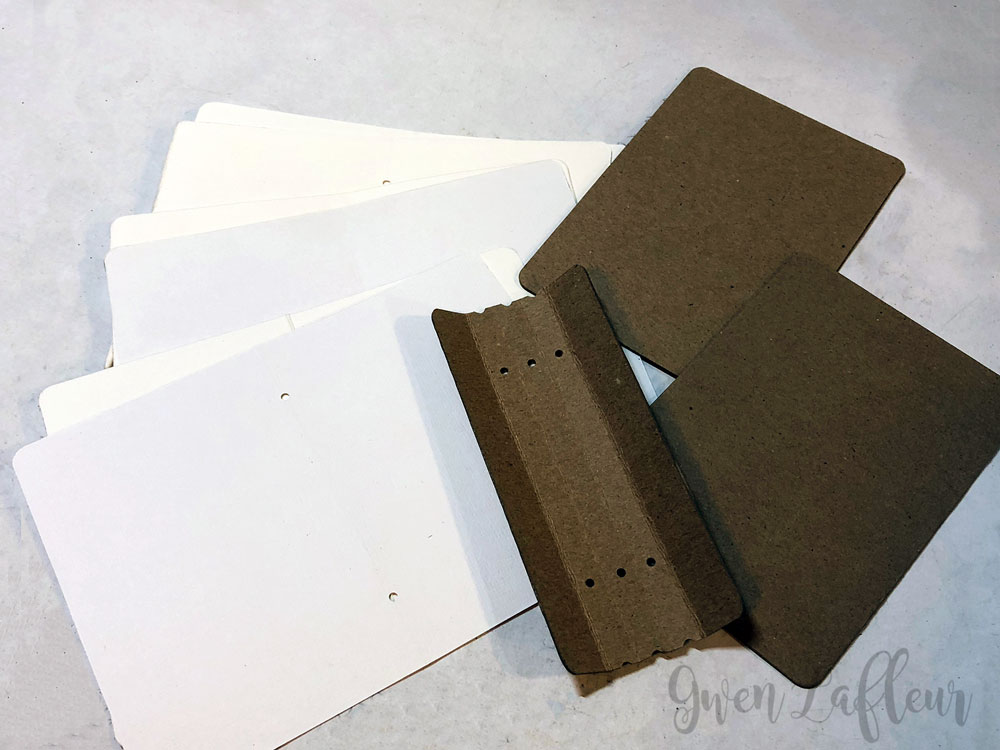
Starting off, I used Eileen's Sizzix Passport Book die and cut the covers, spine, and several inside pages.
Starting off, I used Eileen's Sizzix Passport Book die and cut the covers, spine, and several inside pages.
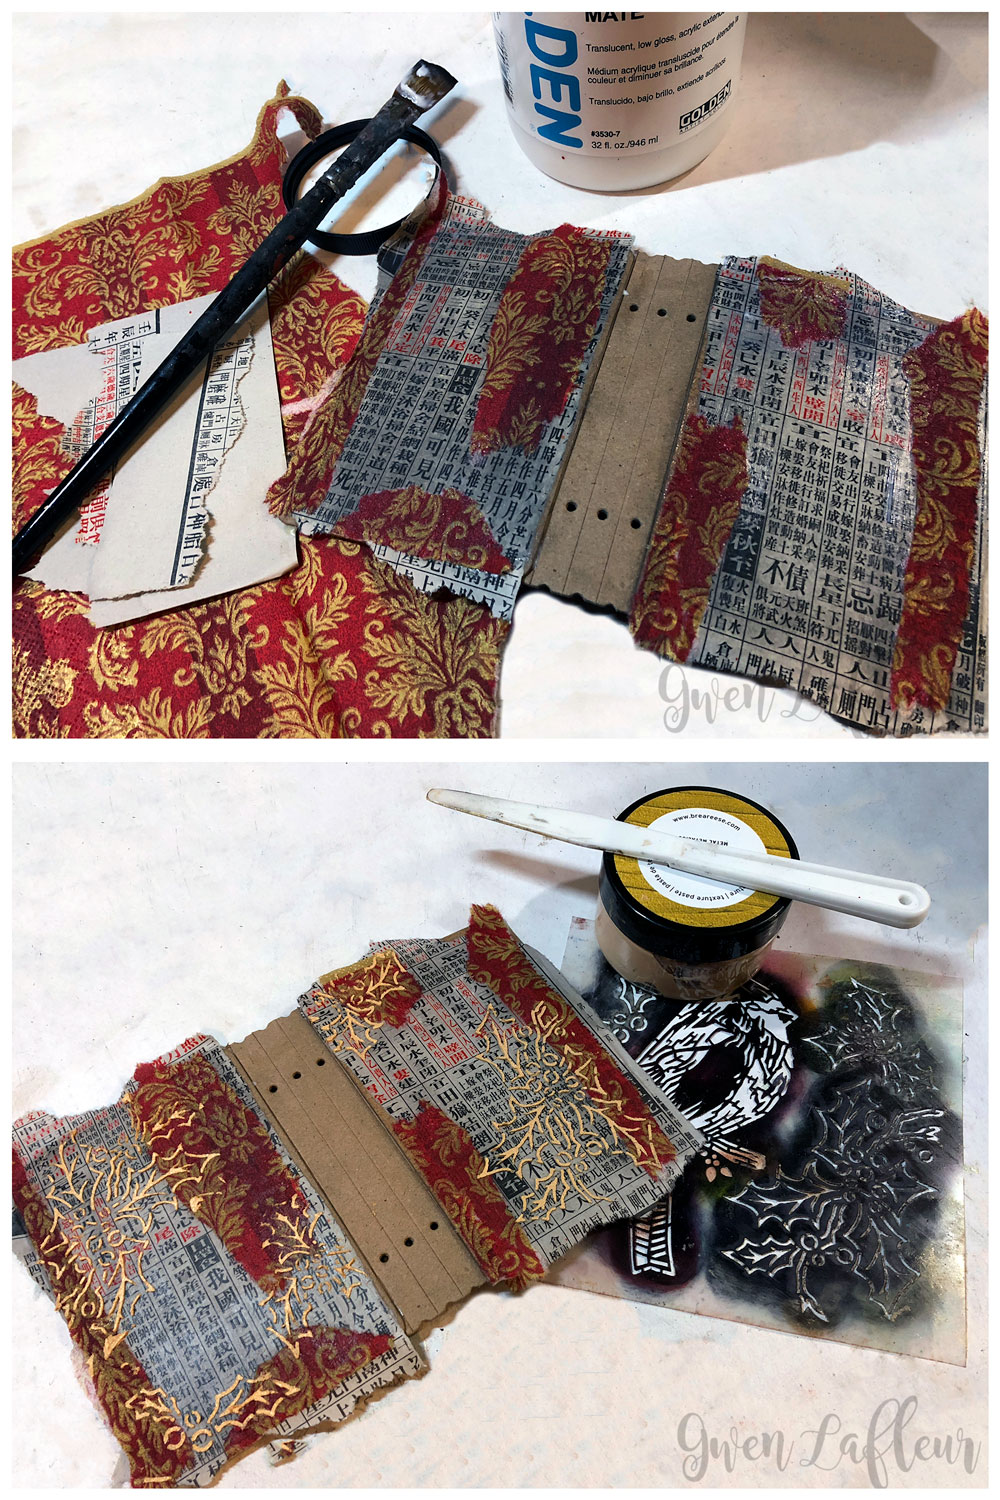
I set the inner pages aside until I was ready for them, then attached the covers to the spine with a strong glue. When it was dry, I pulled out a few collage papers and adhered them onto the front and back covers with matte medium.
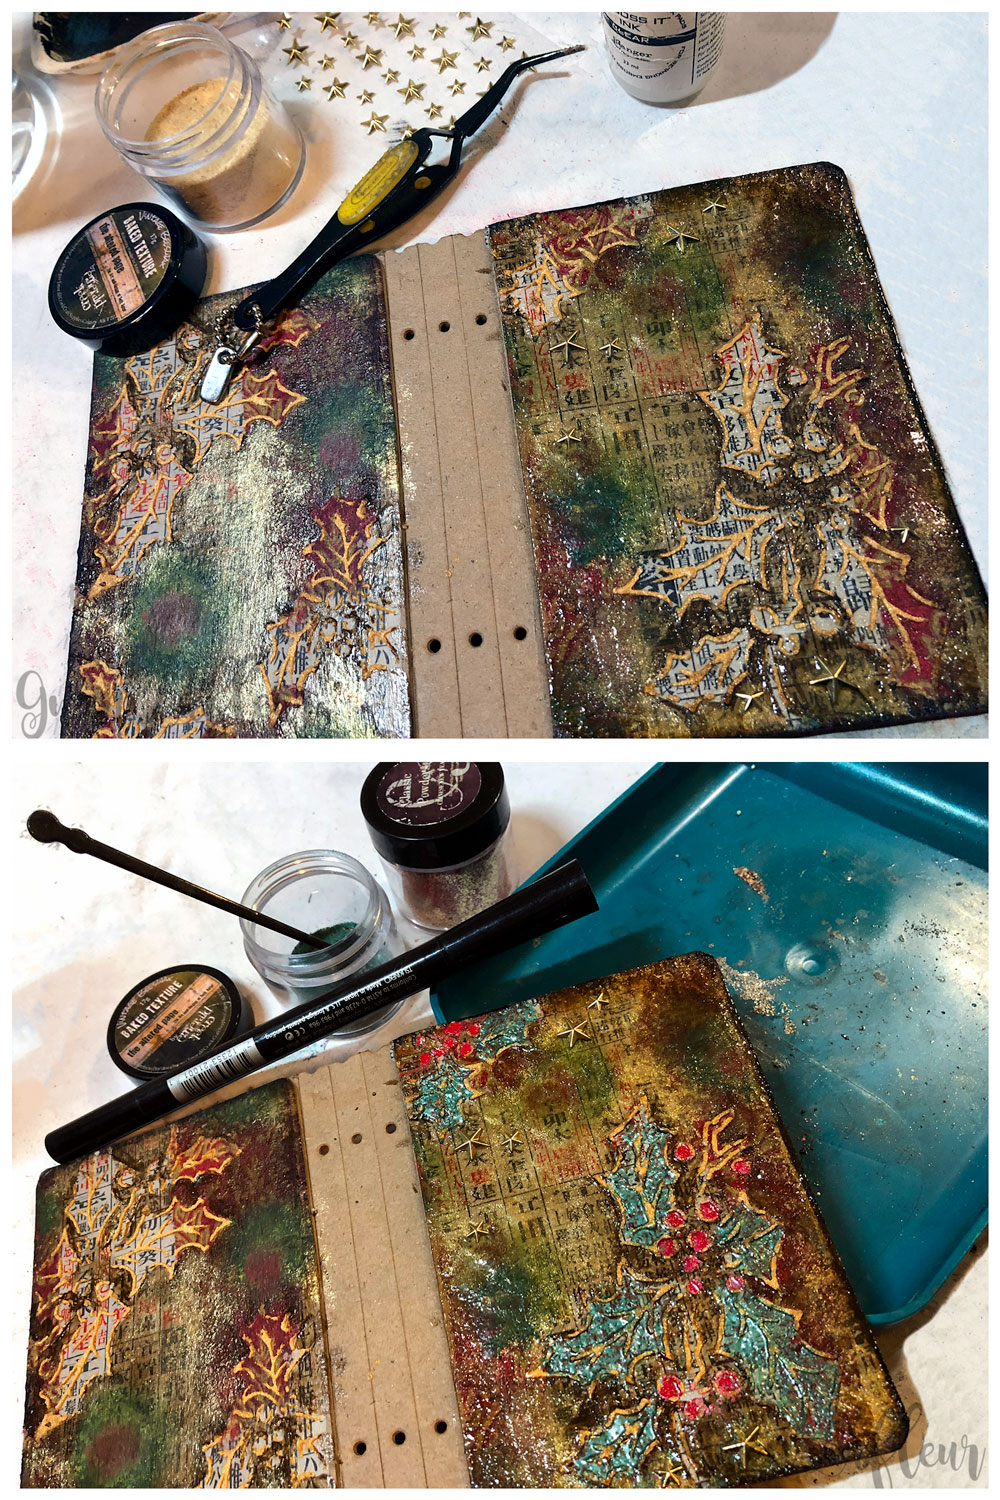
Next I took my Winter Cardinal & Holly stencil from StencilGirl and stenciled in a few places on the front and back covers using gold texture paste. You could do this with an embossing ink and embossing powder, of course, but I knew I was going to be using a lot more layers of EP and doing quite a bit of heating and I'd lose the outline of the design if I didn't use a texture paste that wouldn't melt. Once I had it the way I liked it, I let it dry.
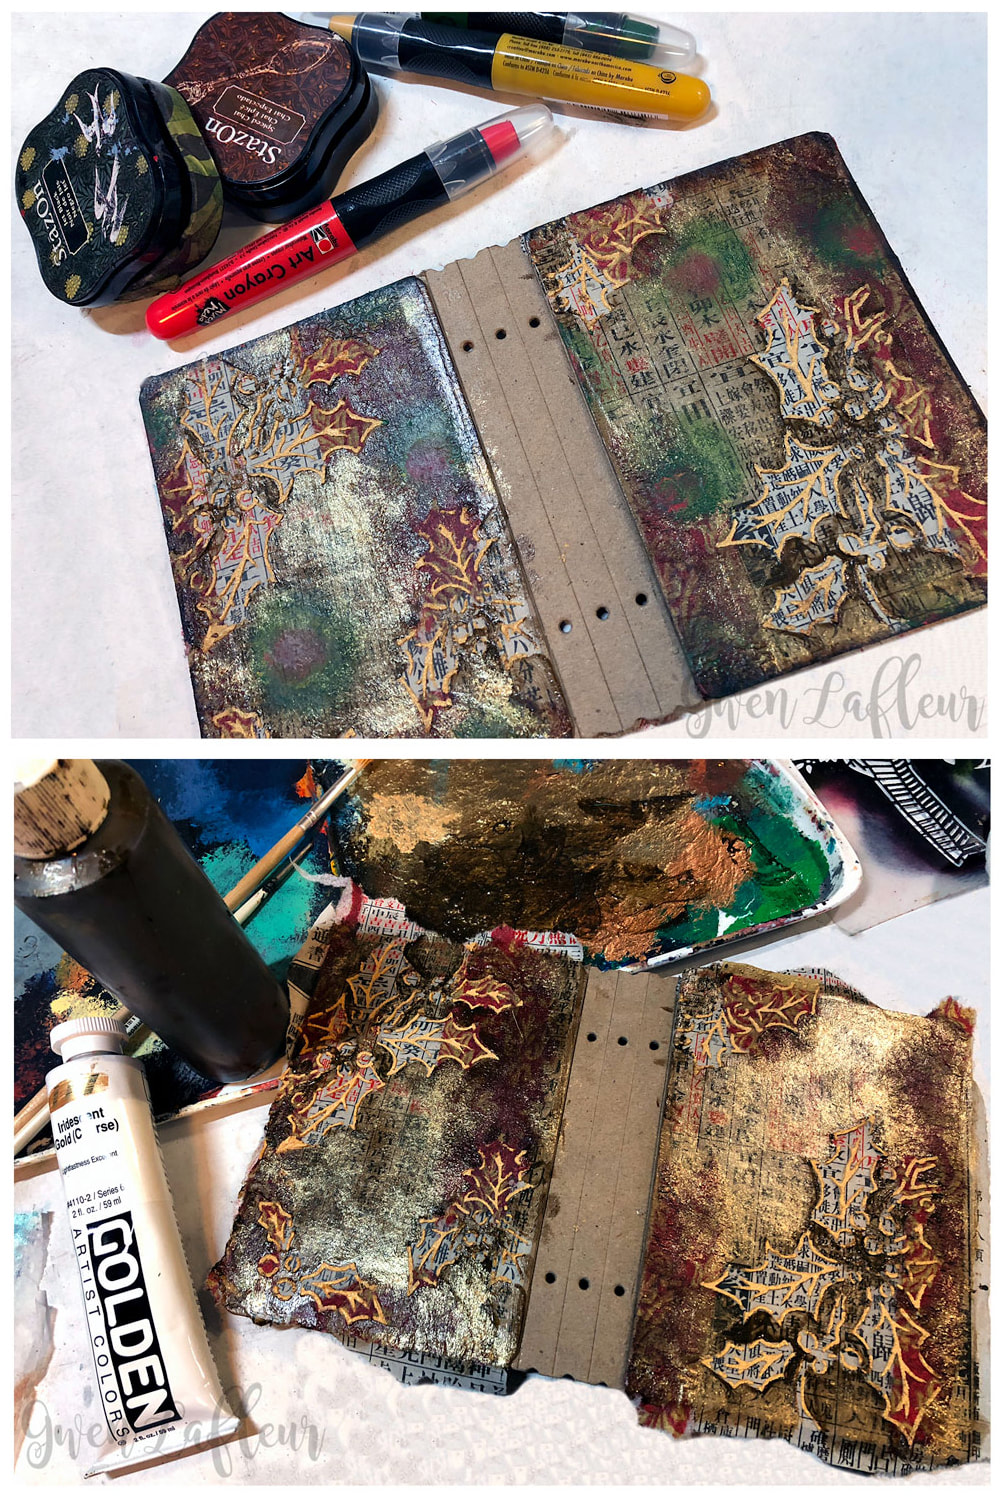
With the stenciled texture paste dry, I used some Marabu Art Crayons to add a few spots of color in the background, blending them out with my fingers. I also added a bit of a frame around the edges of the cover with StazOn ink pads in brown and black.
With the stenciled texture paste dry, I used some Marabu Art Crayons to add a few spots of color in the background, blending them out with my fingers. I also added a bit of a frame around the edges of the cover with StazOn ink pads in brown and black.
I also pulled out some bronze acrylic paint to integrate some of the background elements.
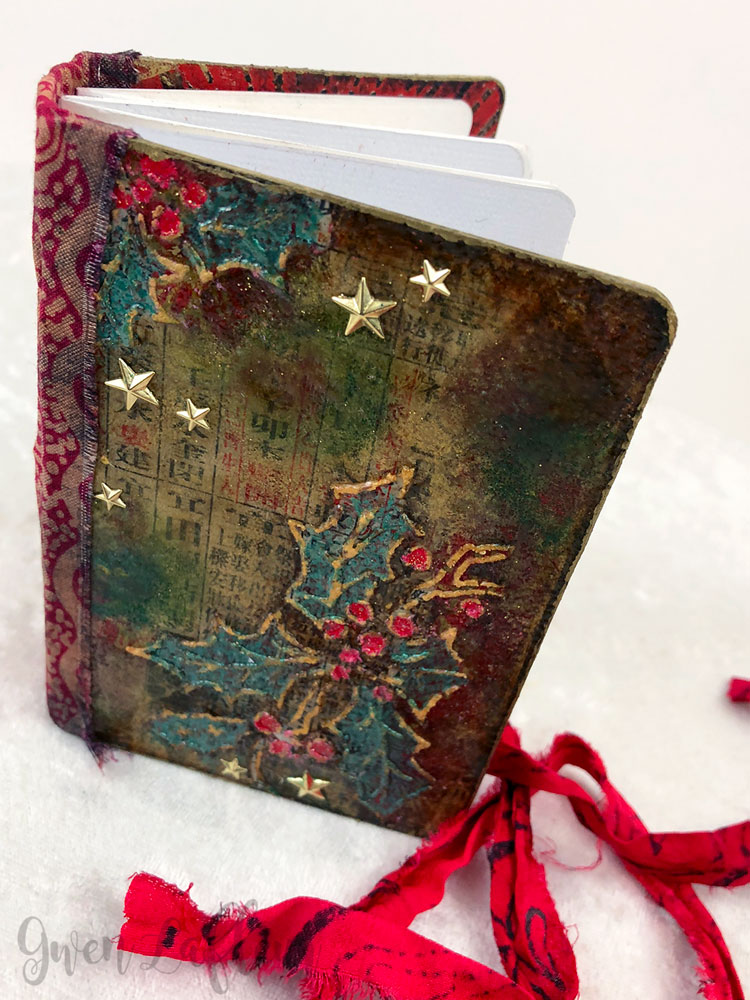
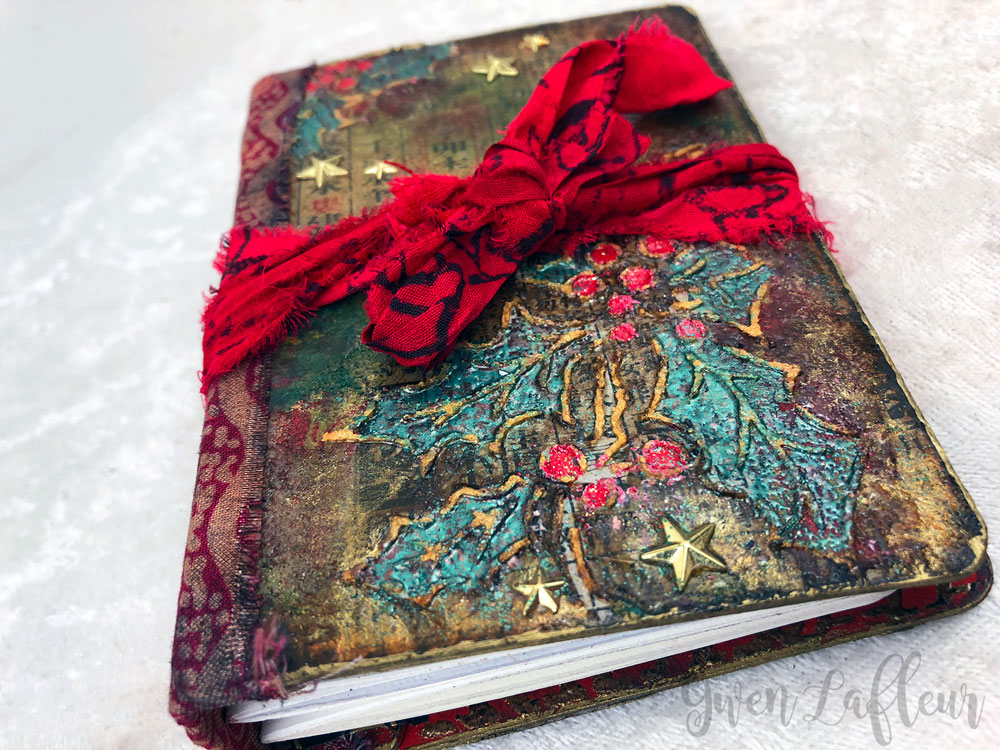
Finally it was time to start embossing... I used a VersaMarker and embossing ink to trace around the outside of the holly sprigs and coat the background, then I coated it with Vintage Beeswax Baked Texture embossing powder. I let it cool, then repeated the process to make sure the coat was nice and thick. It also tends to smooth out more and give better clarity to the layers underneath when you add 2-3 layers of the Vintage Beeswax. I also used my heat gun to re-melt the Vintage Beeswax and embed some small metal star embellishments in a few places on the front cover.
Finally it was time to start embossing... I used a VersaMarker and embossing ink to trace around the outside of the holly sprigs and coat the background, then I coated it with Vintage Beeswax Baked Texture embossing powder. I let it cool, then repeated the process to make sure the coat was nice and thick. It also tends to smooth out more and give better clarity to the layers underneath when you add 2-3 layers of the Vintage Beeswax. I also used my heat gun to re-melt the Vintage Beeswax and embed some small metal star embellishments in a few places on the front cover.
Next I used my VersaMarker to color the berries of my holly design and used a tiny spoon to scoop in some Chinese New Year Classic embossing powder, tapped off the excess and put it back in the jar, and melted it. Then I repeated the process inside the holly leaves and used Patina Oxide Baked Texture embossing powder as my green color.
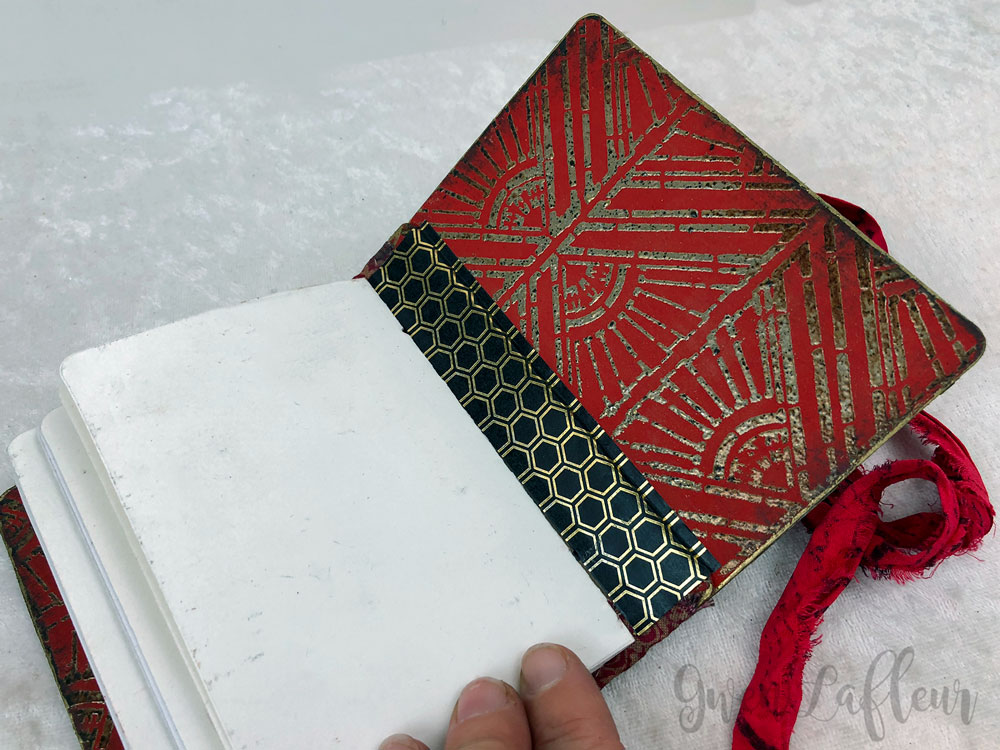
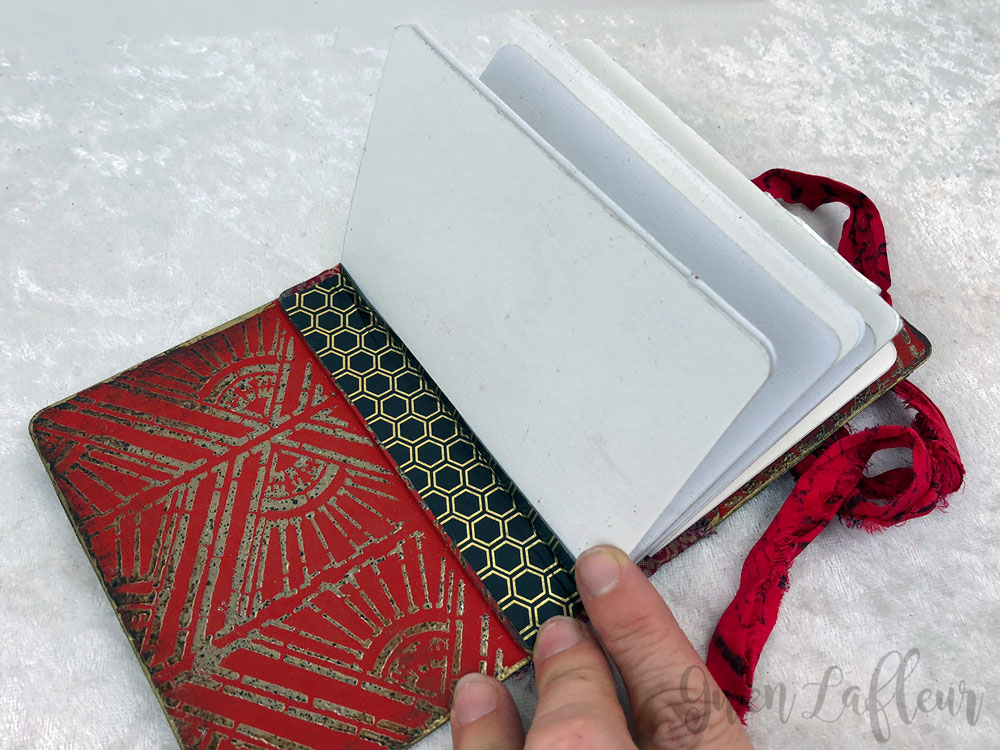
With the front covers done, I turned it over and painted the inside covers red, then used clear embossing ink through my Art Deco Sunburst Background stencil and embossed that with Charred Gold Allure embossing powder.
With the front covers done, I turned it over and painted the inside covers red, then used clear embossing ink through my Art Deco Sunburst Background stencil and embossed that with Charred Gold Allure embossing powder.
Once I'd finished all of the paint and embossing on the inside and outside of the covers, I took the inside pages and attached them through the die cut holes in the spine. I just used some waxed linen thread and lined up two pages stacked inside of each other with each set of holes on the spine and then ran the thread through the holes so I could tie it on the outside. This is how it looked inside:
Above, you can see where I pulled the threads through to the outside of the spine and tied them off. I repeated it until I had all three mini-signatures attached.
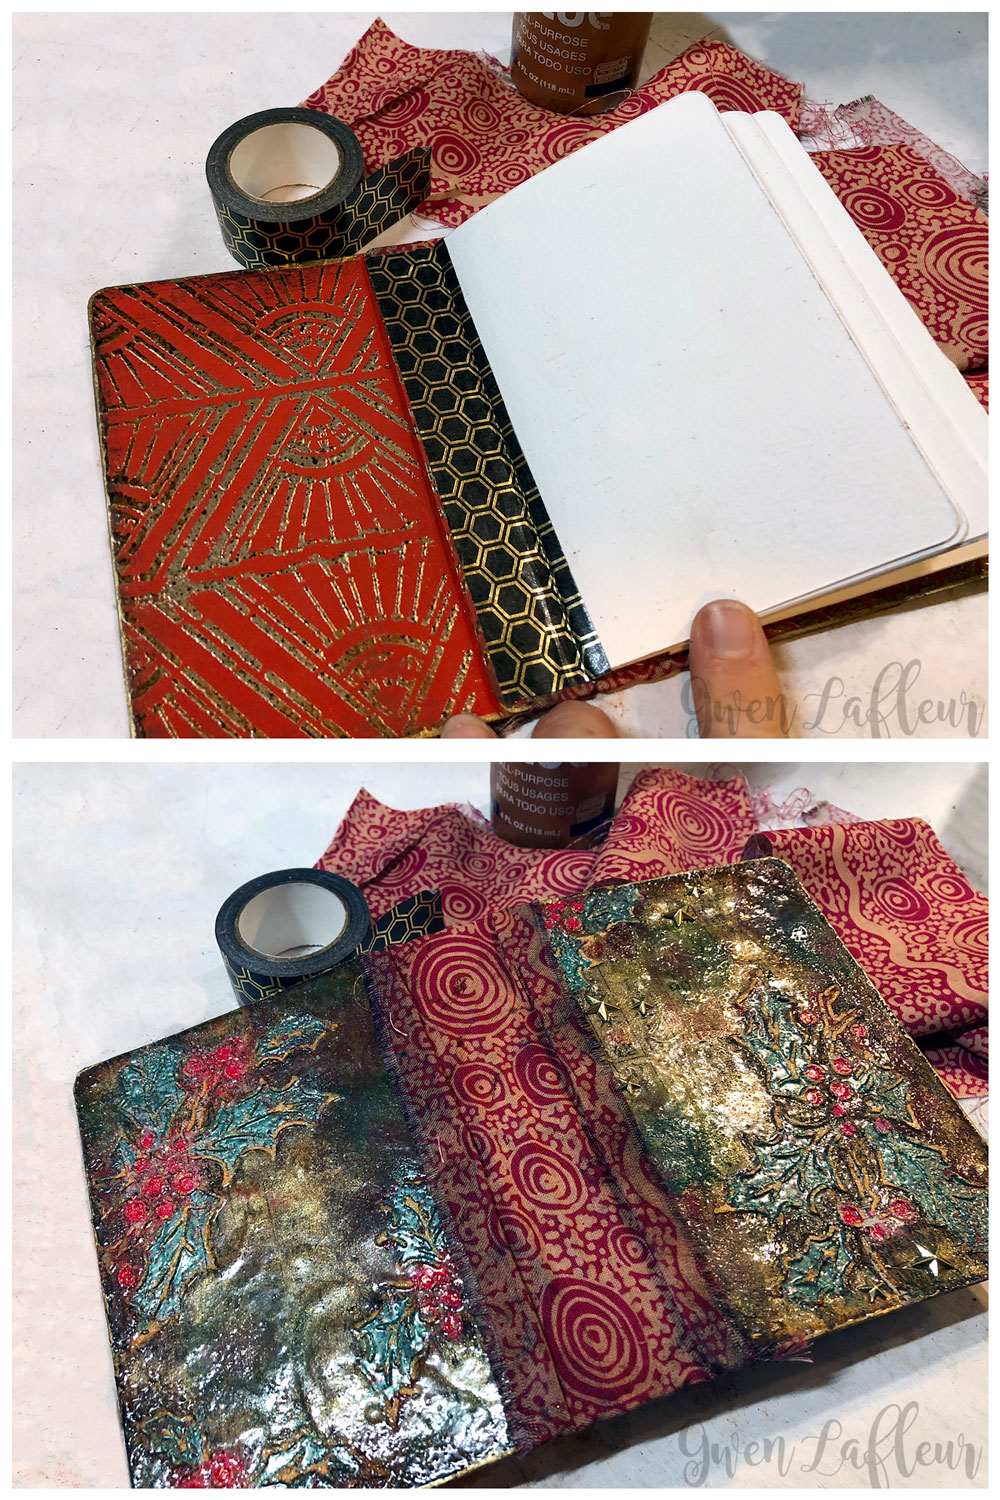
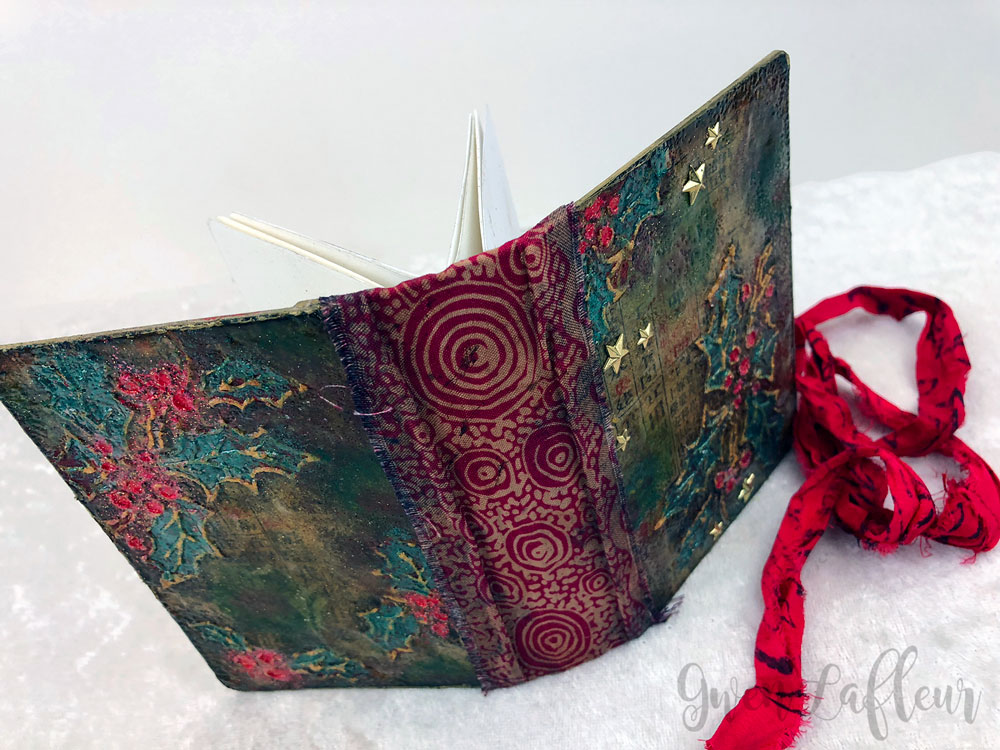
For the finishing touches, you can see below where I wrapped some fabric around the outside of the spine to cover the threads, then I used some washi tape on the inside to cover where the covers and spine are joined together.
For the finishing touches, you can see below where I wrapped some fabric around the outside of the spine to cover the threads, then I used some washi tape on the inside to cover where the covers and spine are joined together.
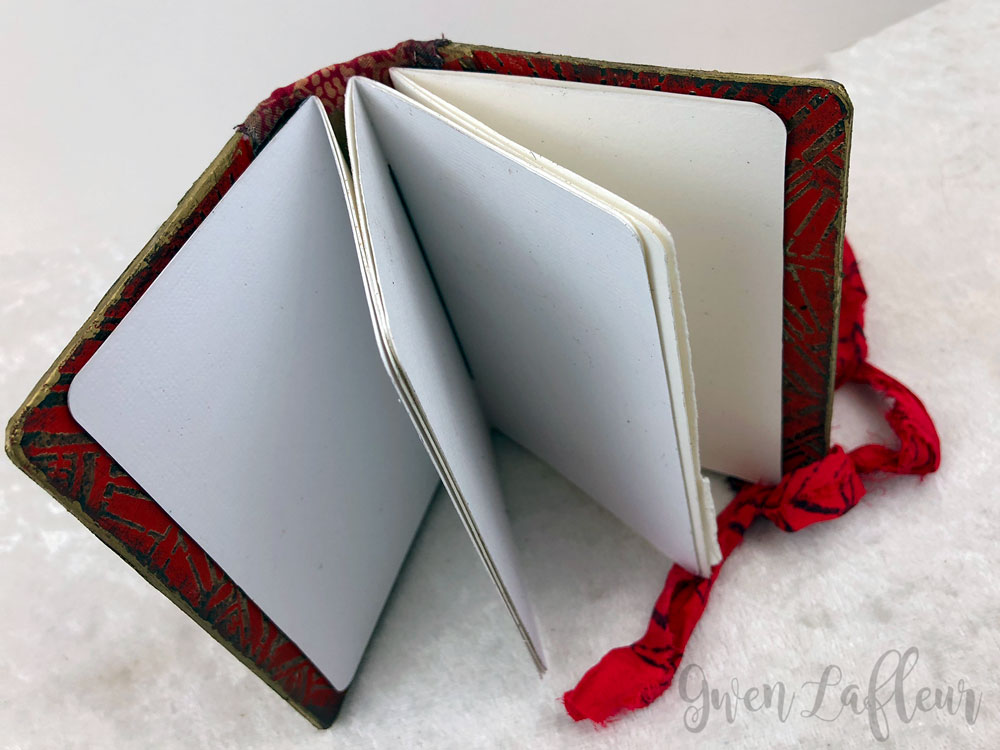
Voilà! A finished mini winter art journal! I just took a scrap of red sari ribbon to use as a closure for the book when I'm not using it. Here you can see the finished insides and outsides of the book:
Thoughts, questions, or comments?
|
|
You might also like...

