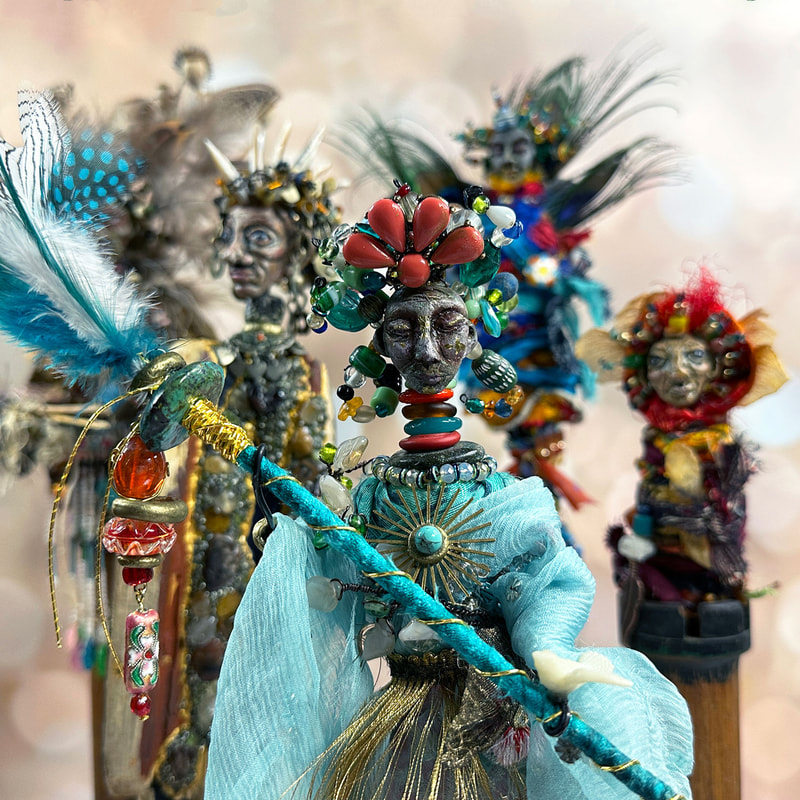
While I love art supplies and tools and will try out most anything, there are a few companies whose products I love and turn to over and over. Both StencilGirl and PaperArtsy definitely fall into that category. For this particular tutorial I've combined StencilGirl stencils with PaperArtsy's Fresco Finish acrylic paints, Infusions, and rubber stamp designs to create two different mixed media medallions.
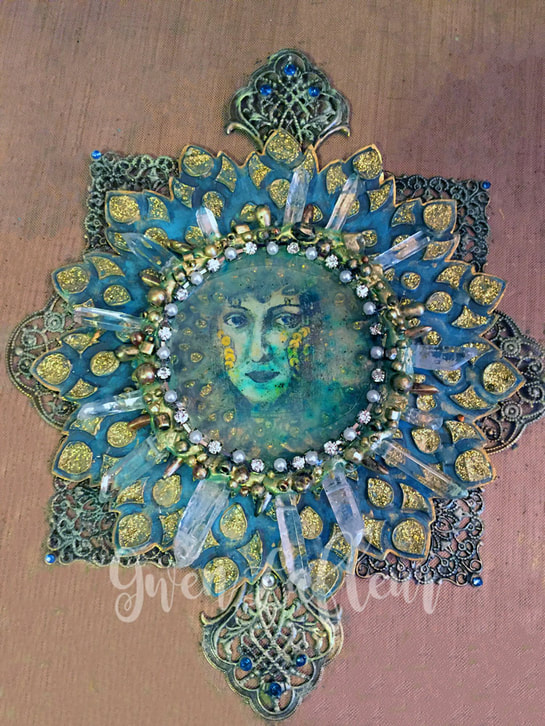
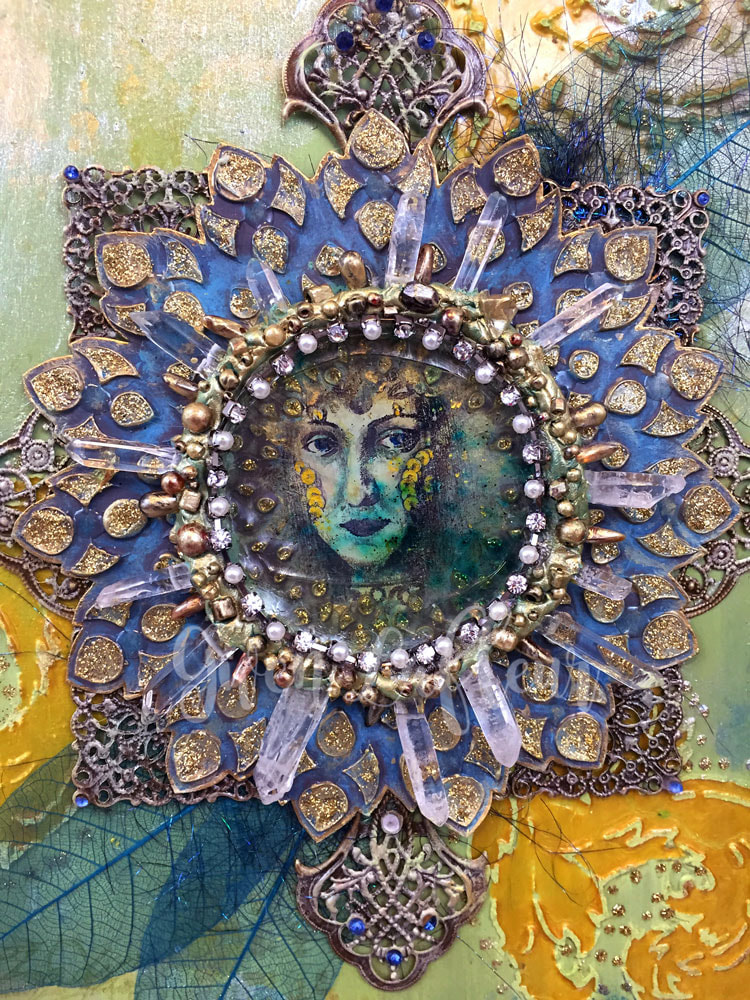
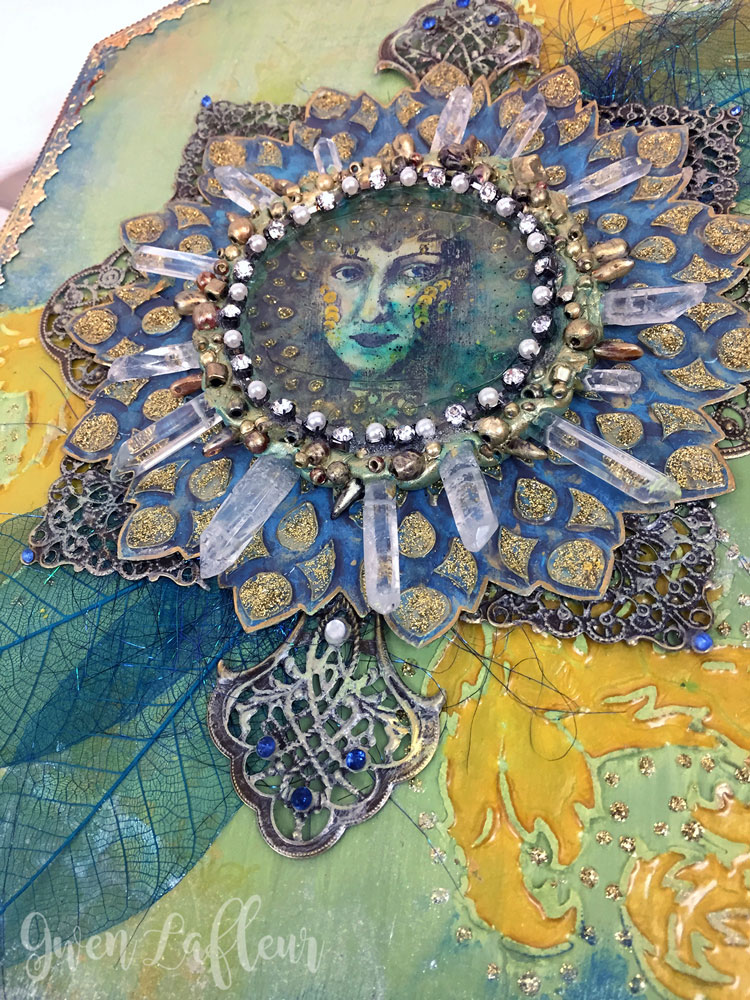
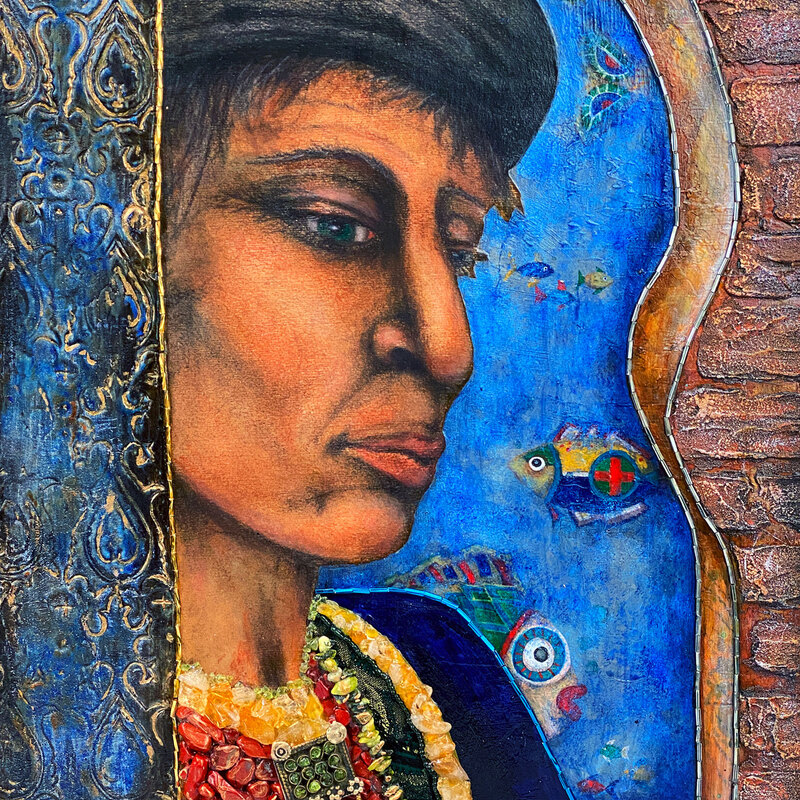
The first piece is a medallion layered on a wood base called, "Lady of the Lake."
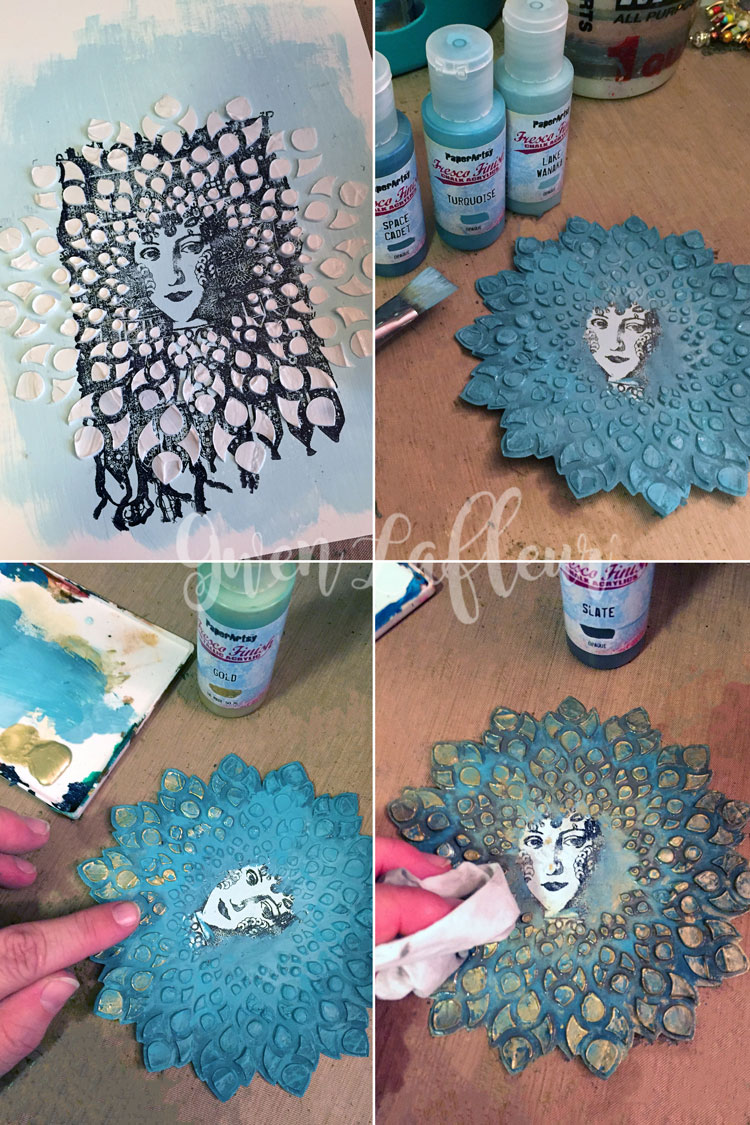
To make this particular medallion, I started with a sheet of vellum finish Bristol paper and put down a base layer using Fresco Antarctica paint. When the paint was dry I stamped the large image from the Lynne Perella Collection 009 stamp set with black Archival Ink (I wanted to have something permanent since I was going to layer on top.) Next I applied molding paste through the Cornish Petals Large stencil by Lizzie Mayne, (making sure to put the center of the stencil over the stamped face) and I let it dry.
Once dry, I cut around the dimensional stenciled area and then used a blend of Space Cadet, Turquoise, and Lake Wanaka Fresco paints over top. Originally I wanted more of the stamped image to show through, but as I painted it seemed to be telling me to keep edging in a bit more until only the face was showing. I'm glad I listened!
Once dry, I cut around the dimensional stenciled area and then used a blend of Space Cadet, Turquoise, and Lake Wanaka Fresco paints over top. Originally I wanted more of the stamped image to show through, but as I painted it seemed to be telling me to keep edging in a bit more until only the face was showing. I'm glad I listened!
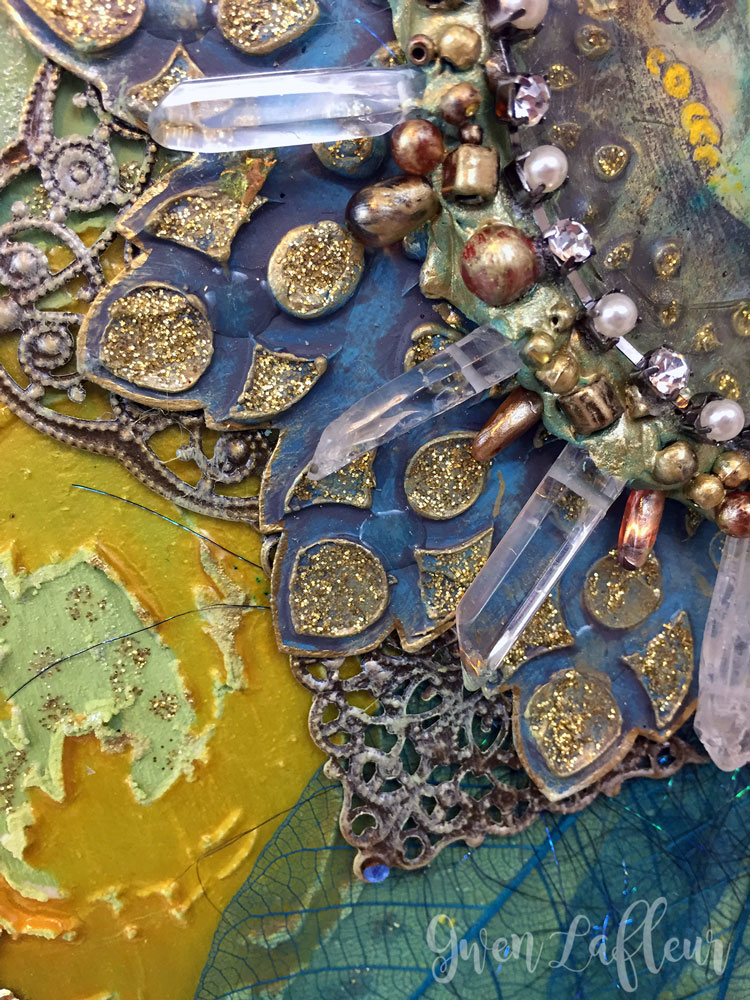
I took some Gold Fresco Finish paint and used my finger to rub it across the raised areas of the design, then mixed Slate with some Satin Glaze and coated the entire thing. I let the glaze dry for a minute or so then wiped off the excess with a baby wipe, making sure that I was mainly removing paint from the raised areas; this really helped to highlight the dimension.
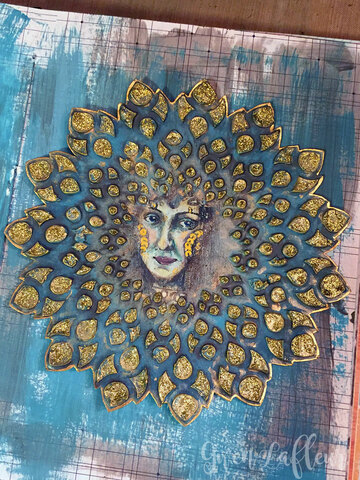
Once that layer was dry I used gold glitter glue to go over all the gold areas and really bling it up. At this point I considered stopping and using the medallion in an art journal instead of continuing to add dimension.
As much as I loved this, and I did! I wanted to go further with the medallion idea and continue to build up layers.
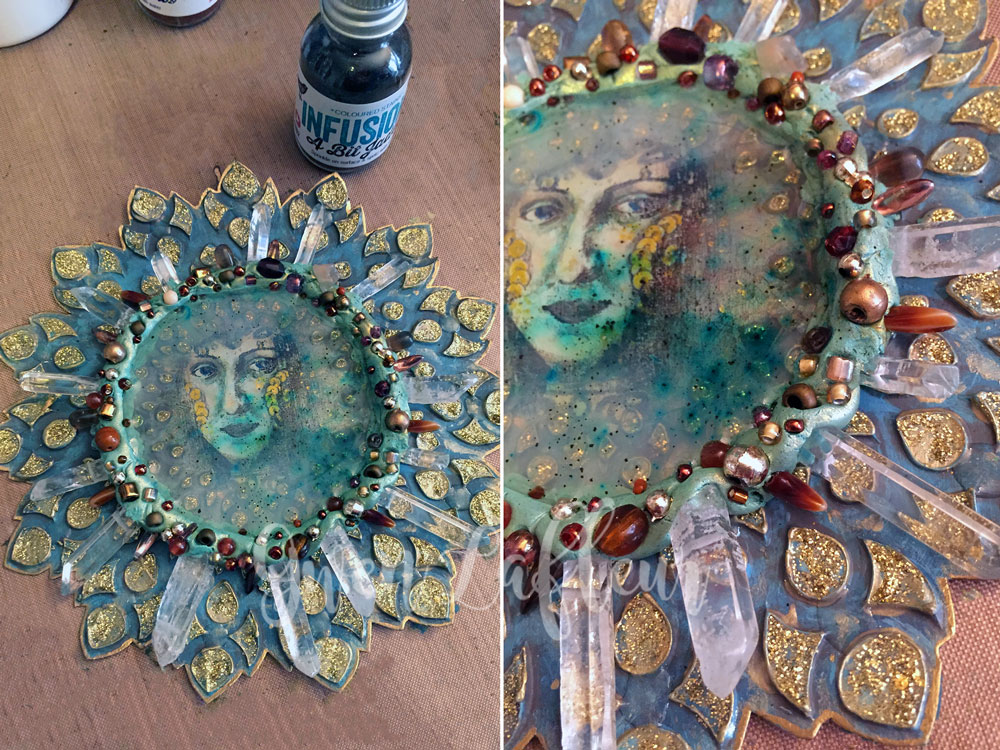
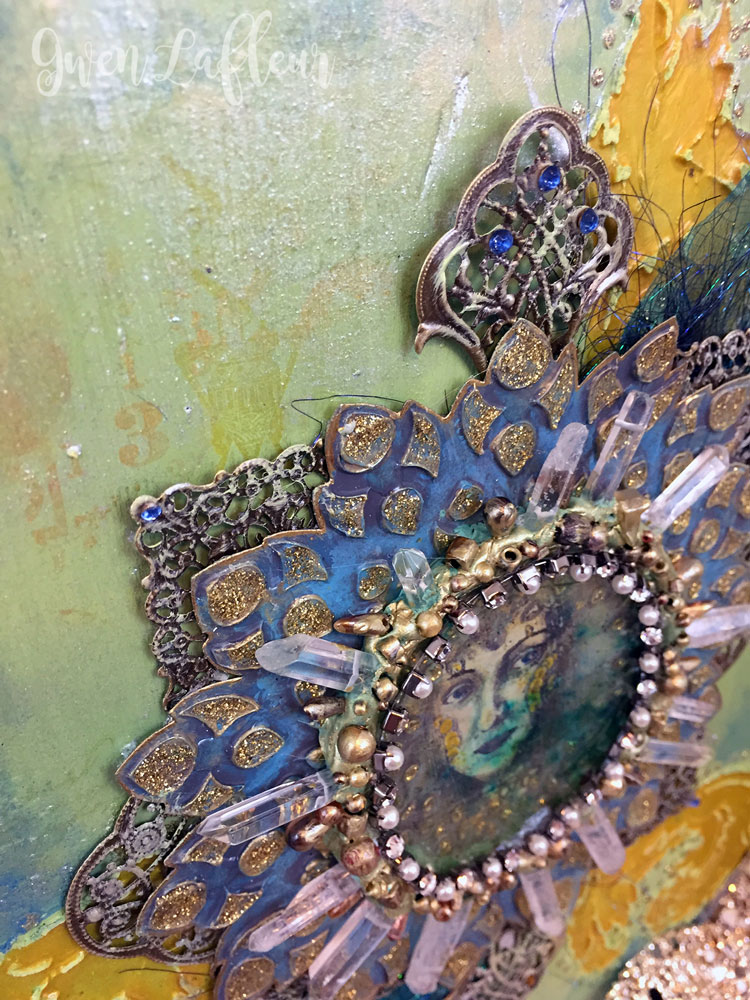
I mixed up some Aves Apoxy Clay and then sprinkled in some Infusions Dye Stain (A Bit Jaded.) I added just a spritz of water to activate the dye as I kneaded it into the clay so that it would stain it for me. I rolled that out and put a ring of clay around the stamped face, then inserted some clear crystals around the outside edge and embedded lots of brown and gold beads into the surface of the clay.
I mixed up some Aves Apoxy Clay and then sprinkled in some Infusions Dye Stain (A Bit Jaded.) I added just a spritz of water to activate the dye as I kneaded it into the clay so that it would stain it for me. I rolled that out and put a ring of clay around the stamped face, then inserted some clear crystals around the outside edge and embedded lots of brown and gold beads into the surface of the clay.
Once the clay was no longer water soluble I filled the space in the center with Diamond Glaze and then sprinkled more Infusions onto the surface. They spread just a bit on contact with the liquid (which I wanted,) and I was careful not to disturb it so that they would remain as dots and splashes of color and not completely dye the glaze. I left this until the glaze was totally dry and the clay was cured (overnight.)
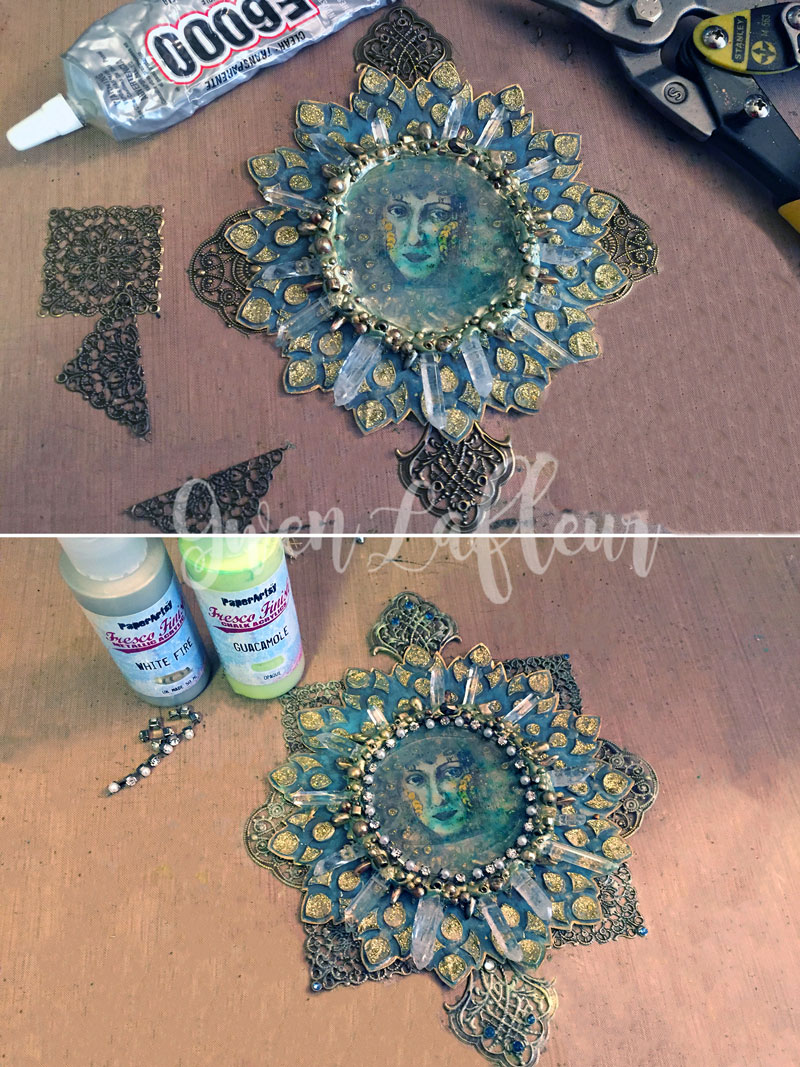
More is more, of course, so next I pulled my Gold Fresco Finish paint back out and rubbed it all over the clay and beads. Some of the color still showed through, but it helped to better integrate that area. Next I took out some brass findings, cut them with a pair of tin snips, and attached them onto the back of the medallion using E6000 glue.
More is more, of course, so next I pulled my Gold Fresco Finish paint back out and rubbed it all over the clay and beads. Some of the color still showed through, but it helped to better integrate that area. Next I took out some brass findings, cut them with a pair of tin snips, and attached them onto the back of the medallion using E6000 glue.
I wanted a bit of a patina effect so I once again used my fingers to rub a touch of White Fire Fresco Finish and Guacamole across the surface of the metal pieces. I added a strand of rhinestones around the inside of the circle to cover up the seam with the glaze (and add more bling!) and then glued a few jewels into some openings on the metal bits.
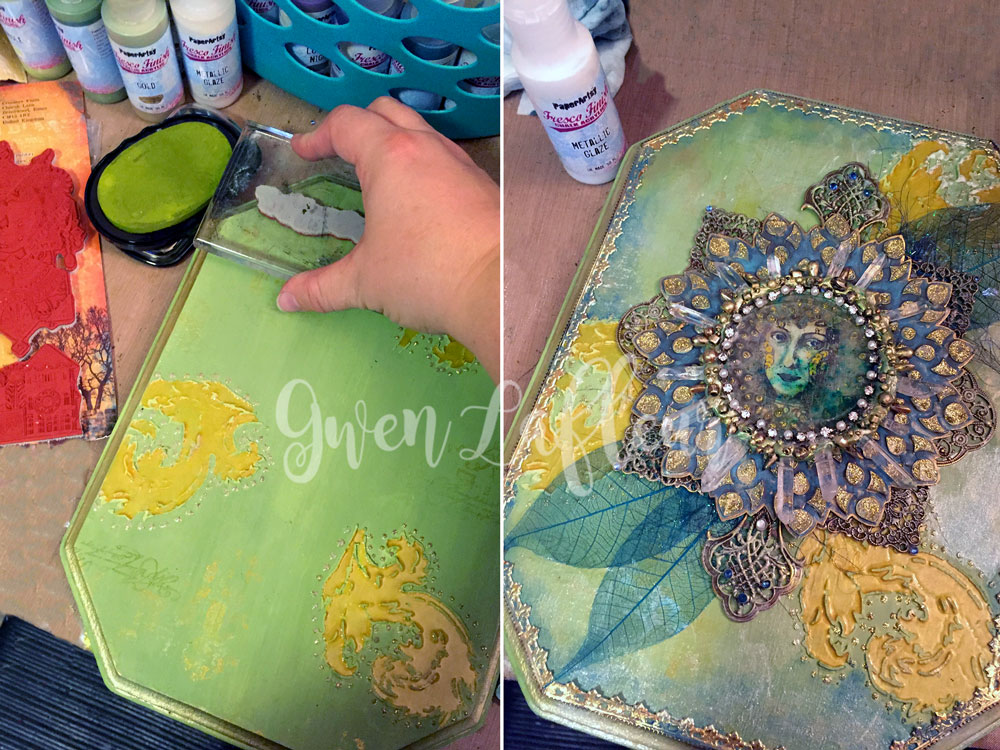
I loved the finished medallion itself, but I felt like it needed to be mounted on something so I took out an unfinished wooden plaque from the craft store, sanded the rough parts, then painted it with Gold, Guacamole, and Tinned Peas.
When the paint was dry I stenciled some flourishes from the 9" x 12" stencil that comes in my Heraldry StencilClub collection using gold texture paste, then filled them with a glaze mixed with more Gold. I also added some stamping using smaller elements on the Lynne Perella 28 stamp collection and Background Plate 5 in gold and chartreuse ink.
When the paint was dry I stenciled some flourishes from the 9" x 12" stencil that comes in my Heraldry StencilClub collection using gold texture paste, then filled them with a glaze mixed with more Gold. I also added some stamping using smaller elements on the Lynne Perella 28 stamp collection and Background Plate 5 in gold and chartreuse ink.
To complete the panel I edged it with more Space Cadet and Turquoise paints and then coated the entire surface with metallic glaze for a touch of shimmer. Finally, I added some Dresden trim borders and a few skeleton leaves and glued it all together.
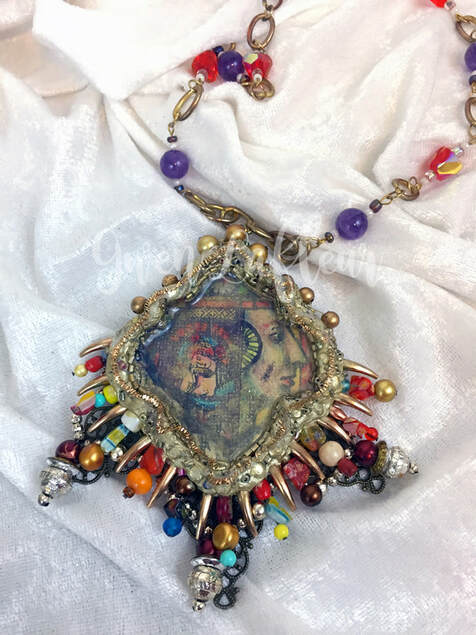
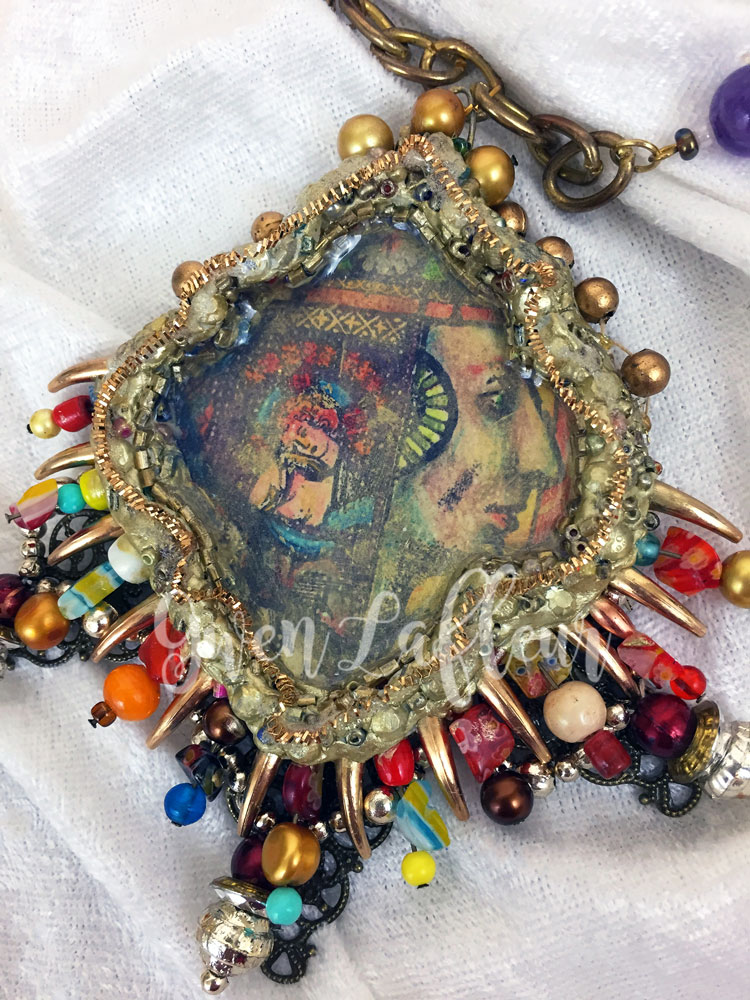
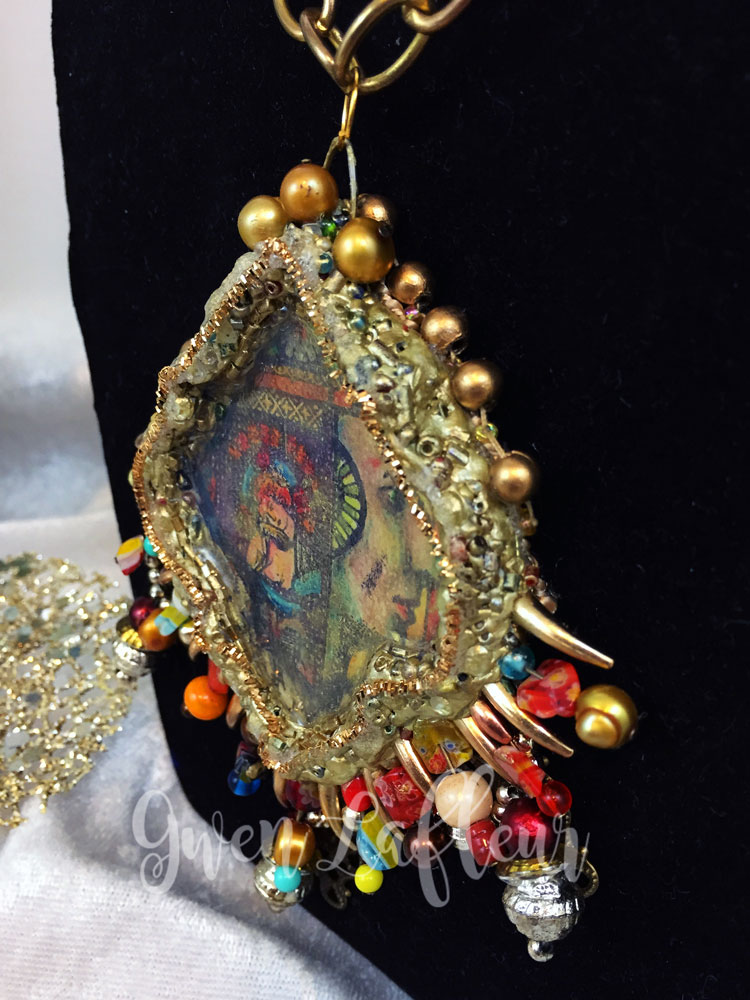
For the second project, I wanted to do a medallion that would work as a large pendant for a statement piece, so I used similar techniques along with my stamps, paints, and stencils and made an artsy necklace - definitely a conversation starter!
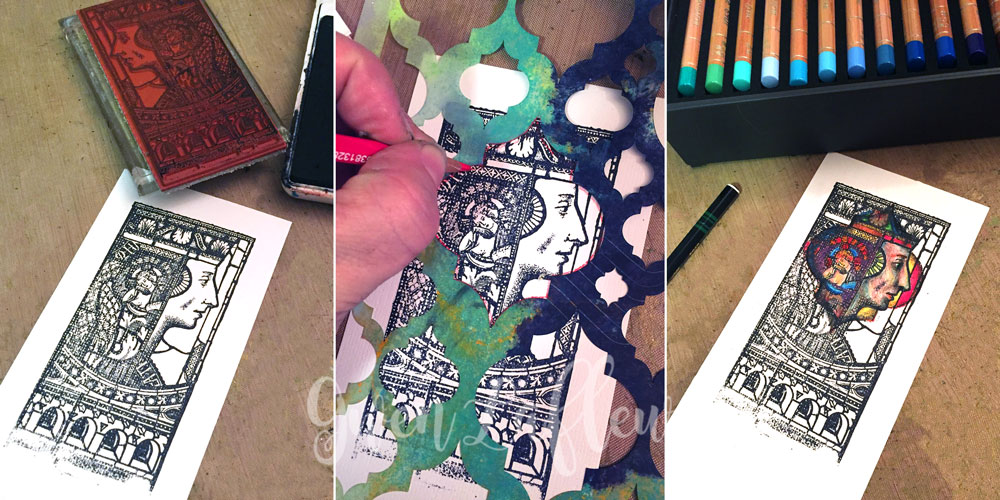
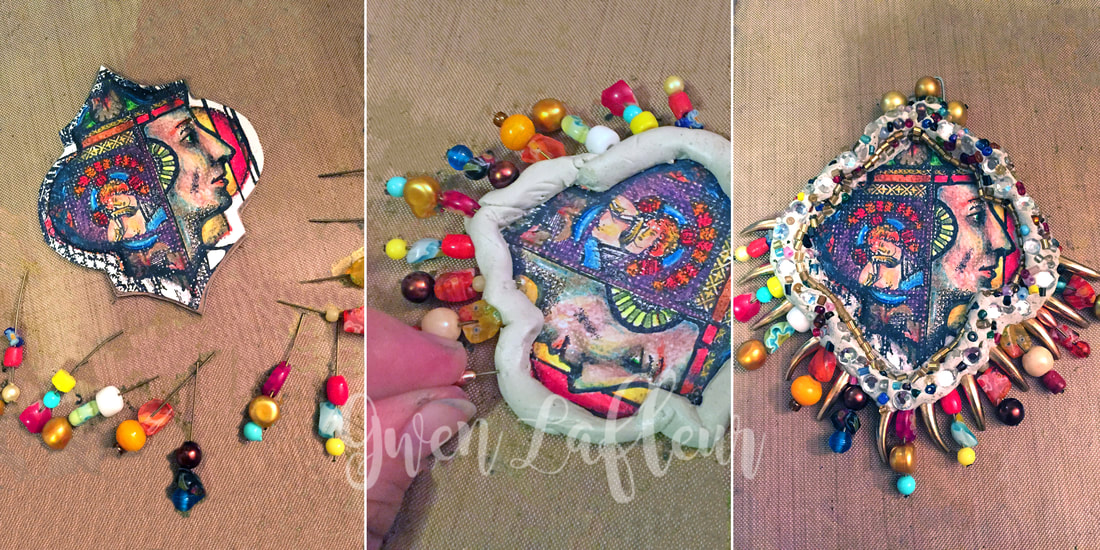
To create the pendant I started with a piece of white cardstock and stamped one of the large images from Lynne Perella Collection 34 with black Archival Ink. Next I took the Marrakech Mix stencil by Michelle Ward and used one of the larger openings to trace around the face - This would become the part of the stamp that showed in my pendant.
I used colored pencils to color in the area defined by the stencil, then I cut it out, leaving about 1/4" border since I knew I wanted to frame the image with clay.
I also knew that I wanted some "stuff" sticking out of the clay, so I gathered a few headpins and various colorful beads and made some picks to stick into the clay.
I also knew that I wanted some "stuff" sticking out of the clay, so I gathered a few headpins and various colorful beads and made some picks to stick into the clay.
I mixed up more Aves Apoxie clay and rolled it out in a thin log to about 1/4" diameter, then wrapped it around the image, pressing it lightly into the cardstock base so that it would stick (I also covered the back of the pendant with a thin layer of clay.) Since I wanted this to be usable as a pendant, I put a loop of wire into the top where I could attach a chain.
Next I stuck my beaded picks into the clay around the bottom, added spike beads in between the picks, and added more beads into the other areas of the clay. I let the clay cure until it was nice and solid before moving on.
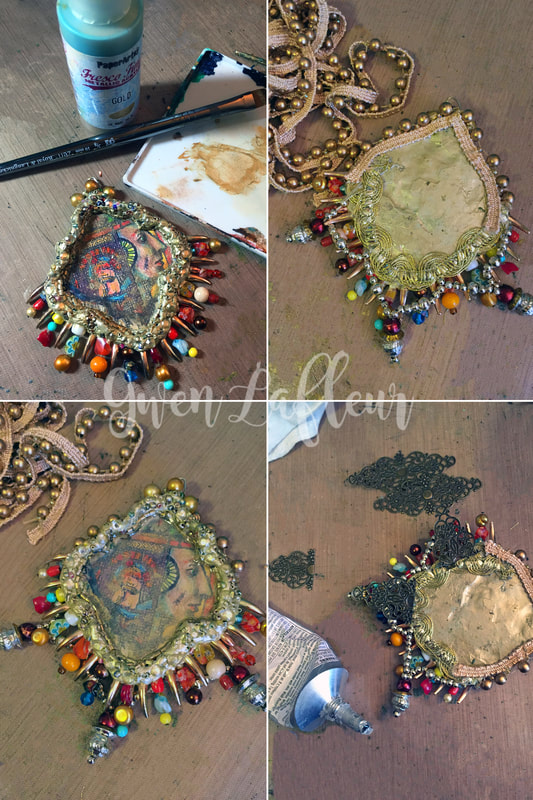
Moving on, I got out my trusty Gold Fresco Finish paint and painted over the clay and beads as well as the back, then when it was dry I flipped it over and glued on some different gold trims that would show around the edges on the front.
As with the first medallion, I took some metal findings and added them onto the back with E6000 (I later cut out and adhered a piece of felt over the entire back side of the pendant to cover any rough bits that might irritate skin or snag clothing.)
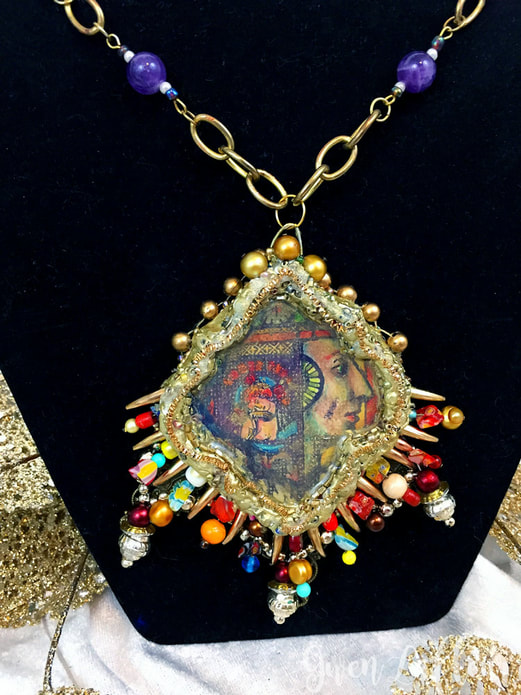
Finally, I filled the opening inside of the clay border on the front with more Diamond Glaze and then edged the inside of the pendant opening with some fine gold trim to help emphasize the original shape.
Add a chain, and voila! A fun and artsy statement necklace. (Of course, this could also be used on the cover or a book, on a mixed media piece, in assemblage art... it definitely doesn't have to be worn!)
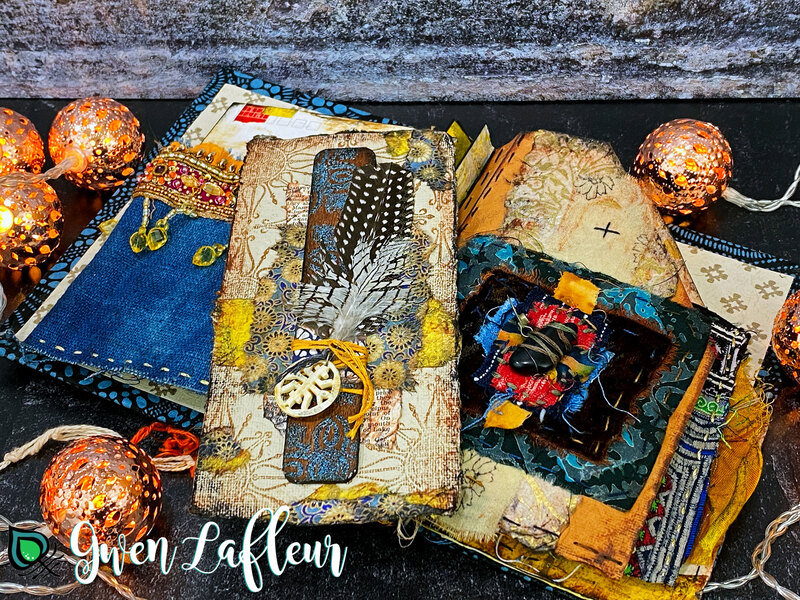
Here you can see a few close-ups of both medallions - click on any of the images to see details.
Thoughts, questions, or comments?
|
|
You might also like...


