It's no secret that I'm a big fan of using embossing powder in my mixed media artwork, so when Seth Apter asked me if I'd be willing to do a project showcasing his seven new flavors of Baked Texture embossing powder from Emerald Creek (originally released in January 2018,) I jumped at the chance.
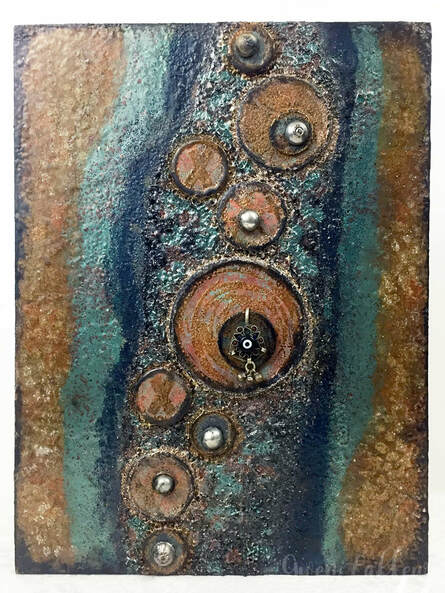
When the long awaited powders finally arrived, I dove in head first and explored. One of the results of my playtime, er... experimentation was this abstract mixed media panel that uses all seven blends and a variety of different techniques.
When the long awaited powders finally arrived, I dove in head first and explored. One of the results of my playtime, er... experimentation was this abstract mixed media panel that uses all seven blends and a variety of different techniques.
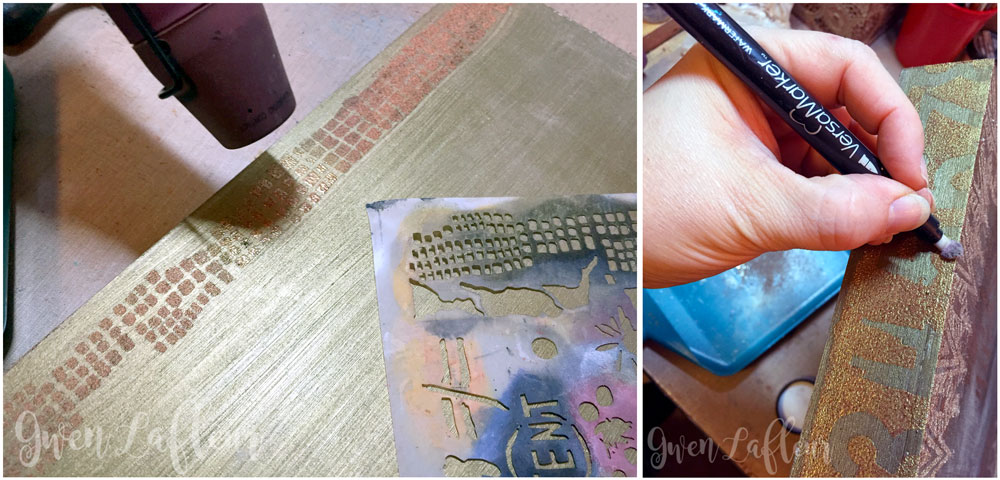
I took some photos as I worked so that you can see some of the ways that I used the Baked Texture powders. To start, I stenciled elements from Seth's Numbers stencil with pigment ink, then added Ancient Amber and heat embossed it. I repeated this randomly across the background (keeping mostly toward the edges since I knew I was going to cover the center,) and making sure to wrap some of the embossing around the sides of my cradled panel. I also used a VersaMarker to edge the panel and I added more EP and heat embossed that as well.
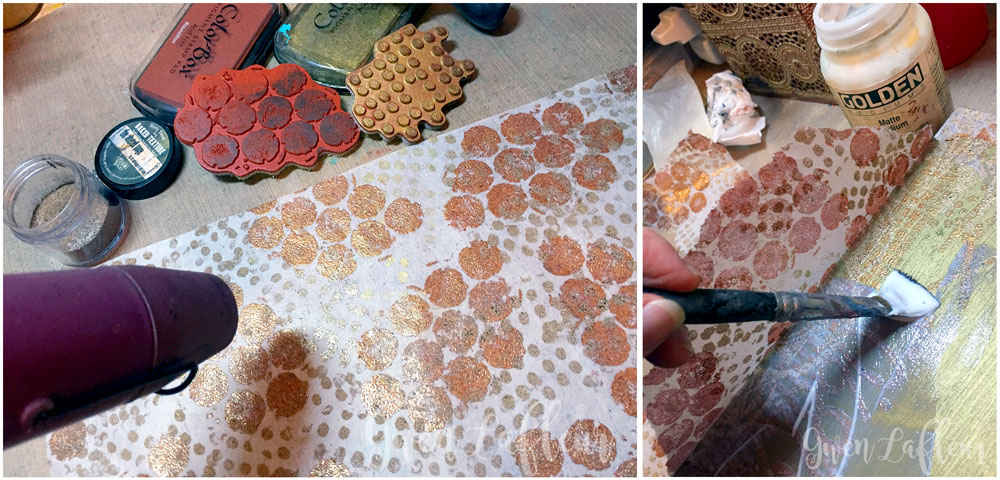
For the next layer, I randomly stamped some circle patterns from two of Seth's PaperArtsy cling rubber stamp sets onto rice paper using pigment ink. I did them one at a time - stamping one pattern and embossing, then repeating with the other pattern. I used Chunky Rust with the larger stamped circles and then using Dirty Sand for the smaller design. I then tore the paper into strips and collaged sections onto the background of my panel using matte medium, making sure to layer some of it over the embossing that was already on there since I wanted to start to build up layers of texture.
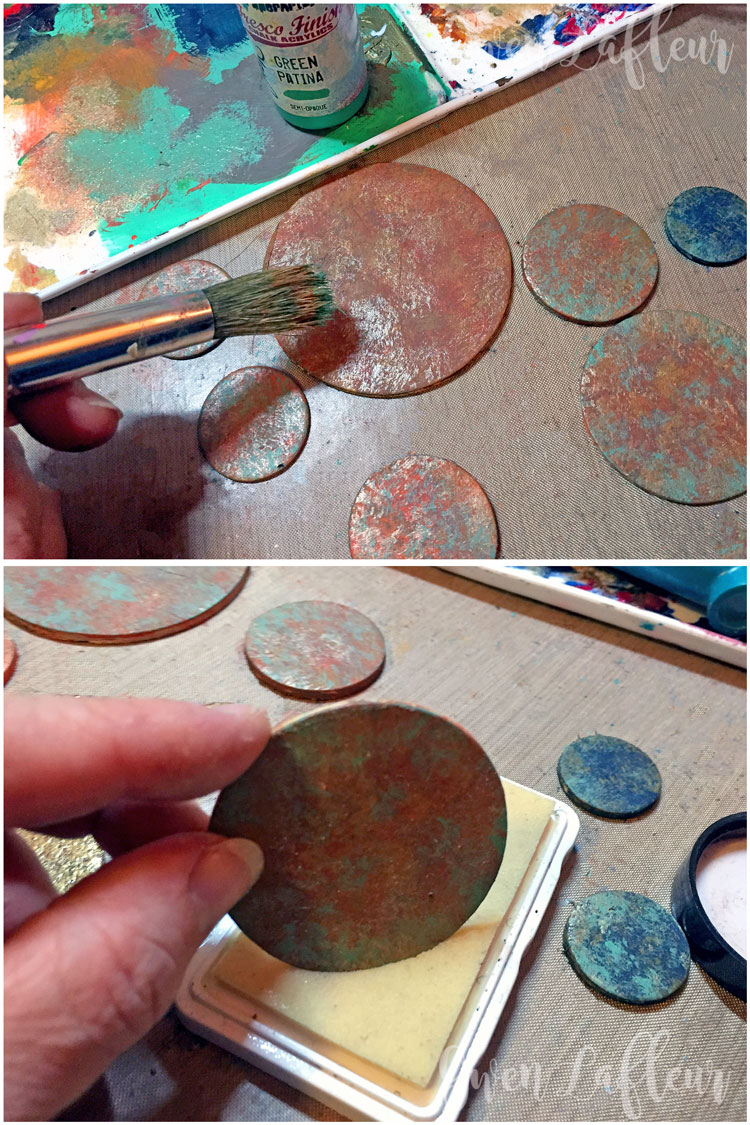
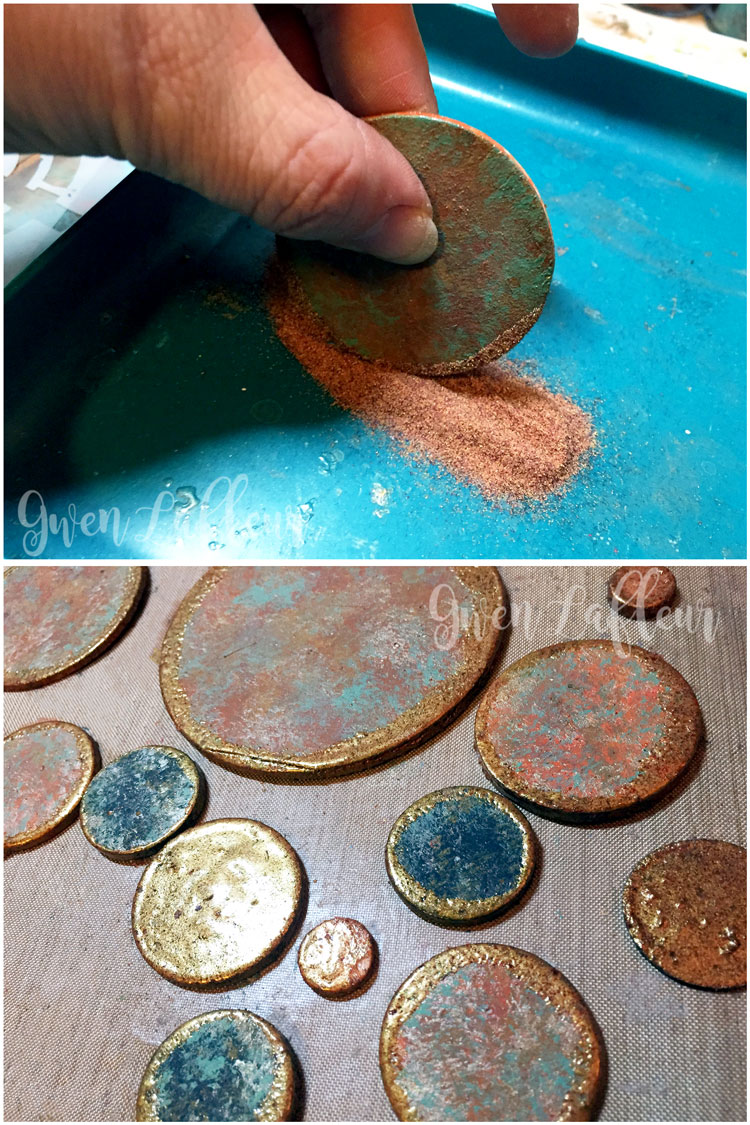
I set the panel aside to dry, then moved on to the circular elements that I knew I wanted to have running down the center. I took several different sizes of chipboard circles and painted them with different colors of Seth's PaperArtsy Fresco Finish paints.
Once the paint was dry, (which is important because the embossing powder will stick to wet paint and you may get embossing where you don't want it,) I ran the edges of the circles across an embossing ink pad (above,) and then ran them through a pile of Ancient Amber.
Above, you can see that I heat embossed the circles - I love the effect of the embossed edges! A few of them I just coated completely for some variety. When I'm working with smaller items like this, I have a set of long copper tongs that I use to hold the piece that I'm embossing so that I don't burn my fingers - super helpful.
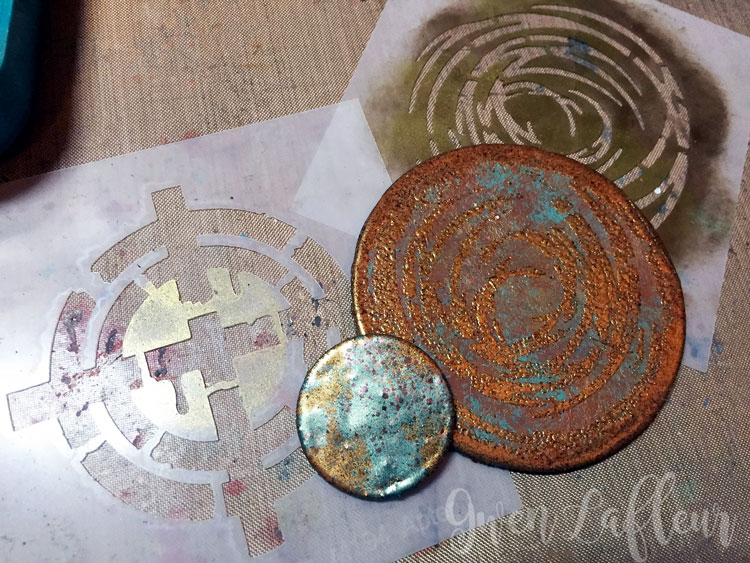
Next, I went back through and used some of Seth's stencil designs from StencilGirl to add patterns to the tops of my circles using pigment ink and then Chunky Rust and Patina Oxide powders.
Next, I went back through and used some of Seth's stencil designs from StencilGirl to add patterns to the tops of my circles using pigment ink and then Chunky Rust and Patina Oxide powders.
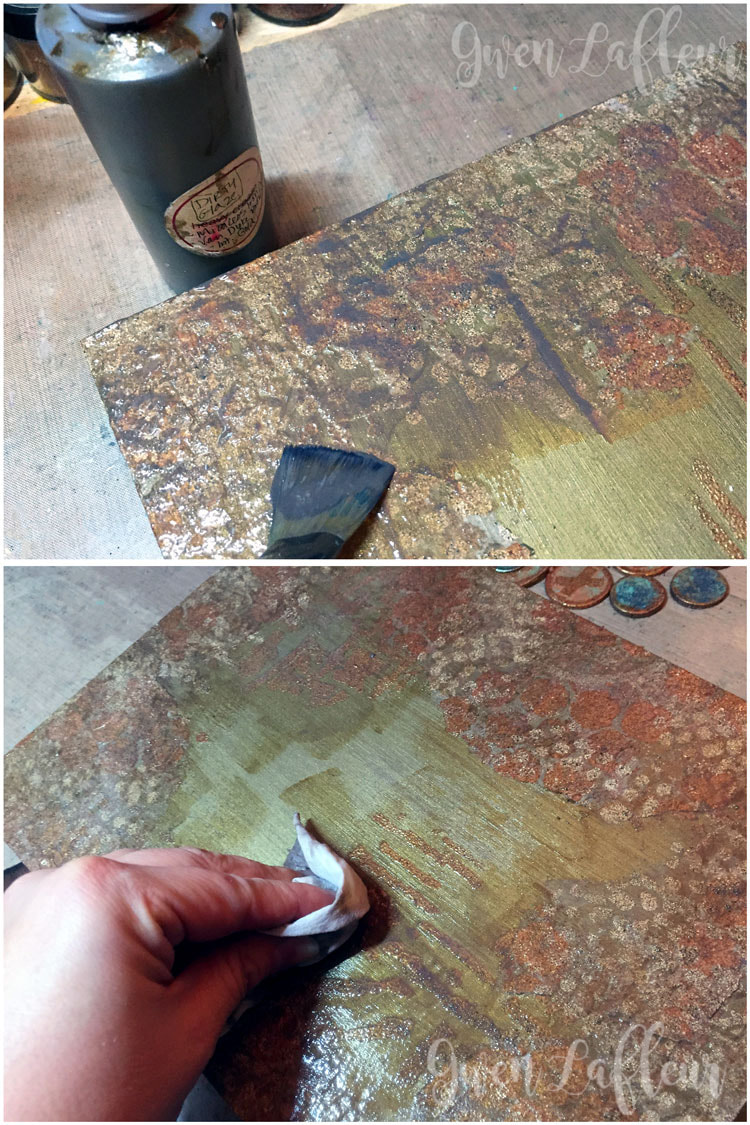
At this point, my circles were ready to add to the panel, so I set those aside and went back to work on prepping my background which I coated with a brown glaze. I applied it, let it start to dry for about a minute or so, and then used a baby wipe to take some of it back off leaving it darker in the crevices of the texture I created with the embossed stenciling.
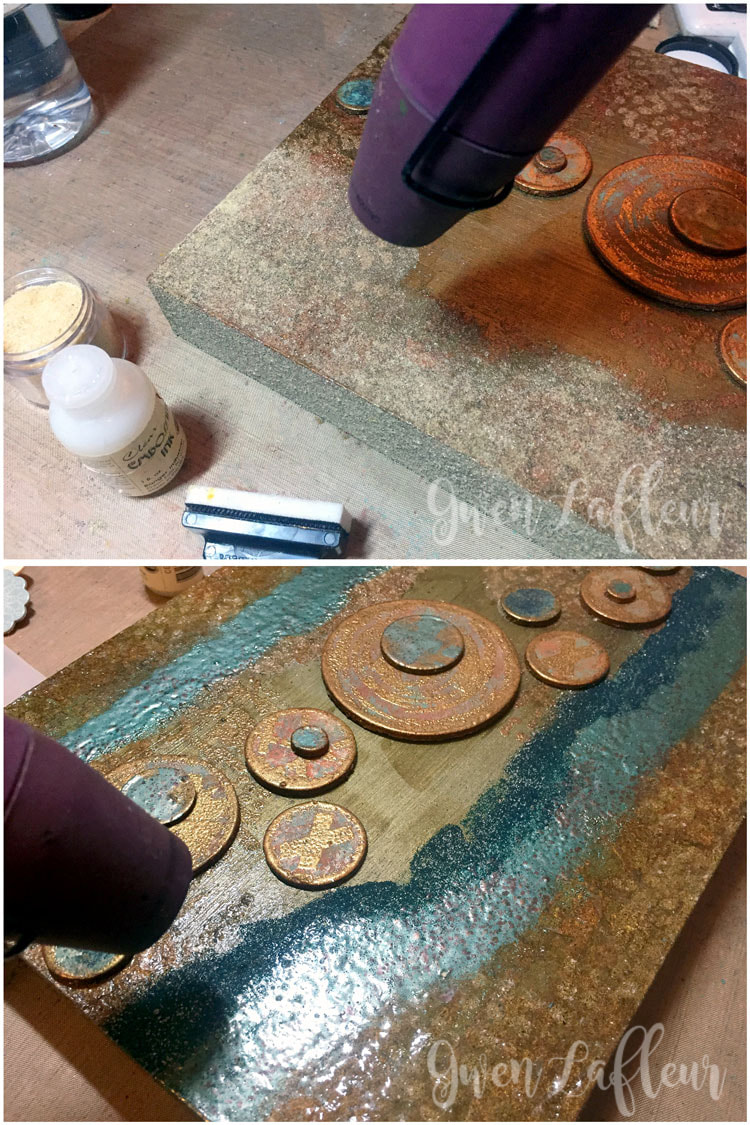
Once the glaze was dry, I placed my circles down the center of the panel and glued them in place, then started coating the background in embossing powder. For this step I started from the outside and the sides of the panel and worked my way toward the middle. First, I coated sections of the panel with embossing ink and then used Vintage Beeswax on top, repeating this process twice to get really smooth coverage.
Once the Vintage Beeswax is melted, you can see how the texture and color from the background layers still really show through! I continued the same process, adding ribbons of color moving toward the middle with Patina Oxide and then with Deep Sea.
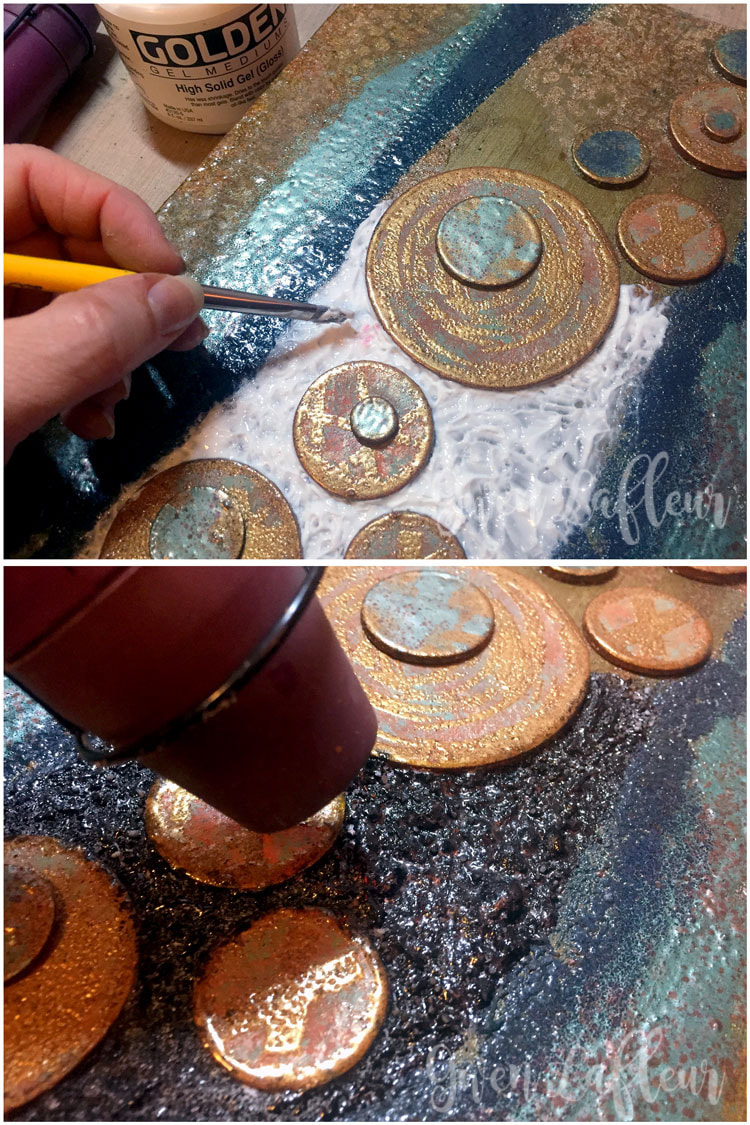
Next comes my favorite part... this was what I knew that I wanted to do the very first time I ever saw Rocky Road - I wanted to create some serious texture using acrylic mediums. For this section, I used High Solid Gel and a small paintbrush to apply the gel around the circles throughout the entire center section. I used a very thick, stiff gel medium because I wanted it to hold its shape so that I would get more exaggerated peaks and valleys in my texture.
Next comes my favorite part... this was what I knew that I wanted to do the very first time I ever saw Rocky Road - I wanted to create some serious texture using acrylic mediums. For this section, I used High Solid Gel and a small paintbrush to apply the gel around the circles throughout the entire center section. I used a very thick, stiff gel medium because I wanted it to hold its shape so that I would get more exaggerated peaks and valleys in my texture.
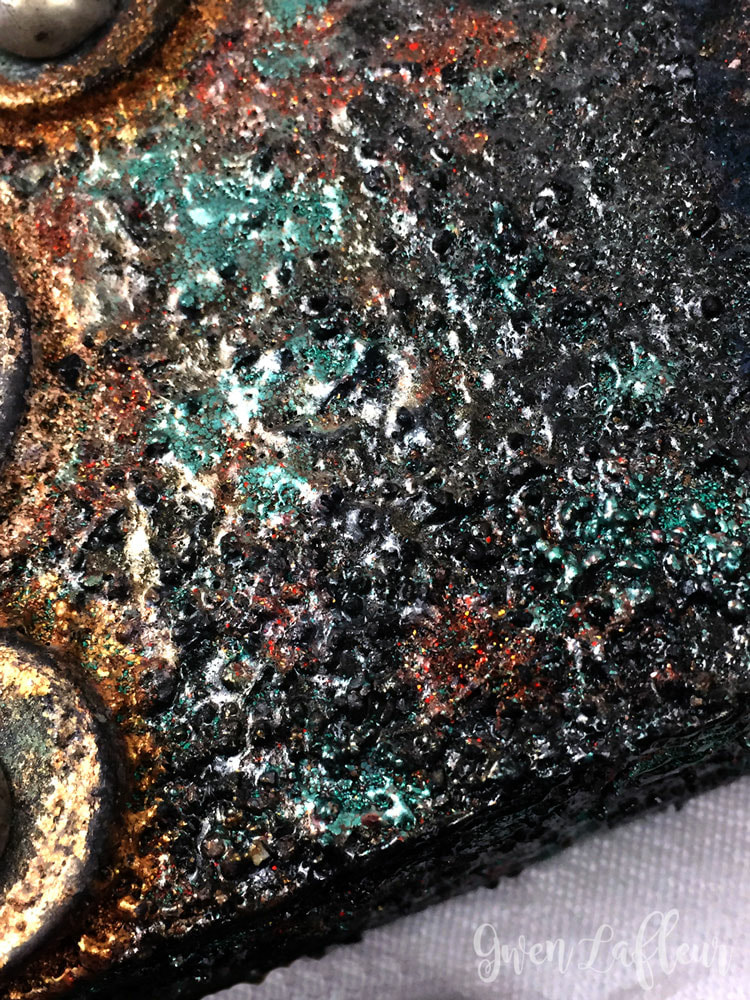
I coated the gel medium section with Rocky Road and then heated it at very short range. Any time you emboss with a wet acrylic medium, especially with the heat gun so close to the surface, you're going to get lots of bubbles. (And fumes! Keep your mouth and nose covered, especially if you do this for extended times like I did here - I have a respirator that I keep in my studio for serious melting and bubbling.) It's going to smell pretty funky, but the texture... oh is it ever worth it. Amazing. (At the bottom of this page there's a link to a video tutorial where you can see this process in action.)
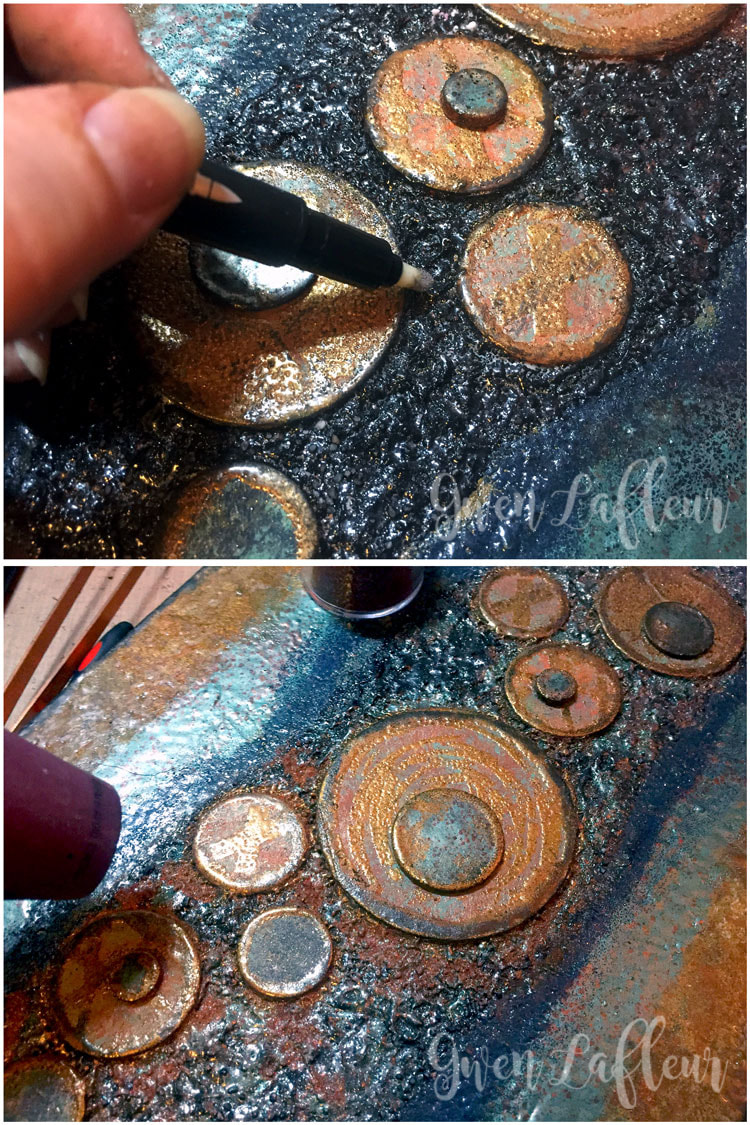
Below, you can see how I went back in with a VersaMarker and lightly brushed ink over the surface of the embossed area...
Below, you can see how I went back in with a VersaMarker and lightly brushed ink over the surface of the embossed area...
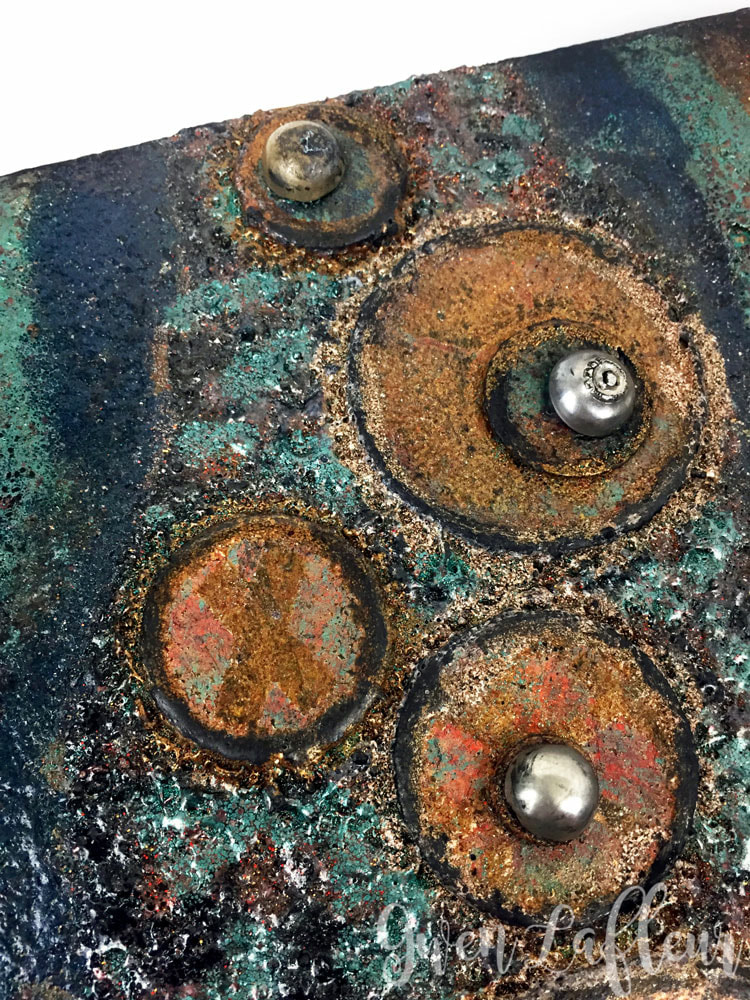
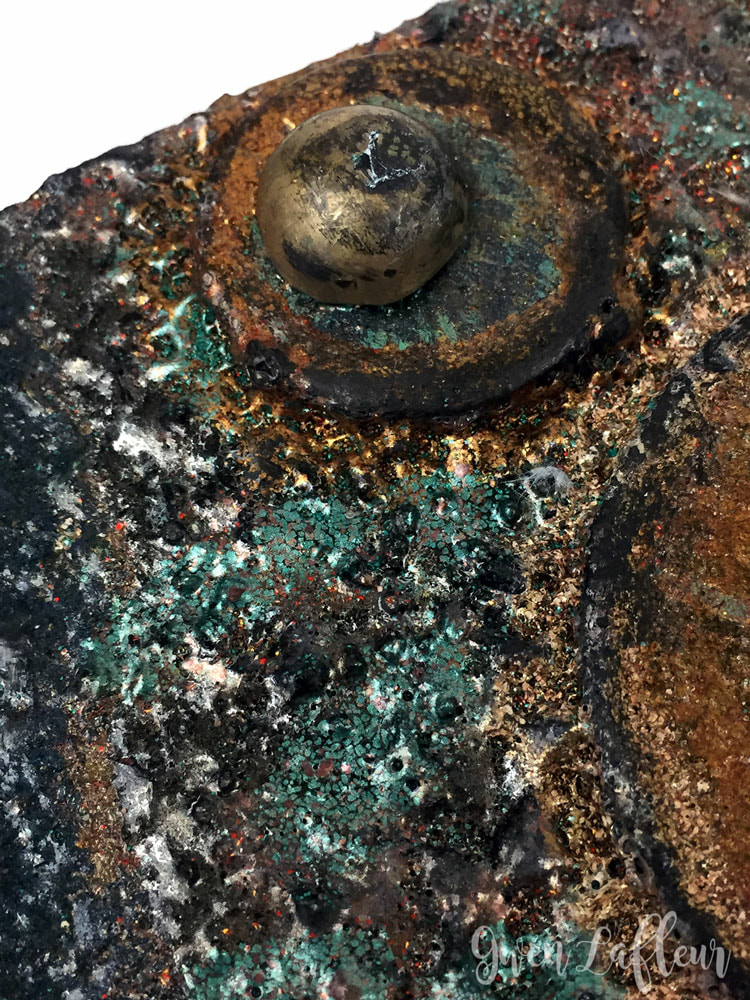
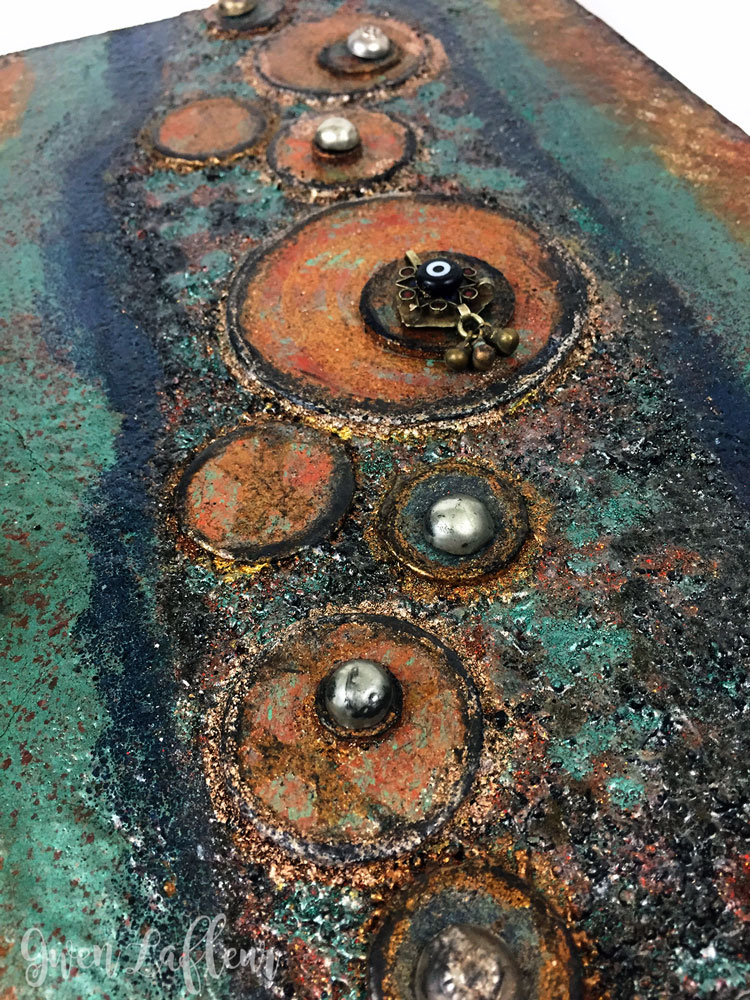
I added a light sprinkling of Chunky Rust and embossed, repeated with an even lighter sprinkling of Patina Oxide, and then added a bit more Rocky Road on top. I kept sprinkling and heating until I was happy with the results. I think I had at least 10 layers of embossing powder on this section and when you look at it up close it's a really cool effect.
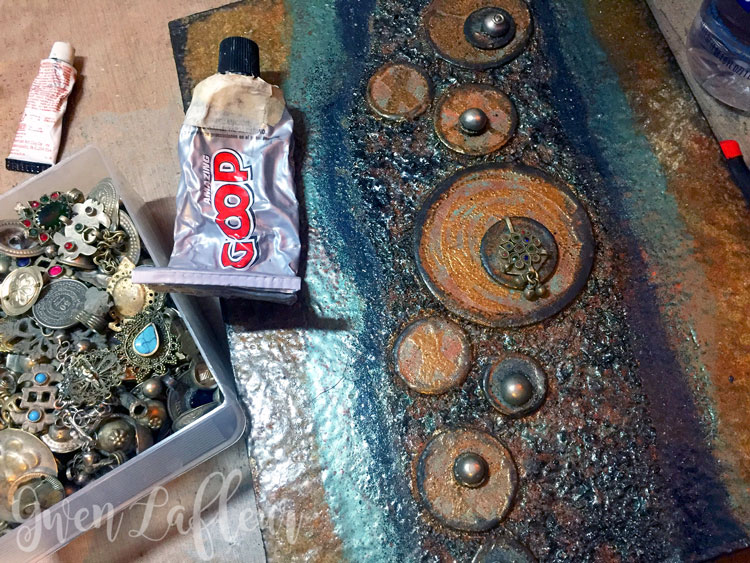
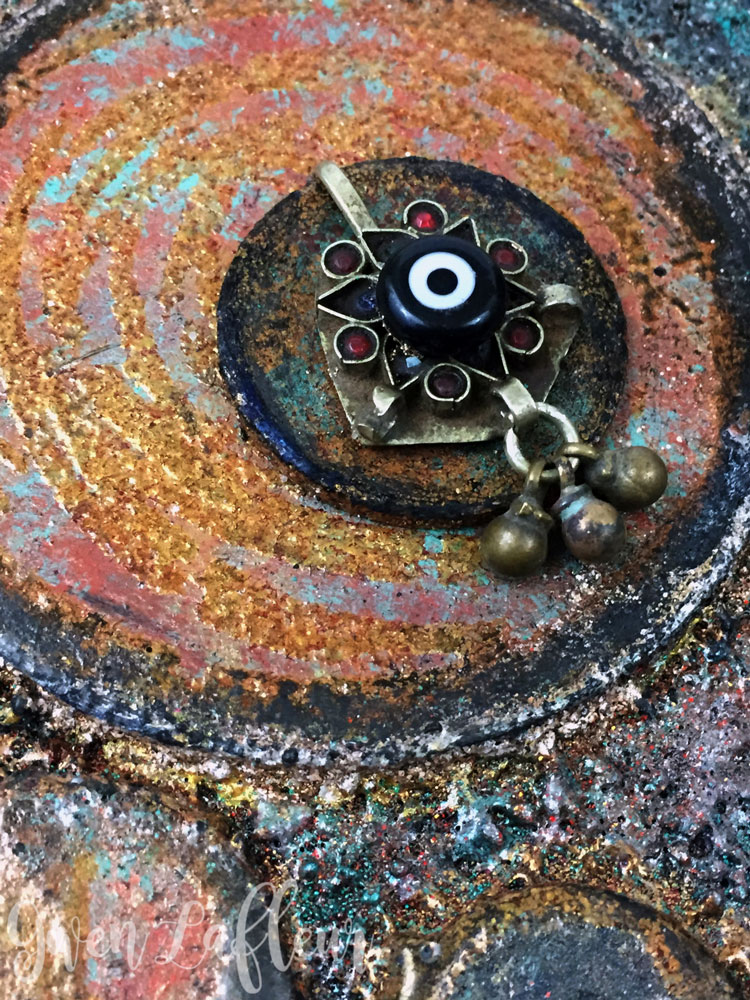
Finally, it just wouldn't be one of my pieces unless I added some funky boho touches, so I dug through my stash of Turkmen jewelry parts and added some buttons and other cool bits on to some of the circles, finishing with a Turkish glass nazar bead in the center of my focal point. I used a touch of black wax around the edges of the panel to frame it, and that was it!
Finally, it just wouldn't be one of my pieces unless I added some funky boho touches, so I dug through my stash of Turkmen jewelry parts and added some buttons and other cool bits on to some of the circles, finishing with a Turkish glass nazar bead in the center of my focal point. I used a touch of black wax around the edges of the panel to frame it, and that was it!
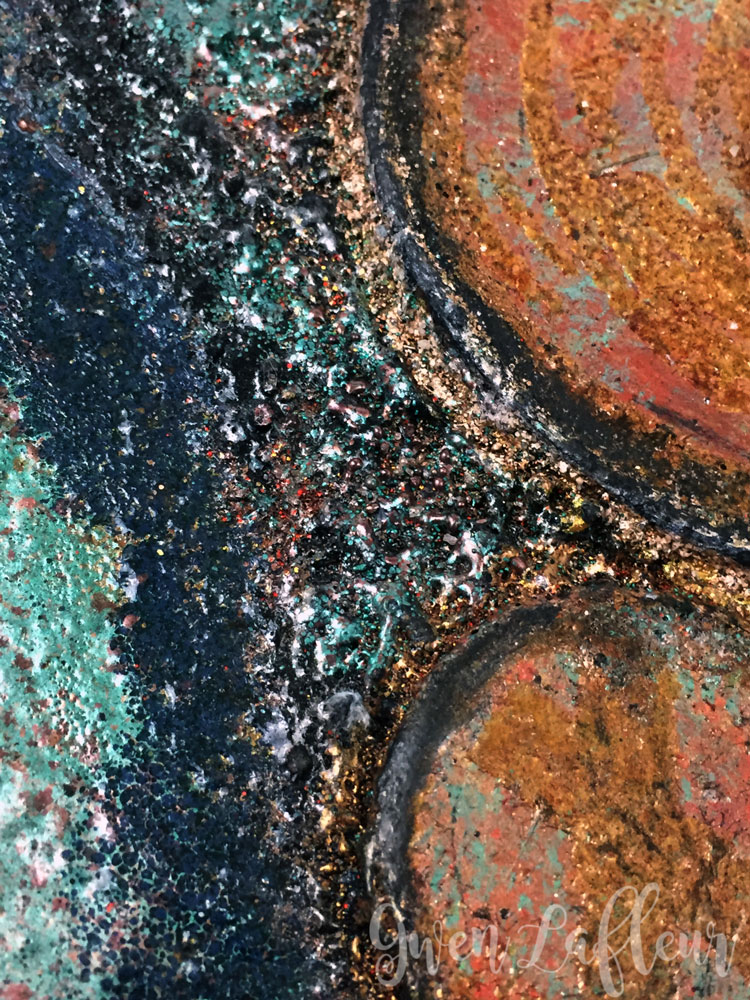
Here are a few close-ups so that you can get a better sense for the different textures you can get using the Baked Texture powders... they're so addictive!
As I mentioned above, I also shared a video tutorial using Baked Texture powders and another Emerald Creek embossing powder. In that video you can see the live-action version of how I use embossing powder with acrylic mediums (it's fun just to watch that stuff bubble on camera!) Check out that blog post for the video as well as photos of the three samples I shared.
You might also like...

