In July 2017 I participated in a blog hop with StencilGirl and Imagine Crafts. While it's no secret that I'm a stencil addict, I'm also a big fan of Imagine Crafts' products - I have a lot of them in my studio that I work with regularly, so it was fun to feature a few of my favorites in this tutorial along with my trusty StencilGirl stencils.
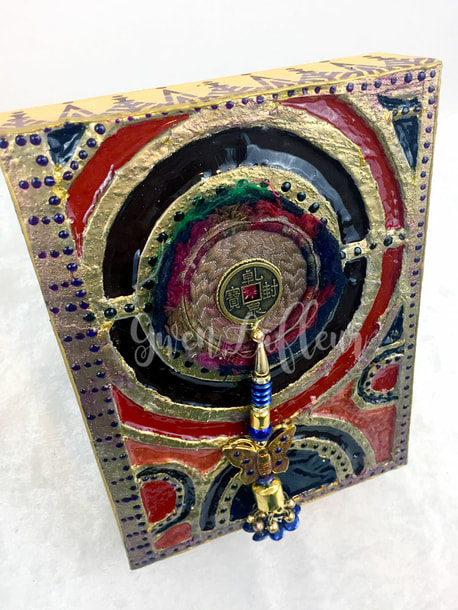
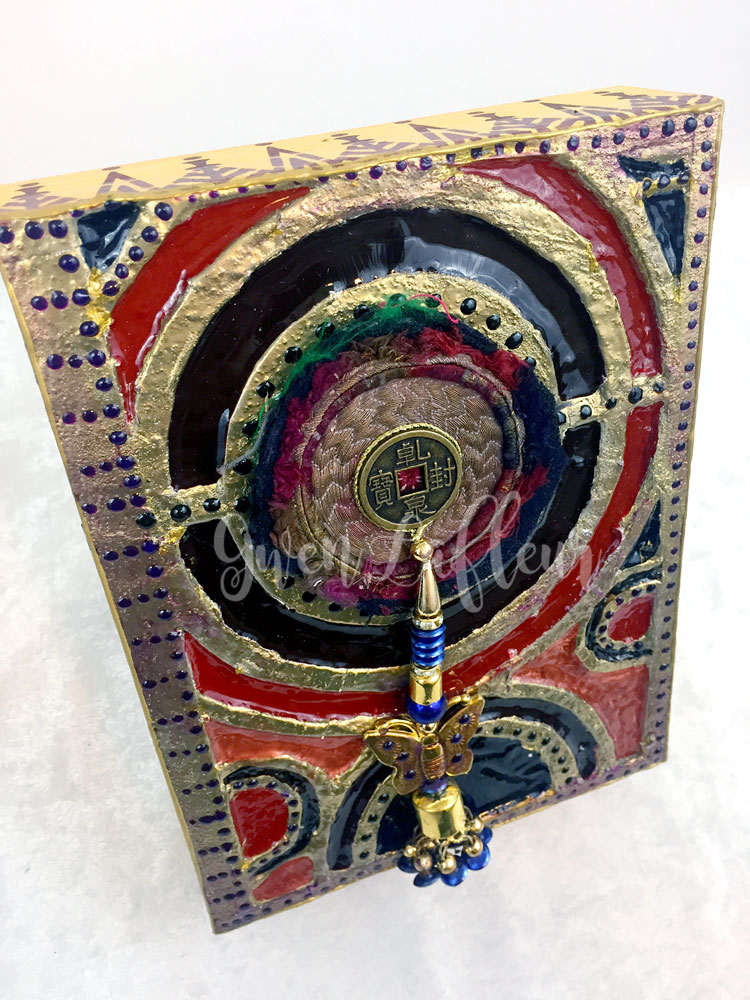
For this project, I had an idea for a technique I wanted to try and dove right in and I was pleased that my little experiment actually turned out a lot like I'd envisioned. I used stencils, cardboard, and some of the irRESISTible products, along with a few others that I'll mention below to make a dimensional mixed media panel.
For this project, I had an idea for a technique I wanted to try and dove right in and I was pleased that my little experiment actually turned out a lot like I'd envisioned. I used stencils, cardboard, and some of the irRESISTible products, along with a few others that I'll mention below to make a dimensional mixed media panel.
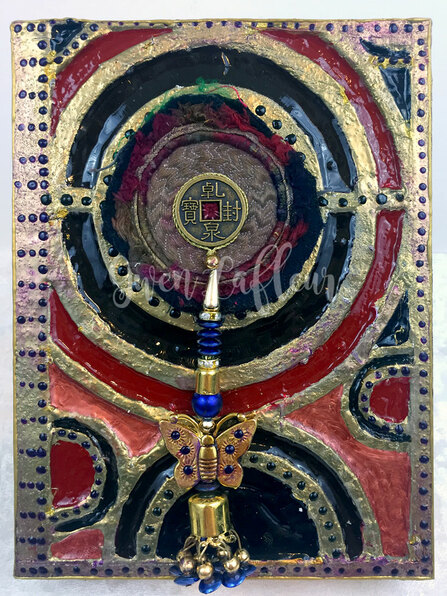
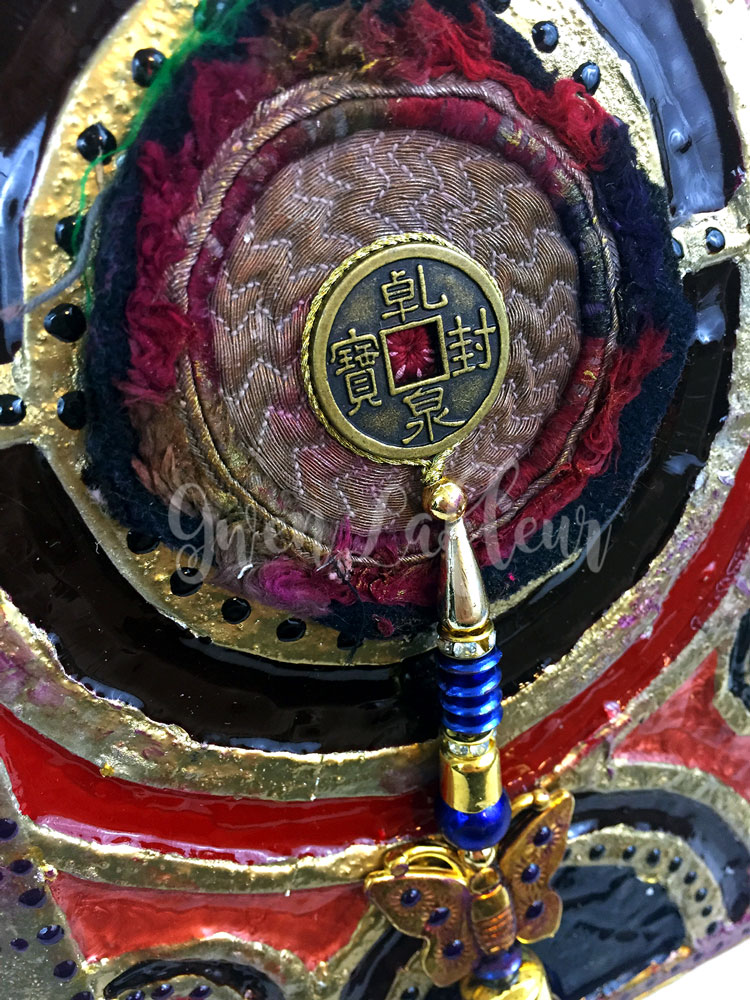
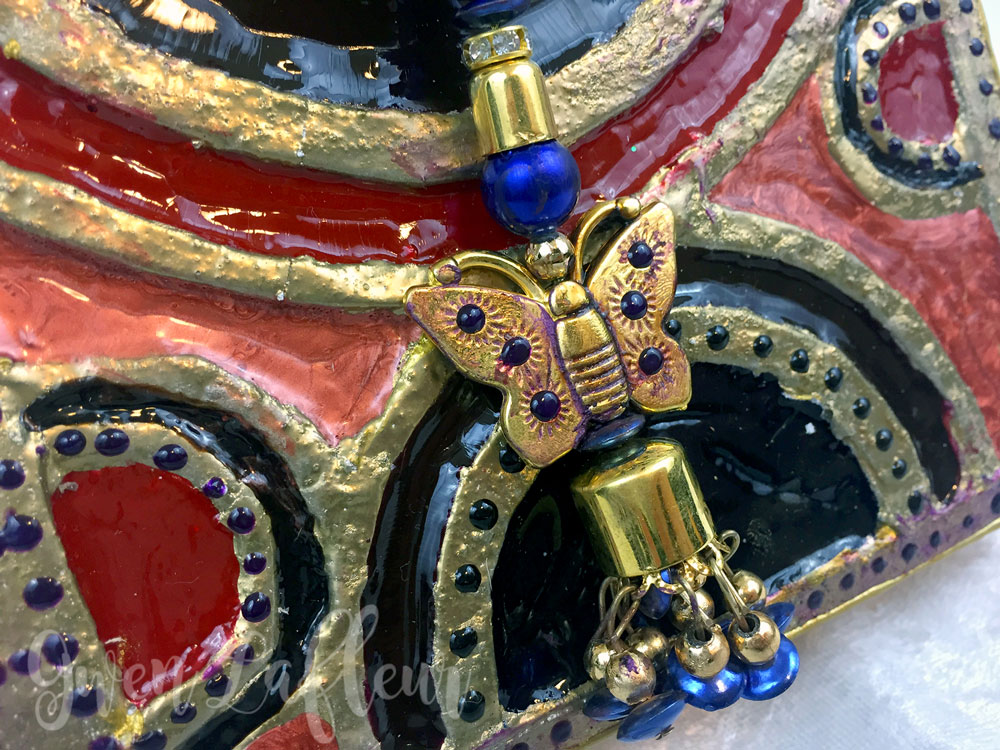
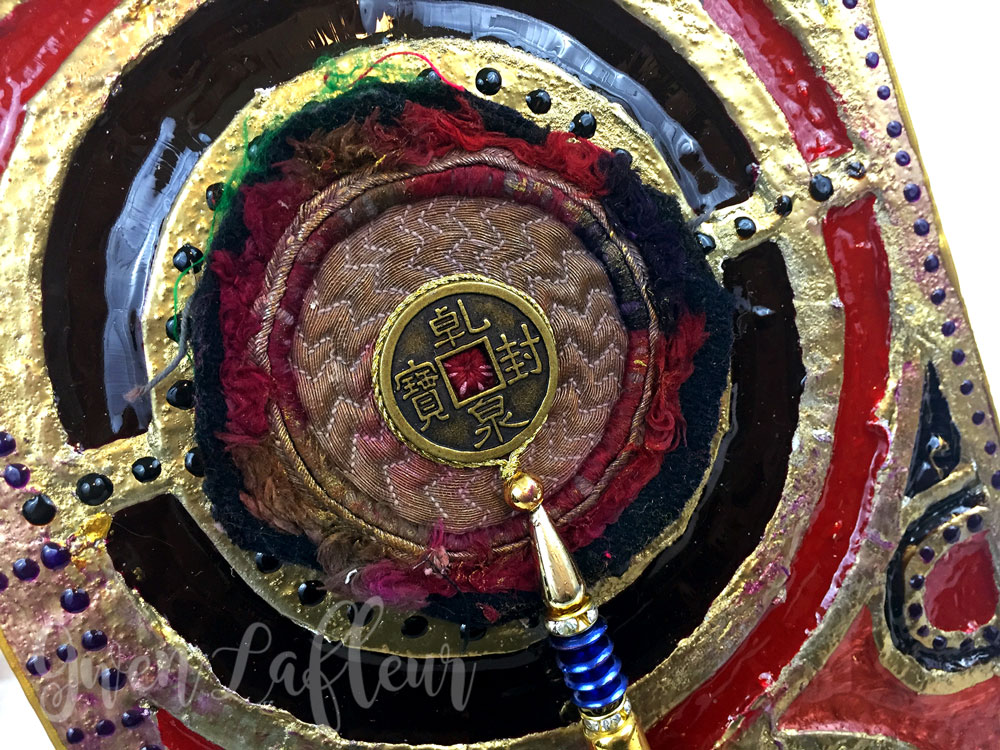
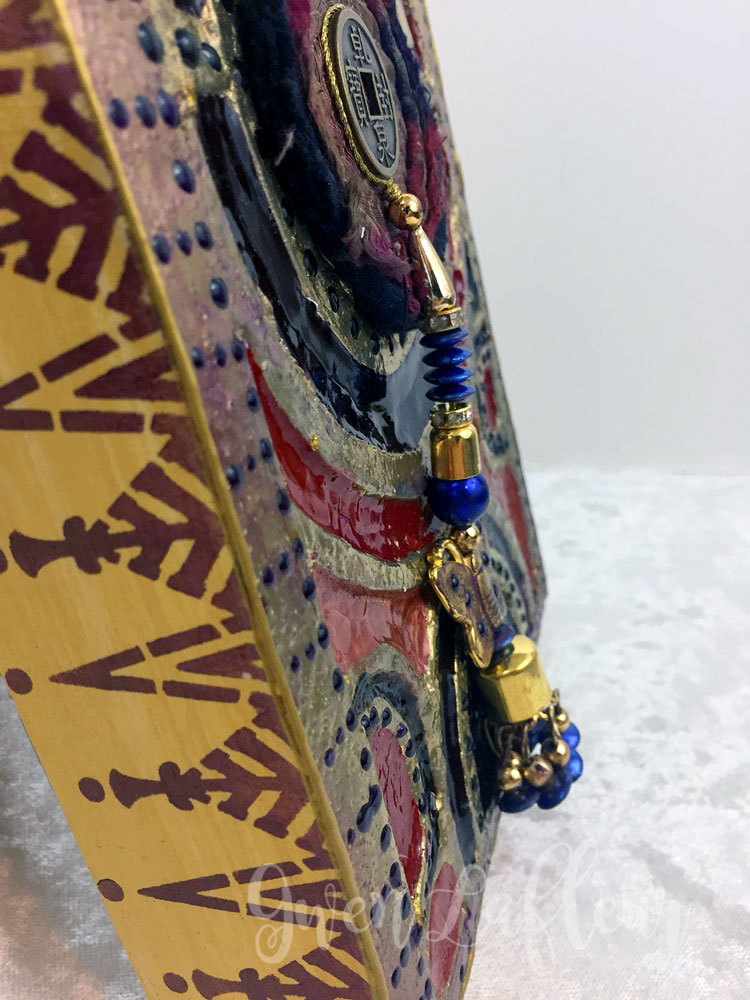
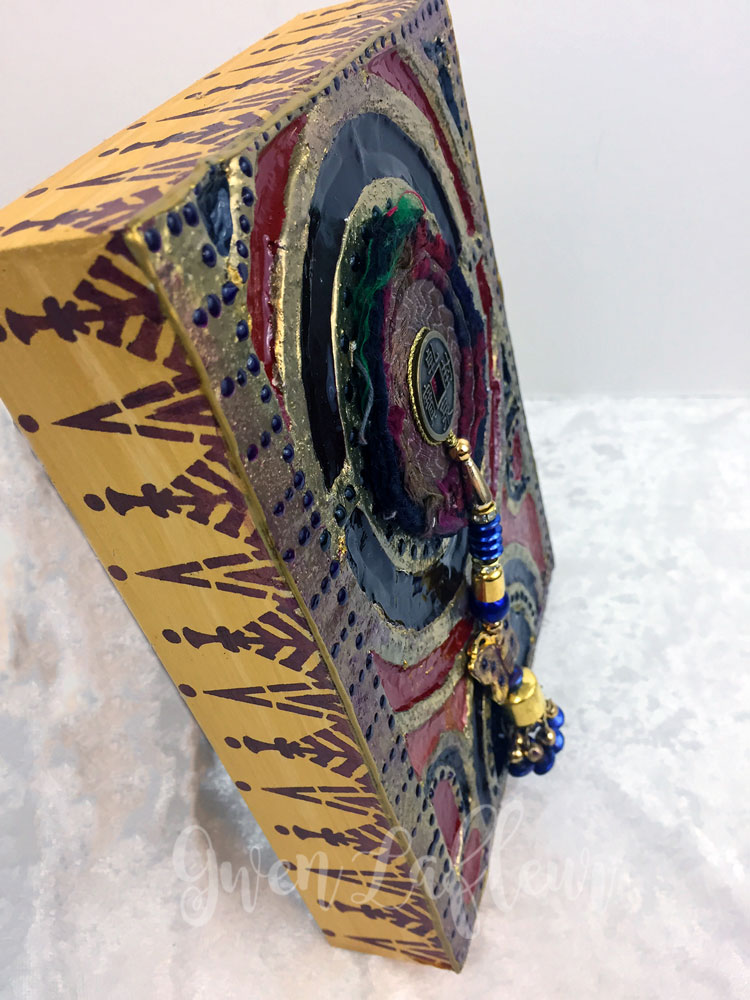
It's hard to capture the textures and dimensions from the backgrounds and mediums in a photograph, but the Imagine Crafts products created some unique finishes that really make this piece stand out. You get a better sense for the details in the tutorial photos below.
My idea was to do something that would create depth; depressions in the design so that I could have pools of color that were reminiscent of enamel or stained glass. There were a few different directions I could have chosen, but I decided to go with cardboard to create the base for the dimension.
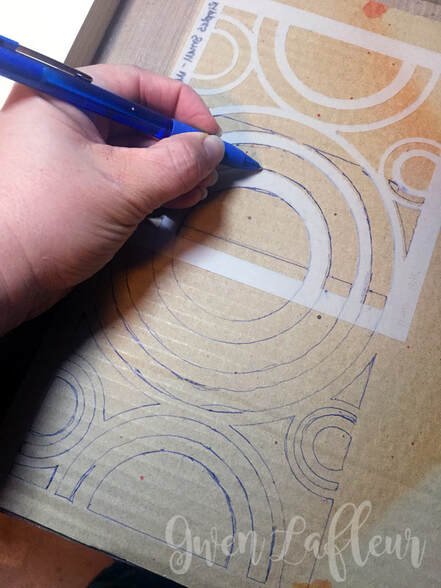
I started by tracing the Ripples Small stencil by Michelle Ward onto the surface of the cardboard. Since I had decided I was going to layer this on a 6x8 panel and the design wasn't quite big enough, I flipped the stencil and lined it up so I could continue the pattern and make it taller.
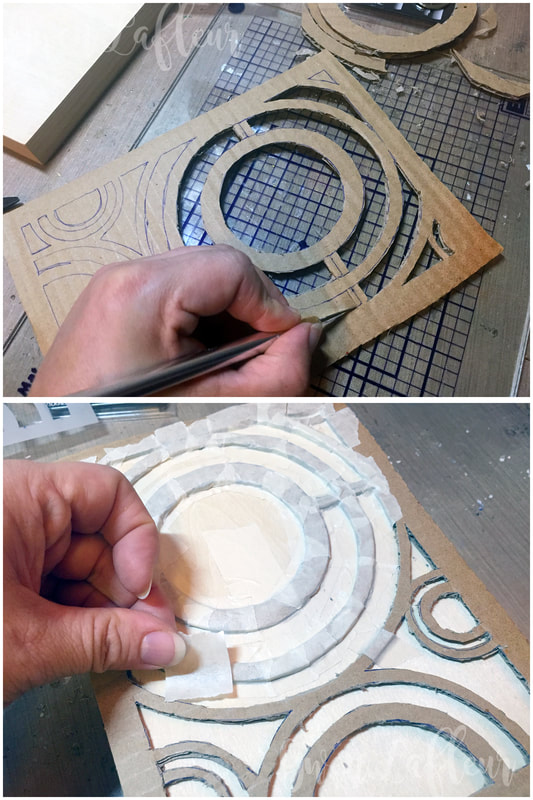
I used an X-acto knife with a glass mat to cut out the design. (The lines on the stencil were where I wanted to have "channels" on my piece, otherwise I could have just used molding paste. This gave me a reverse of what I would have gotten by just stenciling.)
You can also see below where I added a few bridges to the design so that my circles would still be attached after they were cut out.
You can also see below where I added a few bridges to the design so that my circles would still be attached after they were cut out.
I considered several methods for attaching the cardboard to
my panel and then covering the raw cut edges, and ultimately I decided to use masking
tape because it's cleaner, a bit faster, and has the added benefit of no
drying time. You can see in the photo above where I took small pieces and laid them
over the cardboard, adhering to the wood panel on either side. Below is a close-up with a better view of how it looked mid-process.
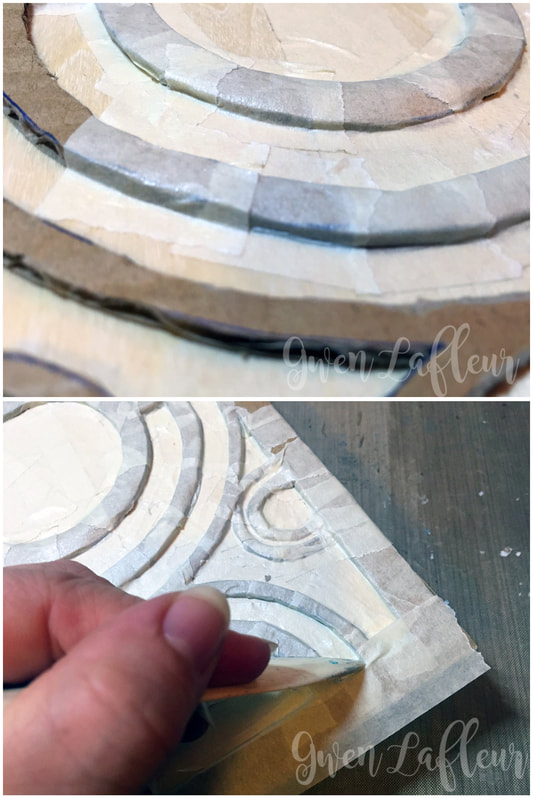
Above, you can see how I used the tip of a bone folder to trace along the edges of the cardboard and make sure the tape got worked into the corners and was flush with the wood along the lines of the cardboard. This gave me much cleaner channels for the next steps.
Next, I wanted to create a metallic surface across the whole panel. I painted the entire area with white gesso and then while it was still wet I coated it with gold embossing powder from Imagine Crafts. Without waiting for the gesso to dry, I used my heat gun to melt and bubble the embossing powder. (The bubbling happens because of the wet acrylic medium under the embossing powder. I love to do this! You can also use gel medium, matte medium, paint, etc...)
I should note that because of how long it took to heat something this large, I covered my nose and mouth to help minimize any unhealthy fumes that might come from this process.
Heating the embossing powder with a wet acrylic medium underneath gives you such cool texture! I continued heating and bubbling until
the whole thing was done, then I started adding color.
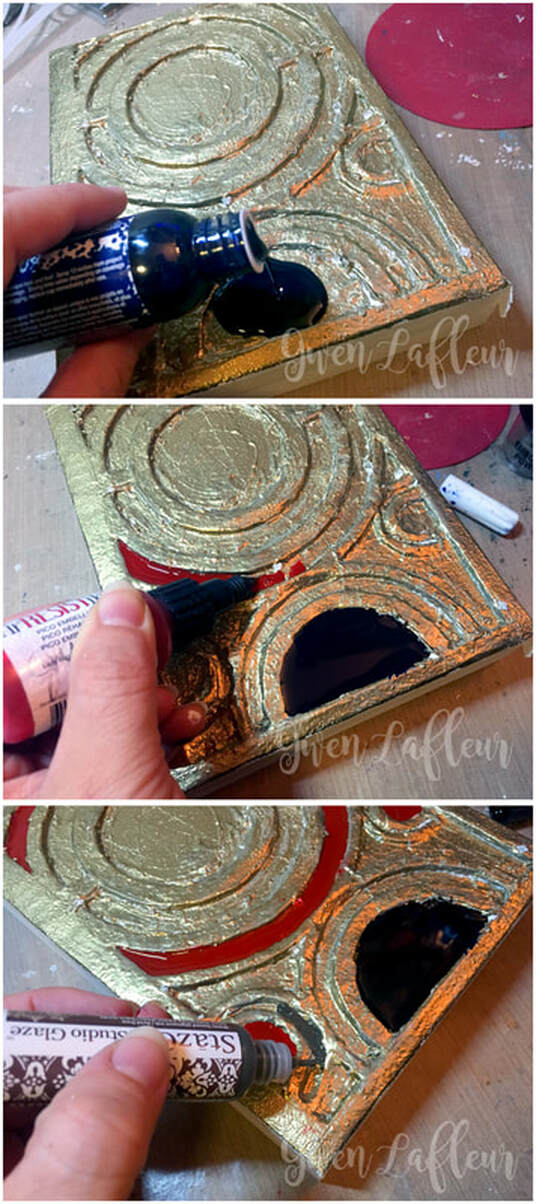
As you can see below, I took the sprayer off of some of my irRESISTible sprays and poured the liquid directly into some of the channels. I also used the irRESISTible Pico Embellishers and started flooding some of the channels smaller with color. (I used Paris Dusk, Copper, and Morocco.) I love these products because they look so much like stained glass when they're dry.
As you can see below, I took the sprayer off of some of my irRESISTible sprays and poured the liquid directly into some of the channels. I also used the irRESISTible Pico Embellishers and started flooding some of the channels smaller with color. (I used Paris Dusk, Copper, and Morocco.) I love these products because they look so much like stained glass when they're dry.
In the last photo above you can see where I also used some of the StazOn Studio Glazes to add color to some of the smaller areas (I used Ganache and Gothic Purple.) Once all of the color was in place, I set the panel aside to dry overnight.
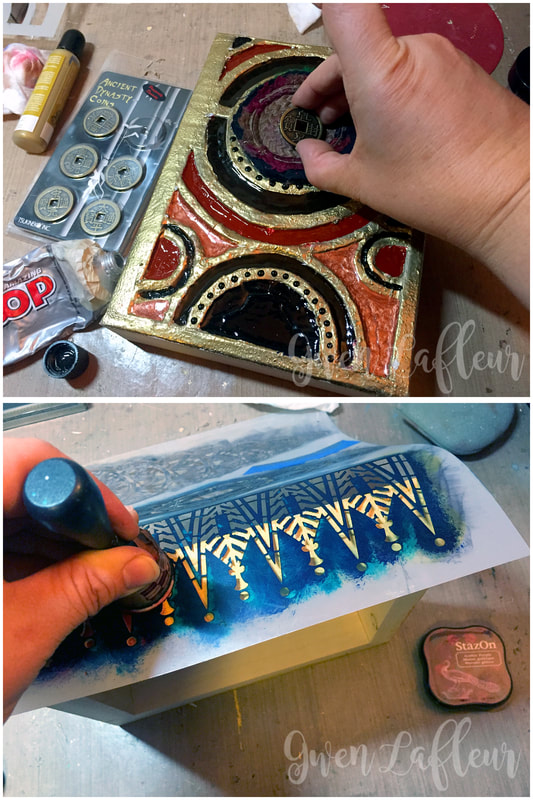
With all of the color filled in and dried, I wanted to add some embellishments. I started by taking one of my medium sized Kuchi Patches (which was also the inspiration for my color palette,) and adhering it in the center of the top set of circles. Then I added one of the Imagine Crafts Ancient Dynasty Coins on top of that.
With all of the color filled in and dried, I wanted to add some embellishments. I started by taking one of my medium sized Kuchi Patches (which was also the inspiration for my color palette,) and adhering it in the center of the top set of circles. Then I added one of the Imagine Crafts Ancient Dynasty Coins on top of that.
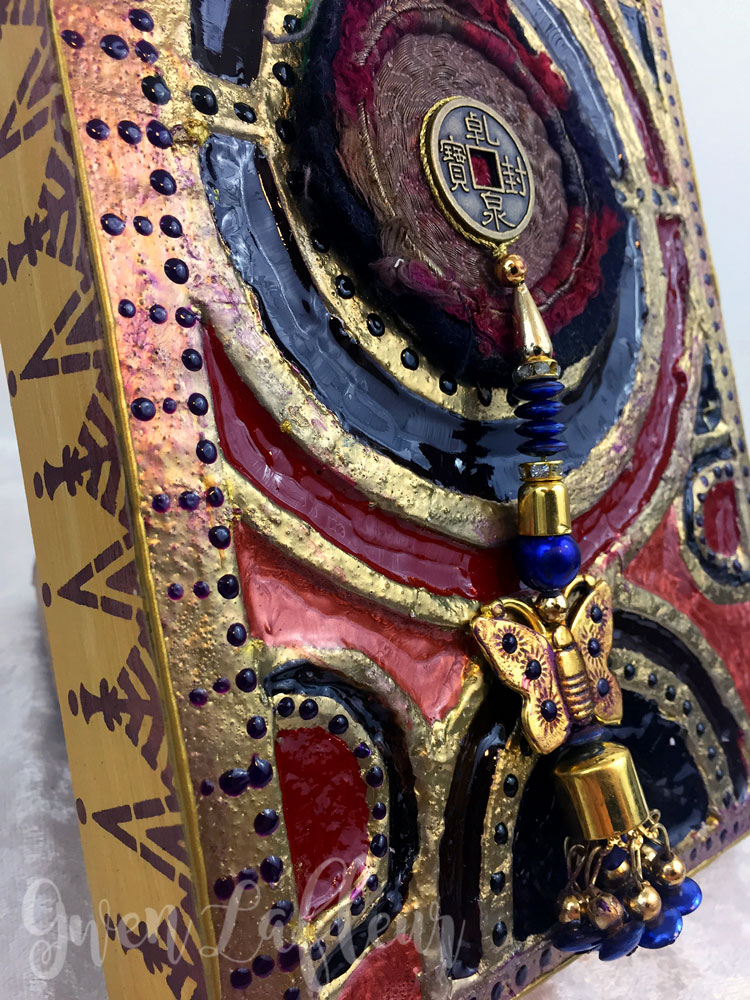
At this point I decided that the sides of my panel needed a little something extra so I pulled out my Art Deco Borders stencil and used some Royal Purple StazOn ink to add the pattern on all four sides.
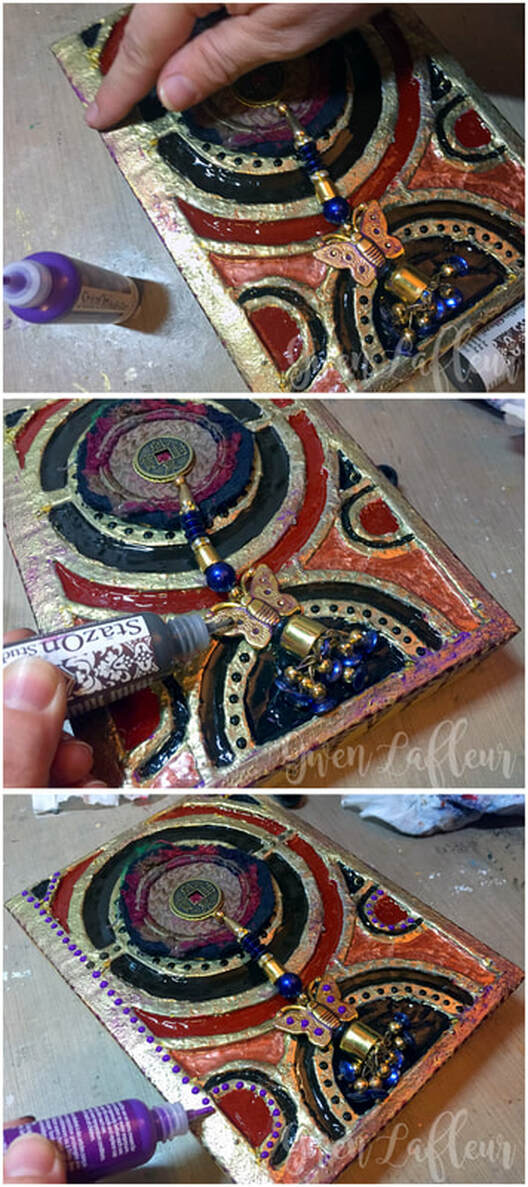
It felt like the front of the panel was still missing something, so I dug through my stash and pulled out one of my Beautiful Butterflies tassels from India and hooked the loop around my coin and adhered that in place, letting the tassel itself hang free. I then used my purple StazOn Studio Glaze and my finger to add a little color along the edges, as you can see below.
It felt like the front of the panel was still missing something, so I dug through my stash and pulled out one of my Beautiful Butterflies tassels from India and hooked the loop around my coin and adhered that in place, letting the tassel itself hang free. I then used my purple StazOn Studio Glaze and my finger to add a little color along the edges, as you can see below.
Finally, I took my StazOn Studio Glazes out again and used them to add some dots throughout the design.
Voila! A finished dimensional mixed media panel with some fun new techniques, and some unique accents!
Voila! A finished dimensional mixed media panel with some fun new techniques, and some unique accents!
Here are a few close-ups of the project so that you can see some of the details:
You might also like...

