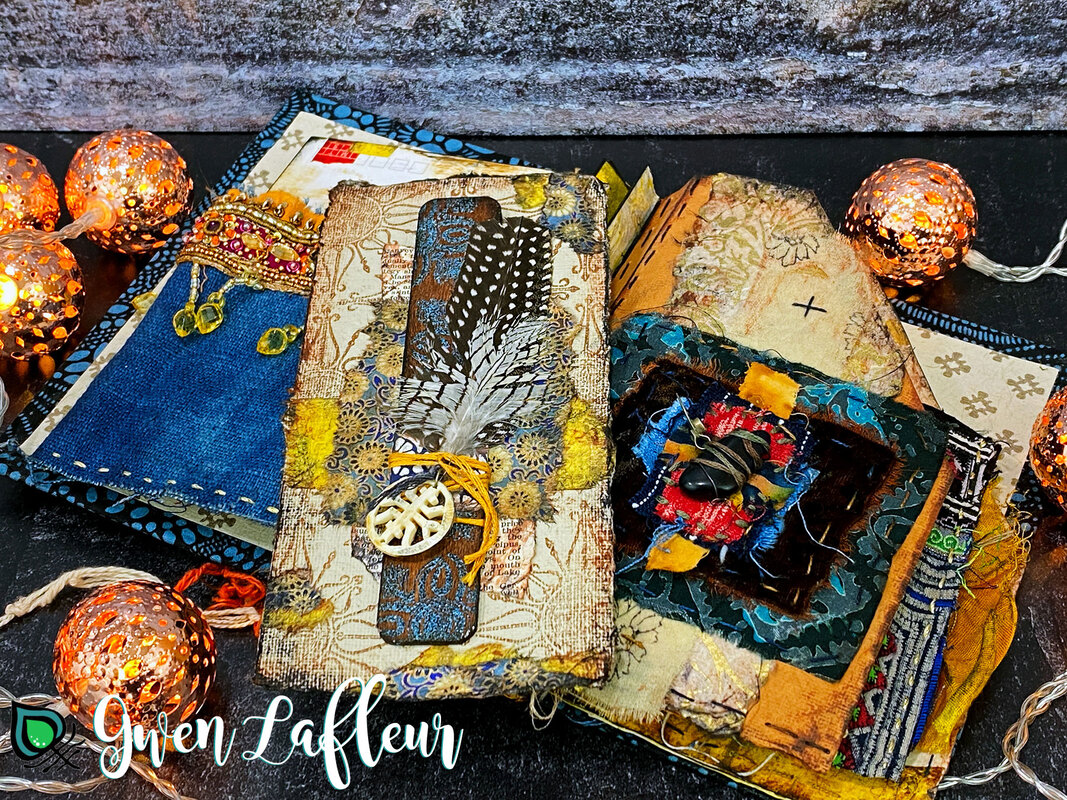
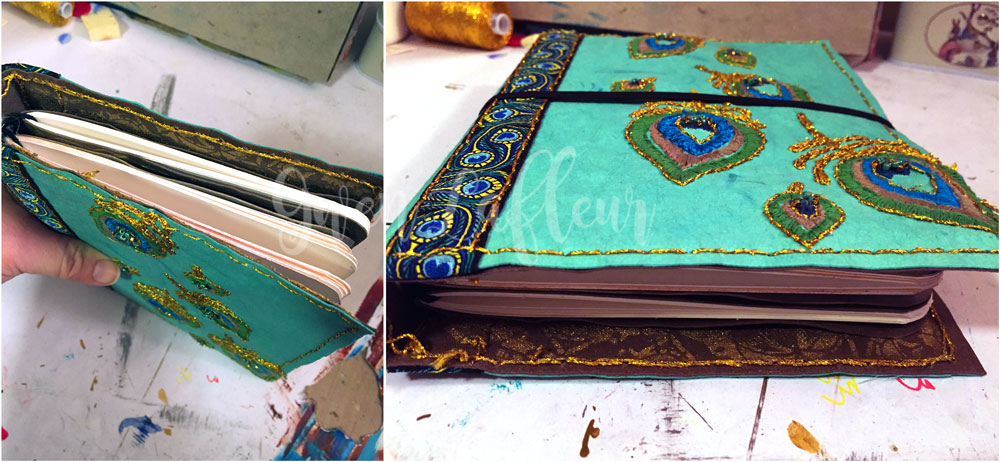
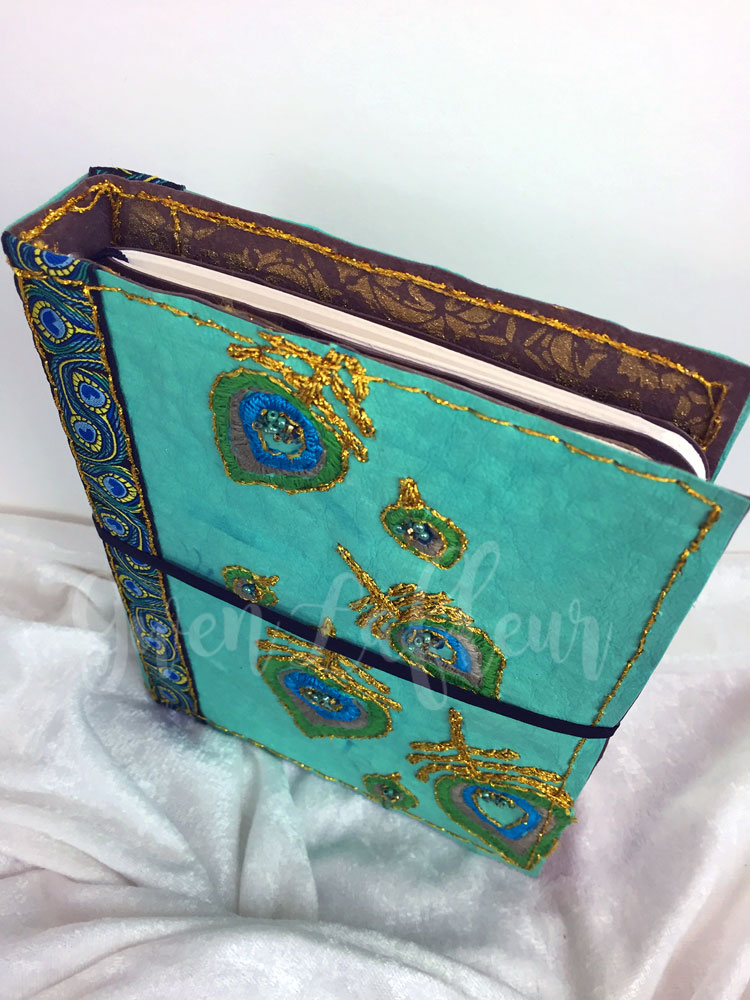
In February 2017, I was fortunate enough to participate in a blog hop with StencilGirl and C&T Publishing (the makers of Kraft-Tex.) There are endless possibilities for how to use Kraft-Tex, including countless ways to combine it with stencils, but I chose to do a riff on a Traveler's Notebook style book cover with two book inserts. I made the book with elastics to give me the ability to swap pamphlet books in and out of the inside, only I customized the structure to be more like a traditional case-bound book.
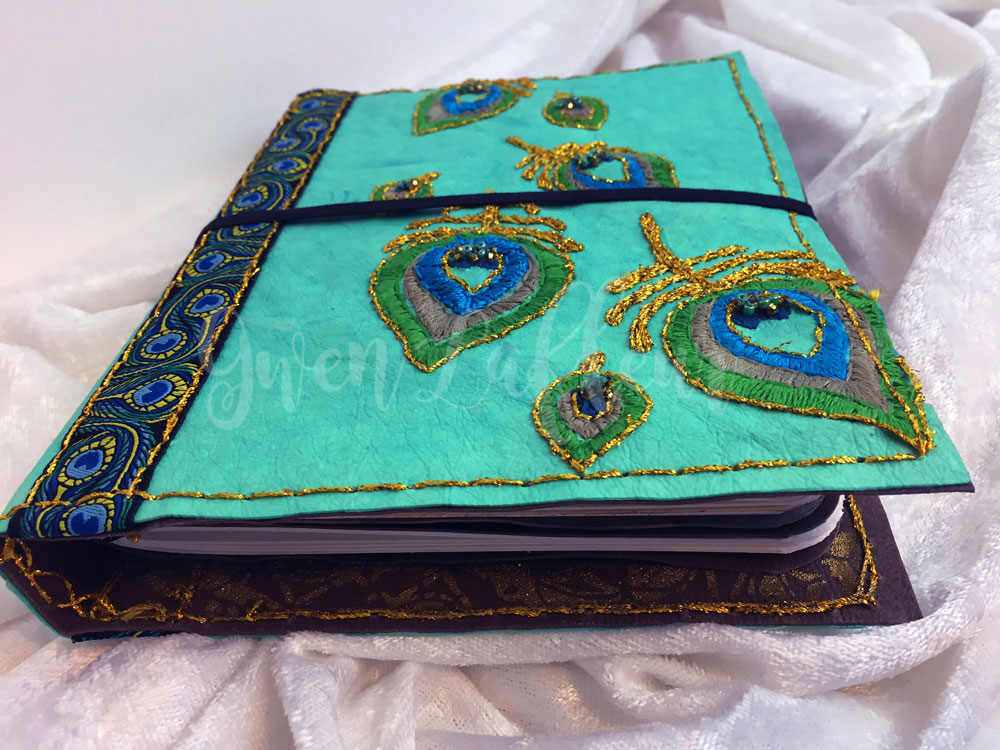
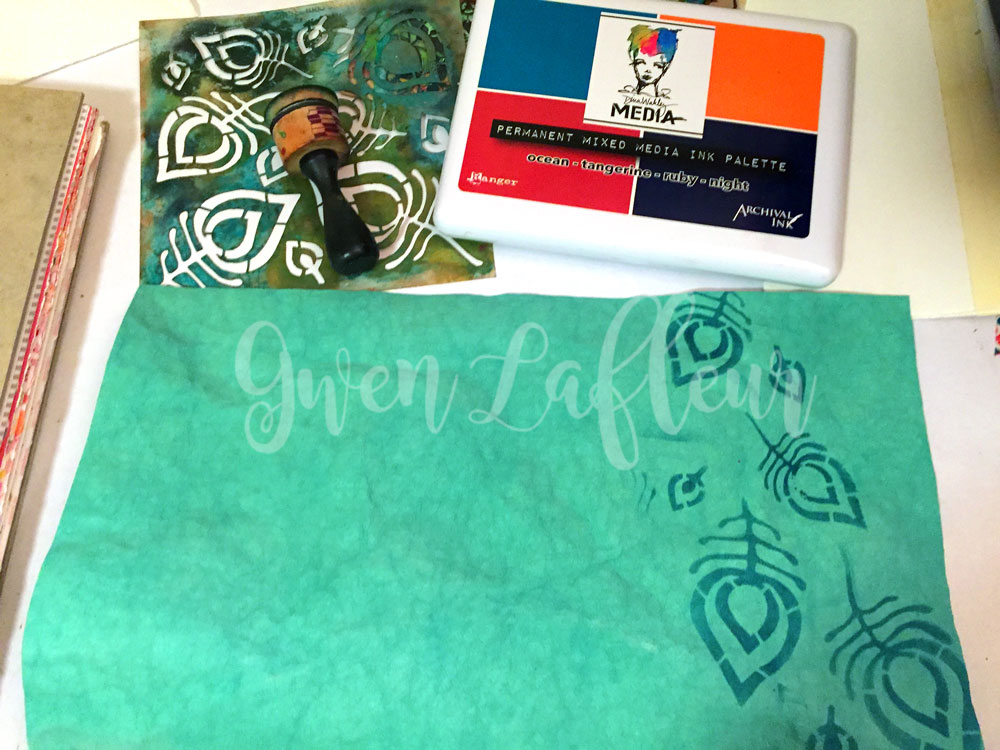
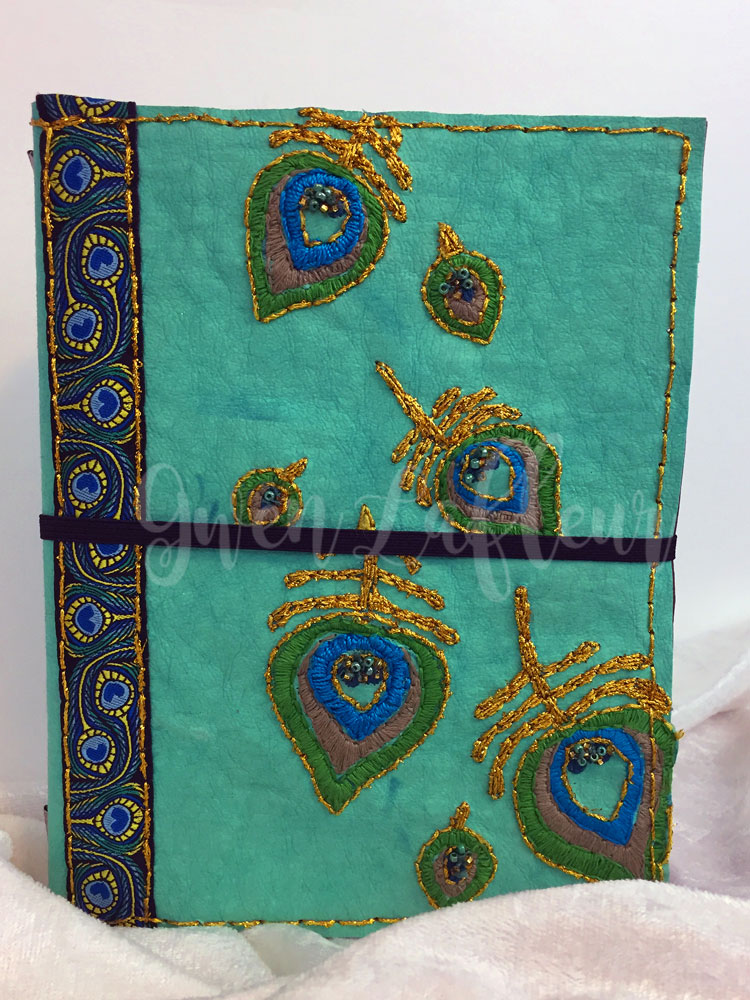
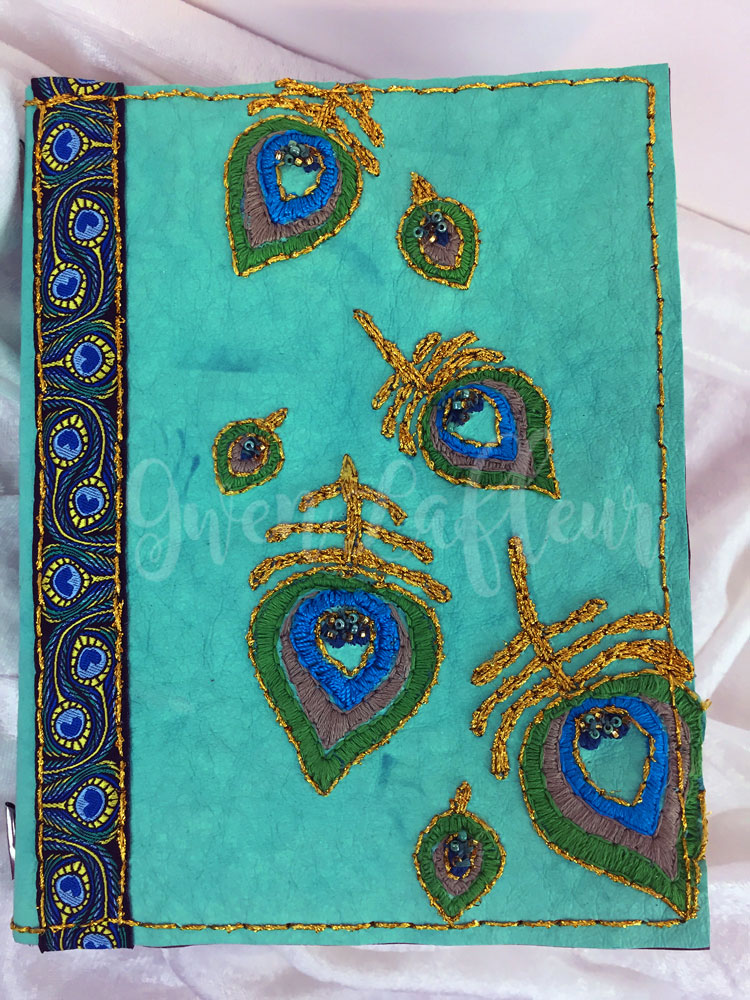
To start I used the turquoise, pre-washed Kraft-Tex and cut a piece approximately the size of the spine and covers, then used some Archival Ink and my Ornamental Peacock Feathers stencil to stencil a pattern on what would become the front cover of my book.
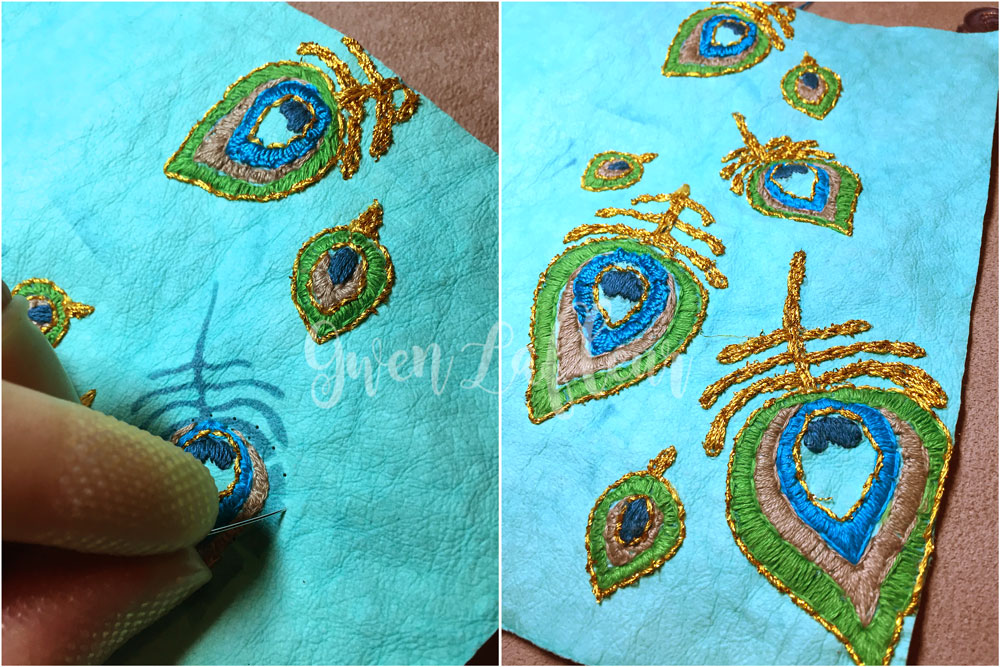
For this project I really wanted to take advantage of the fact that Kraft-Tex is paper but has a lot of the qualities of fabric and leather, so I embroidered my peacock feather designs.
A few tips for sewing on Kraft-Tex:
To be honest, all of that satin stitching probably should not have worked, but I love how it came out! Of course, you don't have to stitch; you could stencil the design on as a pattern and then use paints, markers, etc... to add in color and details.
When the stitching was done, I wanted to put some structure behind it to make sure that my stitches were secure so I cut pieces of thin chipboard and adhered them to the back of my cover piece where the front and back covers were going to be.
- It feels like leather, but it's still paper. If you put the holes too close together it will tear. (You'll probably want a designated Kraft-Tex or paper needle, for either hand or machine sewing.)
- If you poke a hole in it and it's not where you wanted the hole, it will show - it doesn't disappear the same way it would on fabric. To outline each section of embroidery, I used a needle to pre-poke the holes for my back-stitched borders.
- Use a needle with a hole that's big enough for your thread, but not unnecessarily big - you don't want too-wide holes because it will show.
- It can be hard to pull the needle through - I wore Finger Gloves on my thumb, pointer, and middle fingers. This helped me grip the needle to pull it through as well as protect my fingers. (Thimbles are an option here, but I can't stand using them - I have a really hard time working while wearing one.) The other big help for pulling the needle and thread through was to coat the threads with Thread Heaven before stitching. It takes some of the hand stress out of the sewing process.
- When working with a design like this one that has sections of color, work from the inside out. When setting new stitches, re-use existing holes if you can.
To be honest, all of that satin stitching probably should not have worked, but I love how it came out! Of course, you don't have to stitch; you could stencil the design on as a pattern and then use paints, markers, etc... to add in color and details.
When the stitching was done, I wanted to put some structure behind it to make sure that my stitches were secure so I cut pieces of thin chipboard and adhered them to the back of my cover piece where the front and back covers were going to be.
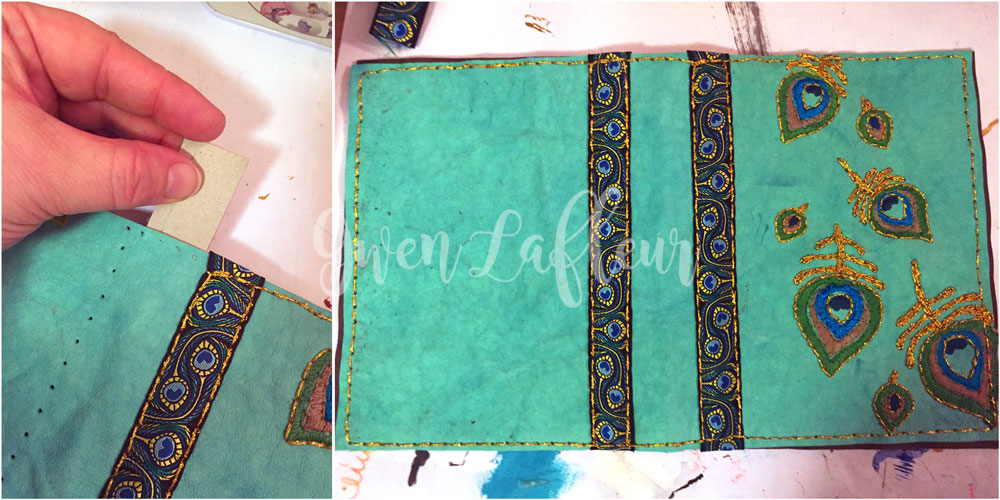
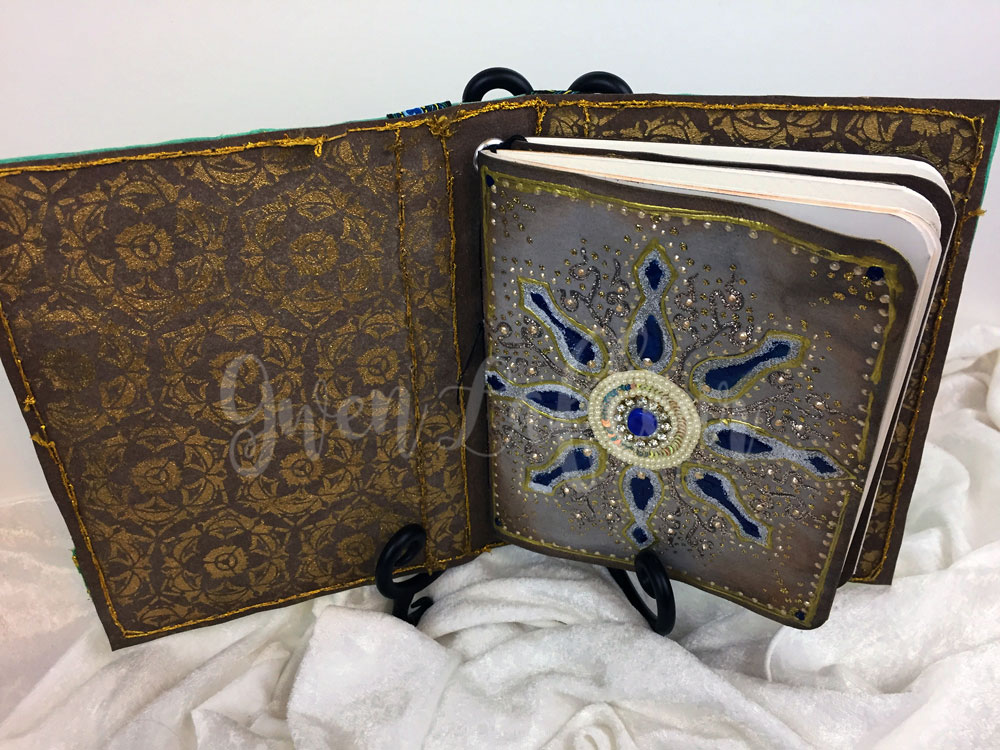
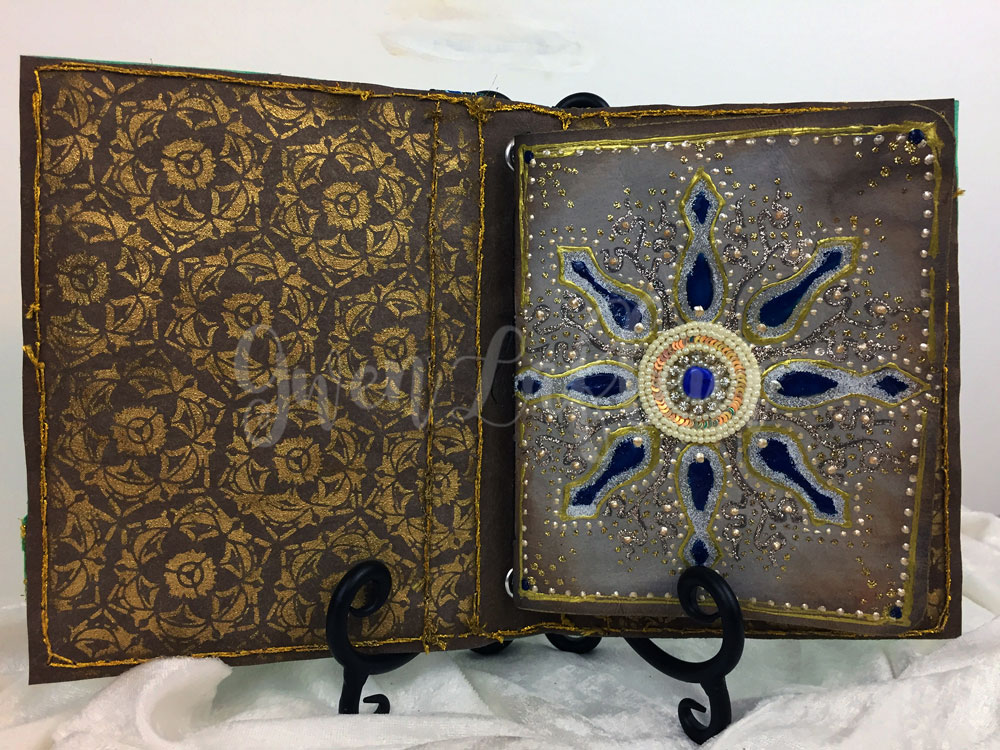
Next I cut a piece of Chocolate Kraft-Tex the same size as my cover and clipped it to the back to sandwich the chipboard so that I would eventually have inside covers in a contrasting color. (For this part I didn't use pre-washed Kraft-Tex... I cut a chunk off of the roll and threw it in my washing machine with a load of colored clothes - detergent, fabric softener, and all. It's colorfast, so there was no bleeding. Once washed, I took it out and laid it on the table to air dry.)
To bring it all together, I pre-poked holes through the chipboard and front cover, making a frame around the edges, and back-stitched with gold Sizzle thread from Wonderfil.
To bring it all together, I pre-poked holes through the chipboard and front cover, making a frame around the edges, and back-stitched with gold Sizzle thread from Wonderfil.
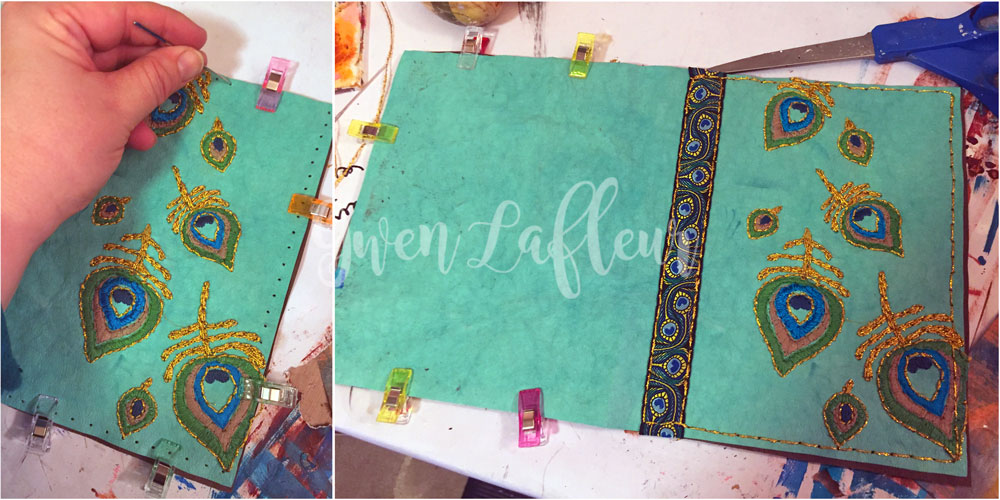
In the photo above you can also see where I added some ribbon... I had the perfect piece of peacock feather patterned ribbon to accent the covers, so I tucked the ends between the pieces of Kraft-Tex and sewed it into place as I stitched the border.
After I finished the front cover, I poked the holes for the back and then slipped another piece of chipboard into the spot which would become the spine. I kept stitching until the whole thing was finished.
After I finished the front cover, I poked the holes for the back and then slipped another piece of chipboard into the spot which would become the spine. I kept stitching until the whole thing was finished.
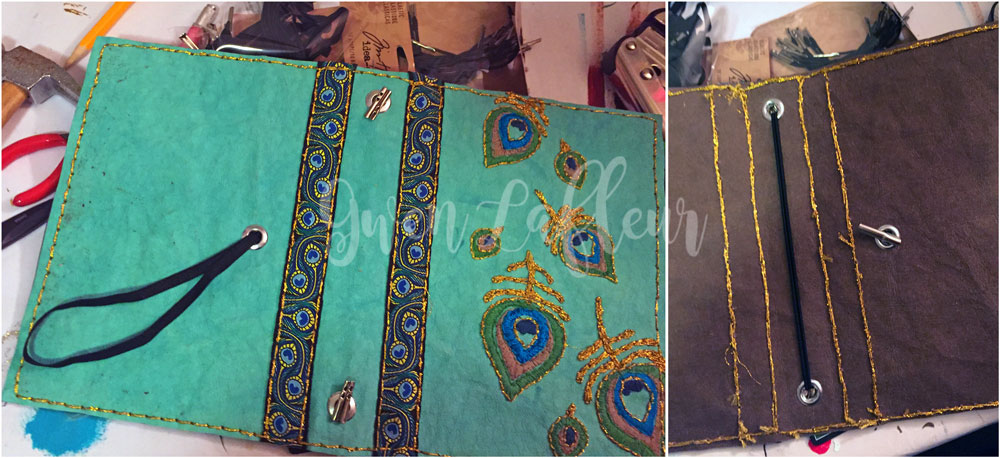
Next I punched holes where I wanted to insert my elastics and put in some grommets, then added Tim Holtz elastics (2 kinds - one for the inside to hold the book inserts and one with only one end that would wrap around the outside as a closure.)
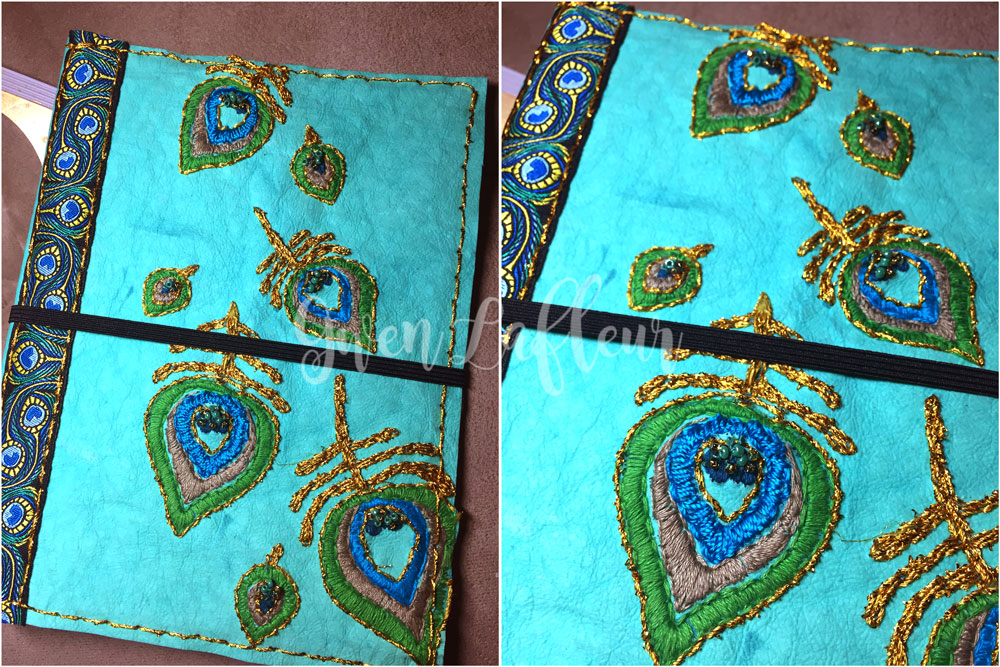
I wanted to add a few finishing touches to the covers; first I went back and stitched a few beads onto the embroidered peacock feathers.
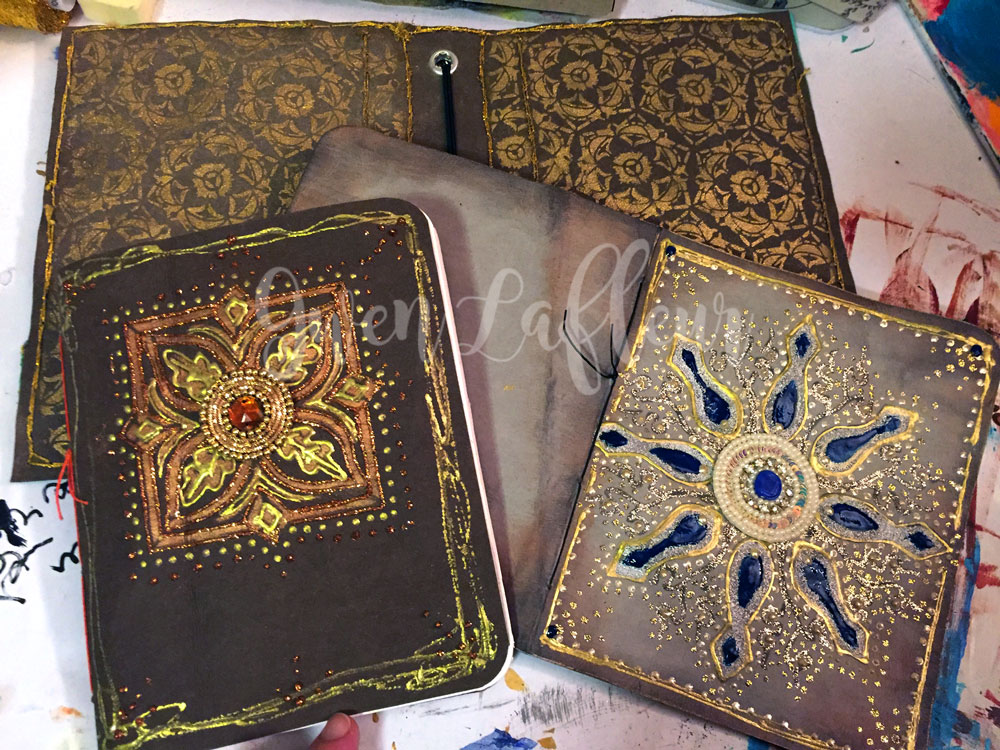
For the final finishing touch I stenciled the insides of the book covers. You could leave the inside covers plain, but I really liked the addition of some pattern on the insides. I used gold pigment ink through my Decorative 6-Petal Flower Screen stencil and then heat embossed with gold embossing powder.

With that, the covers were done!
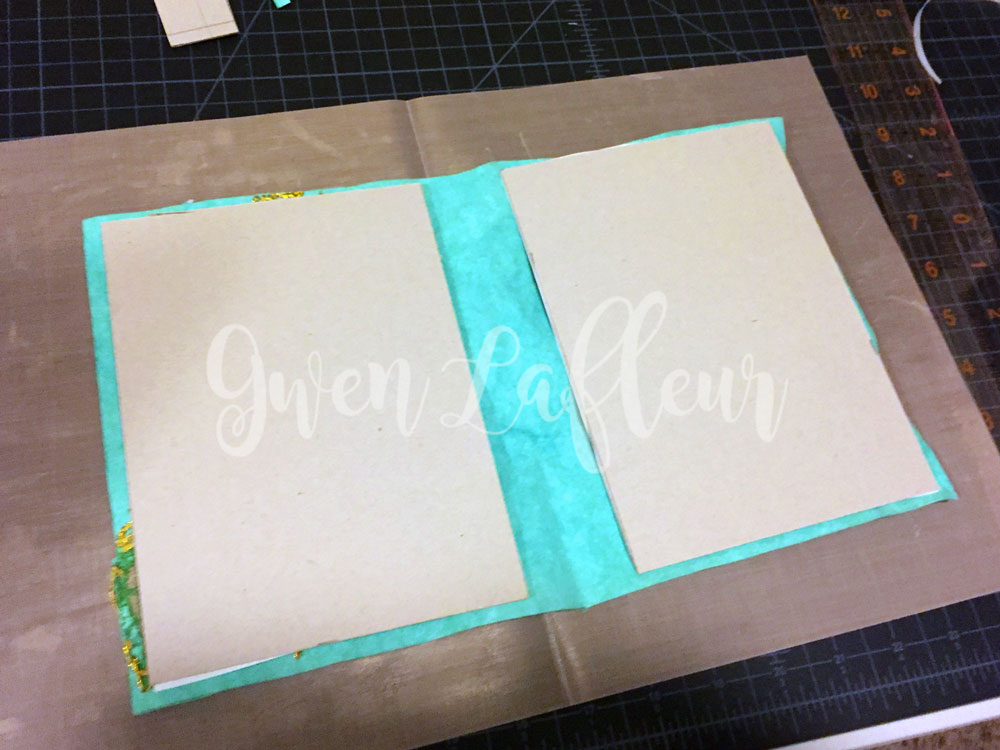
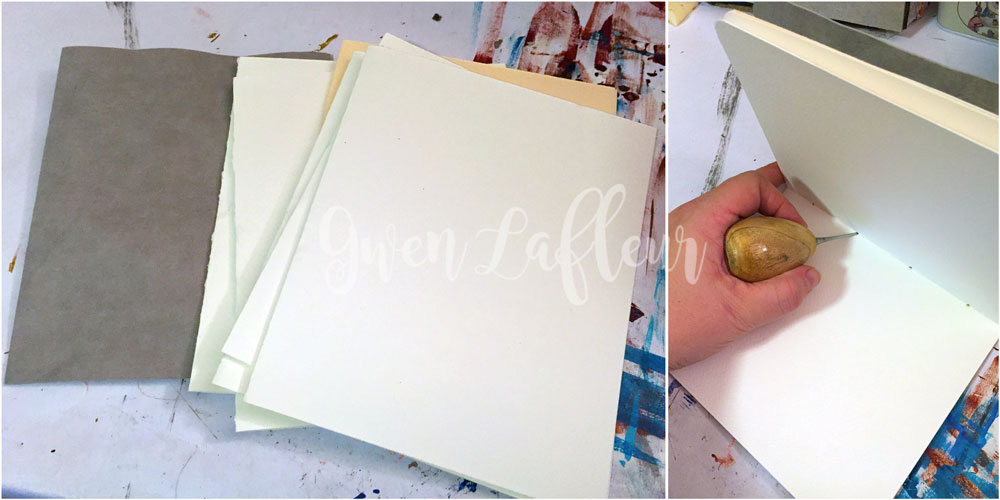
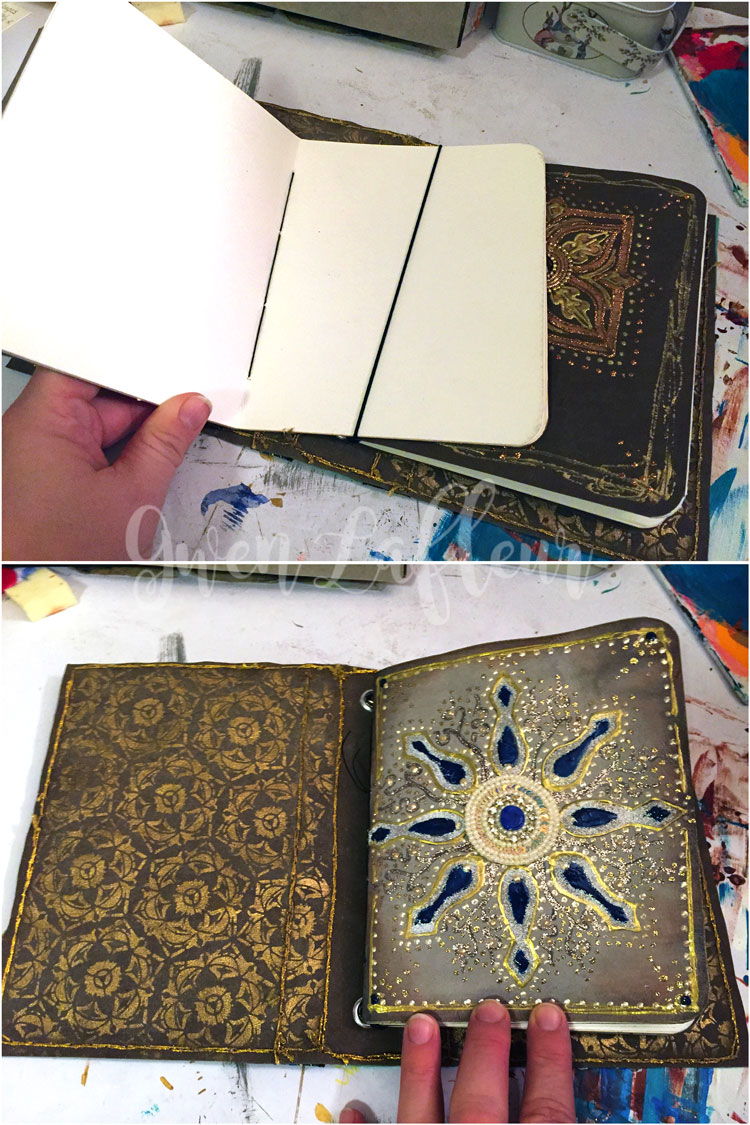
Next I needed to make some booklets that would fit inside. I measured my book - the height shouldn't be much taller than the distance between the holes where your inside elastics go. I kept the width about 1/4" smaller than the width of the cover. I cut and folded some papers - bristol and watercolor paper, and also cut and folded covers from Stone Kraft-Tex and Chocolate Kraft-Tex. Then I used my awl to punch four holes into the creases (you want an even number of holes for this method.)
Next I needed to make some booklets that would fit inside. I measured my book - the height shouldn't be much taller than the distance between the holes where your inside elastics go. I kept the width about 1/4" smaller than the width of the cover. I cut and folded some papers - bristol and watercolor paper, and also cut and folded covers from Stone Kraft-Tex and Chocolate Kraft-Tex. Then I used my awl to punch four holes into the creases (you want an even number of holes for this method.)
|
|
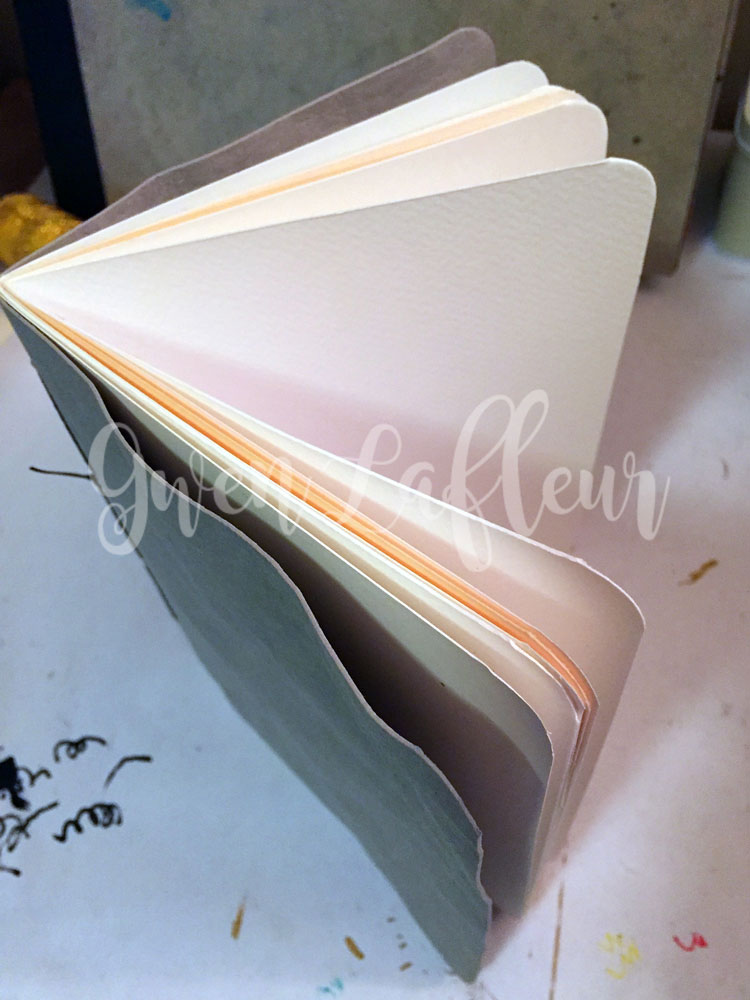
I used the pamphlet stitch and waxed linen thread to bind the books together. In total, it takes about 10 minutes to make one of these little books... quick and easy. I repeated this process for the second book so I could use both of the elastics I'd attached to the spine of my outside cover.
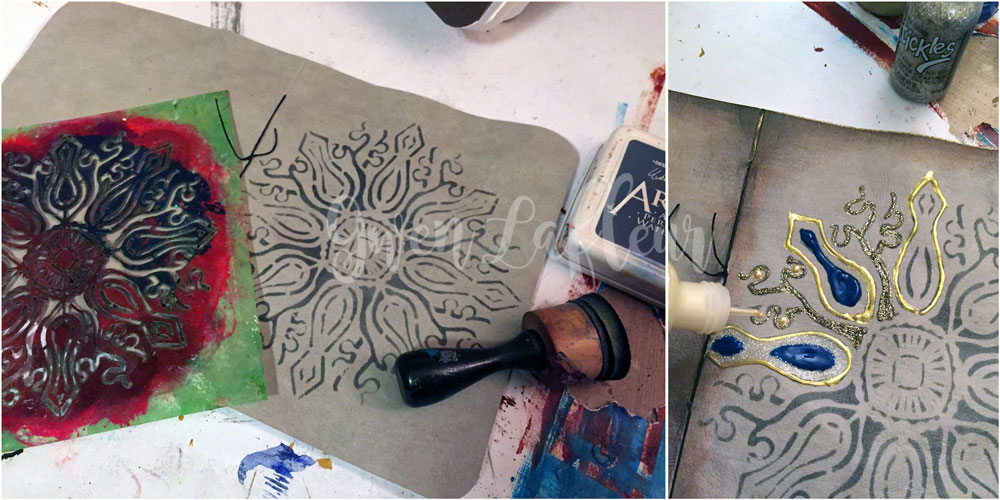
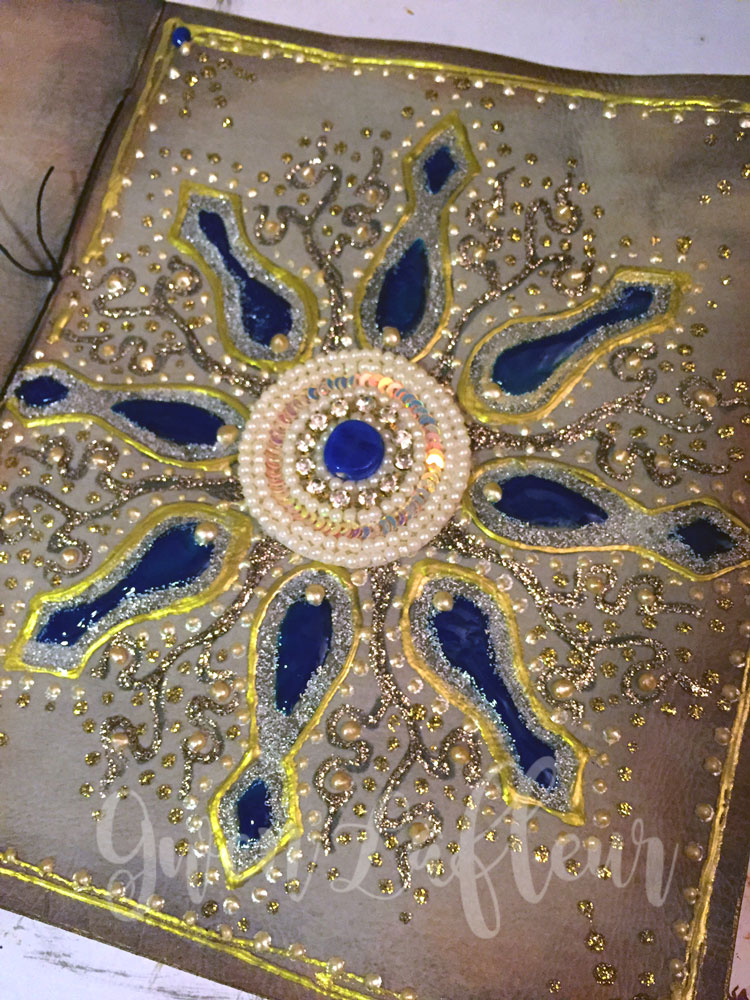
Next was the fun part... embellishing the covers! Starting with the stone book, I once again stenciled with Archival Ink, this time using my Decorative Medallion stencil. Then I used Liquid Pearls / dimensional paints and Stickles and went over the top (this is another way you could do the outside cover if you don't want to sew.)
I added a sari applique in the center (I picked it out first and then matched the colors of the Liquid Pearls and the Stickles to the applique,) and a scribbled gold border around the edge.
I added a sari applique in the center (I picked it out first and then matched the colors of the Liquid Pearls and the Stickles to the applique,) and a scribbled gold border around the edge.
|
|
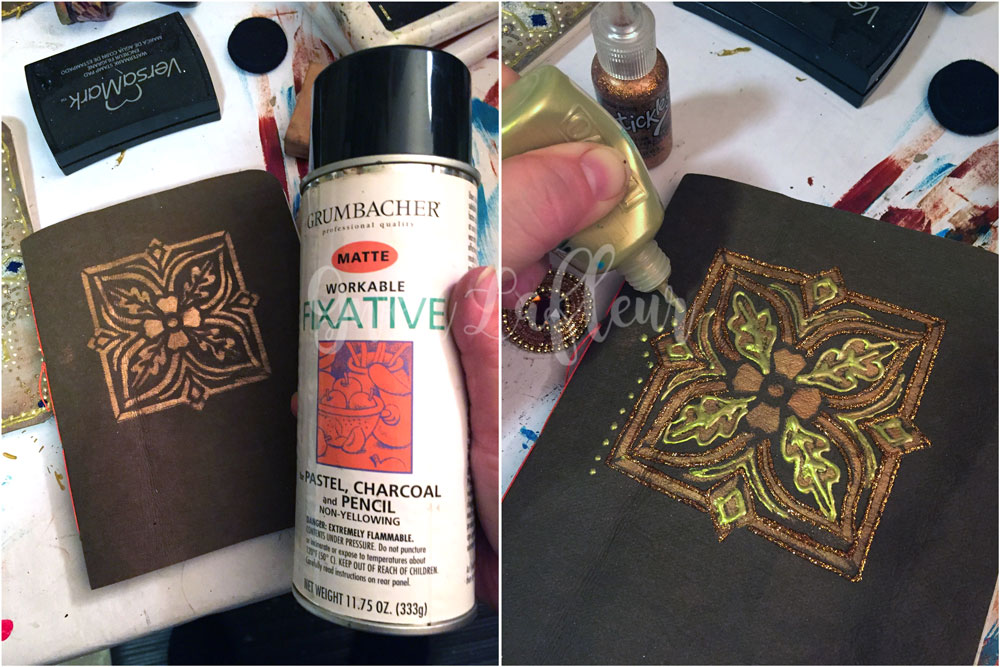
For the second book I went with a different technique to decorate the cover... I stenciled with Versamark ink and then with the stencil still in place I went over top of the wet ink using bronze PanPastels.
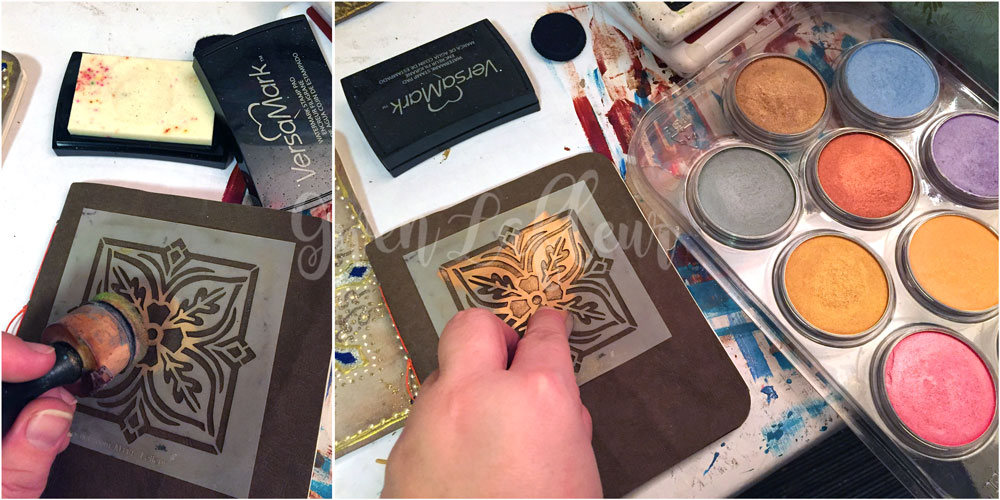
I sealed the PanPastel layer with a workable fixative, then used the same process from the first booklet to embellish with dimensional paints and Stickles.
Once everything was dry I just slid my new journals into the elastic in the cover and they were ready to go.
|
|
I really like the stiffer, more structured covers as compared to a traditional Traveler's Notebook, but you could follow this same process to construct your book and just leave the chipboard out if you prefer a more flexible cover. In that case you would want to make sure that the height of the books you make to go inside is a little shorter than the distance between the holes in the spine... without the chipboard, the stretching from the taller books would probably collapse the covers.
Voilà! A finished reusable notebook cover with your own custom pamphlet books inside.
Voilà! A finished reusable notebook cover with your own custom pamphlet books inside.


Thoughts, questions, or comments?
|
|
You might also like...