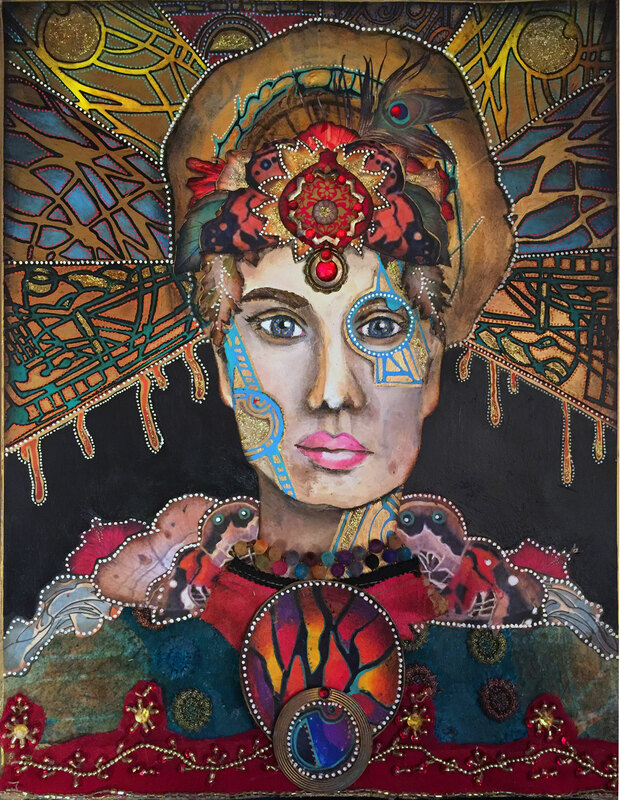
I've been fortunate enough to take several classes with Andrea Matus deMeng - I love her mixed media portraits and I have definitely been inspired by her work as I've started adding more and more mixed media portraits into my own portfolio. A few years ago I had an assignment to come up with a project using the Circle Tower StencilClub stencil collection by Carol Wiebe and I thought that a portrait would be a fun and different way to incorporate them.
As I worked, I took a few photos so that I could create a process overview to share how it came together.
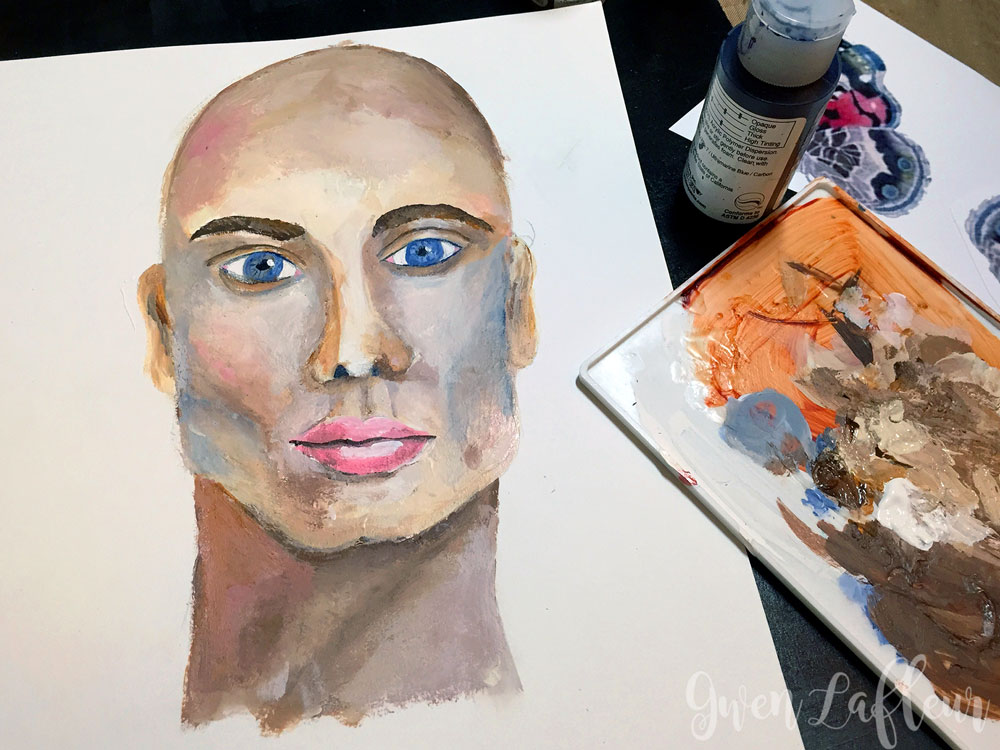
I started by taking a face that I'd sketched and then painted; ever since taking portrait and figure drawing classes at SAIC (the School of the Art Institute of Chicago,) I've tried to incorporate more hand-drawn or painted portraits into my work. This is one of my earlier portraits and it shows, but I still love how it turned out. You could also use collage images, face stencils, or even stamped images if you want to make a smaller version of this type of portrait.
I started by taking a face that I'd sketched and then painted; ever since taking portrait and figure drawing classes at SAIC (the School of the Art Institute of Chicago,) I've tried to incorporate more hand-drawn or painted portraits into my work. This is one of my earlier portraits and it shows, but I still love how it turned out. You could also use collage images, face stencils, or even stamped images if you want to make a smaller version of this type of portrait.
Once I'd finished the painting for the portrait - done on mixed media paper to make it fairly easy to collage, I cut out the finished face.
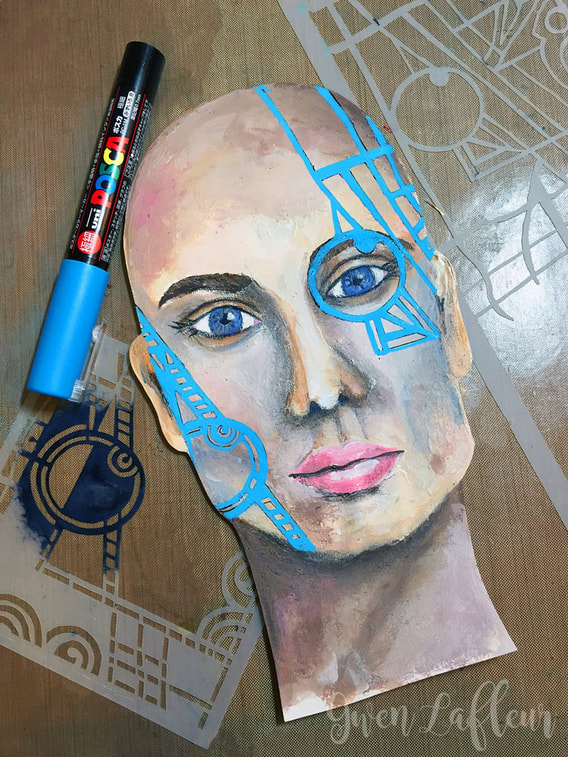
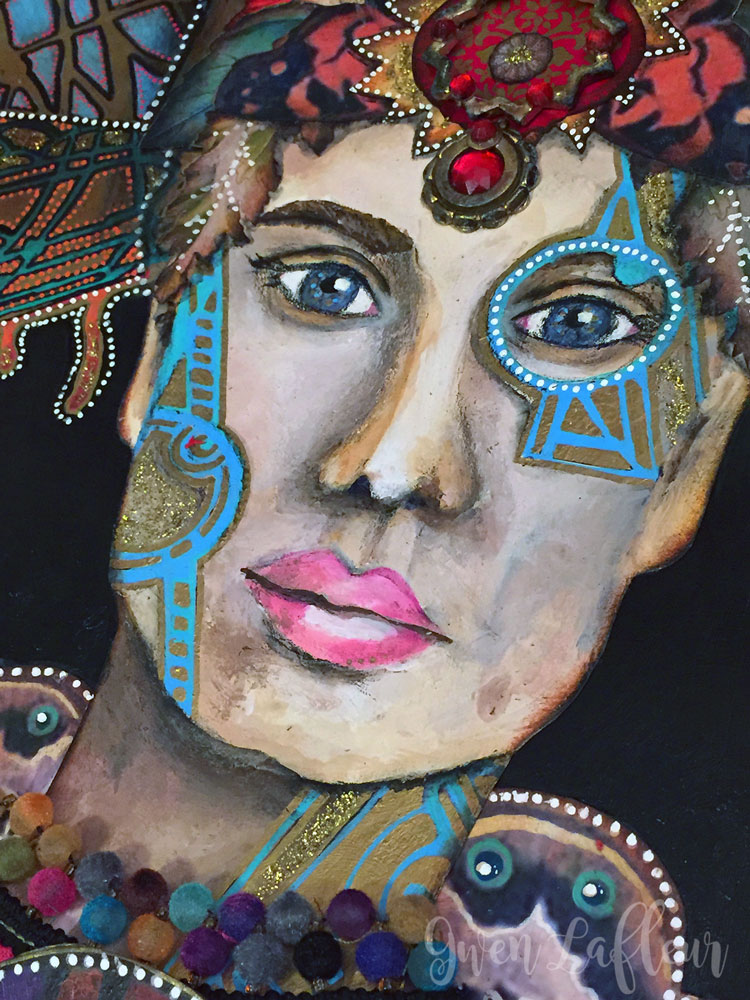
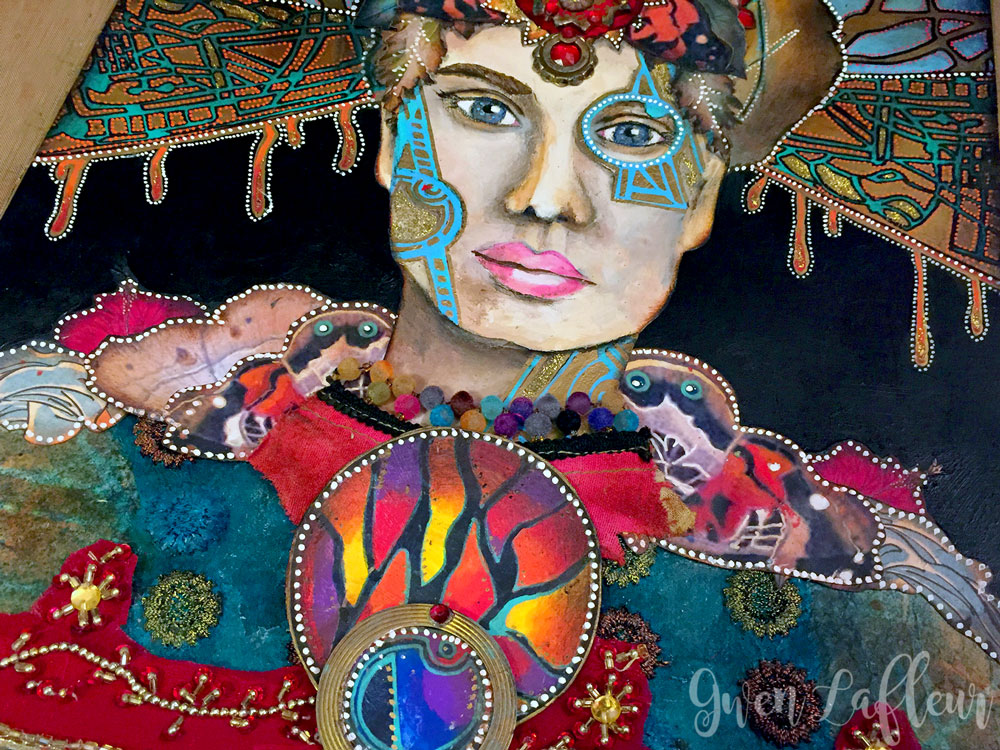
I took the stencils from Carol's StencilClub collection and traced parts of the design onto the portrait - some of the circular openings seemed perfect for adding some frames around the eyes and designs on the face that would be kind of futuristic and Steampunk, all at the same time.
After tracing the designs onto the face, I colored them in with a Posca paint pen.
Next I set the face aside and started working on the background. I took a sheet of 11" x 14" heavy-weight vellum finish Mixed Media paper (Strathmore) and completely painted it with Carbon Black fluid acrylic paint.
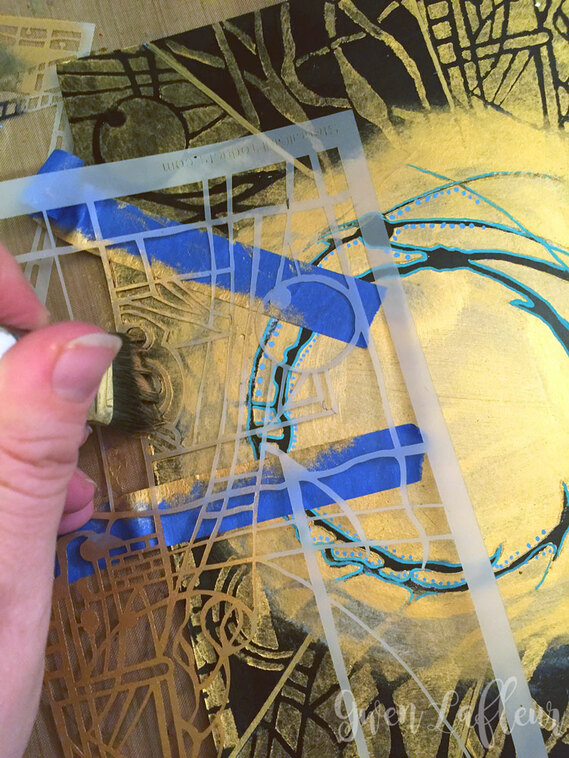
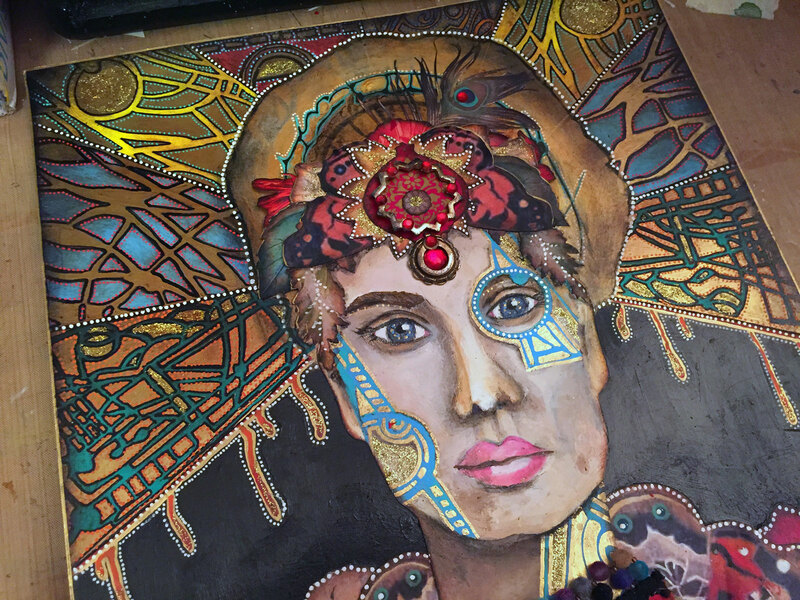
I used one of the large circular openings from the 9" x 12" stencil and put that where I wanted the head to go, then painted over that with gold acrylic paint (these stencils are actually masks, so the background color will be the color of the design when you're done.) I used a protractor and ruler to draw "rays" around the circular stenciled area - I was envisioning rays of patterns coming out from behind the head like a halo.
You can see below how I used painter's tape to mask off each section as I went - I put a different pattern in each area and I didn't want them to bleed into each other; the tape helped me to cleanly distinguish between each section.
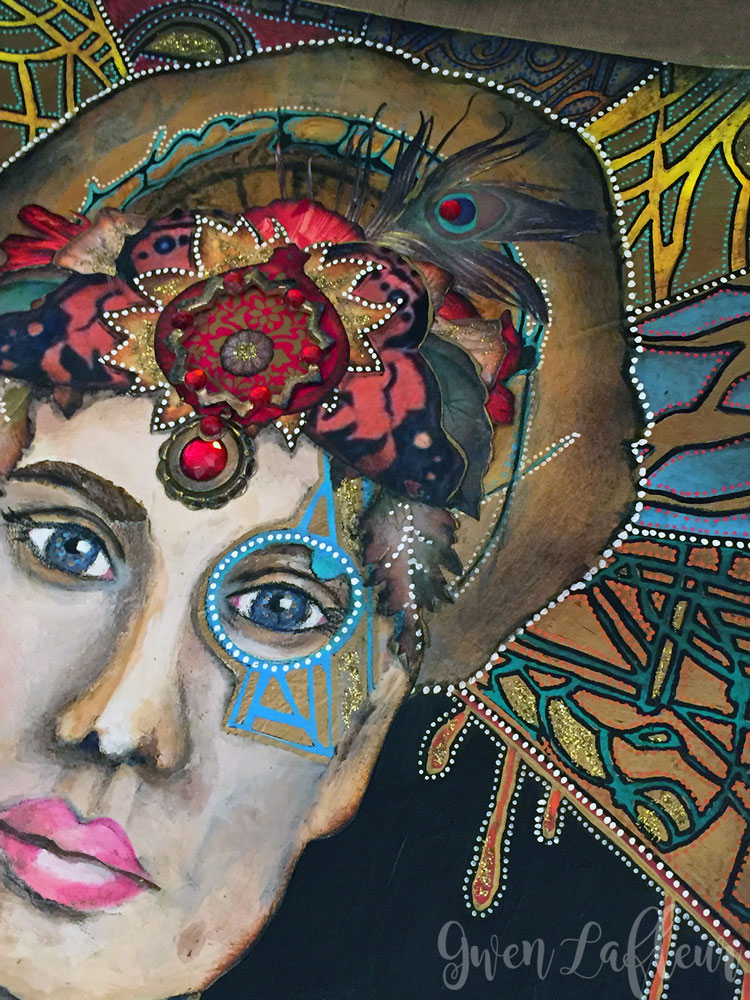
After completing the background I deliberately didn't take many photos since most of the process of creating the torso came from my classes with Andrea. That said, I used matte medium to adhere the face over the circular stenciled section. From looking at the final piece you can also see that I took lots of collage images - butterfly wings, embellished fabrics, and some stenciled papers, and arranged those until I liked the look and it felt like a nicely dressed and accessorized figure - for both the torso and a headdress. I also took more paint pens to color in the stenciled rays behind the head.
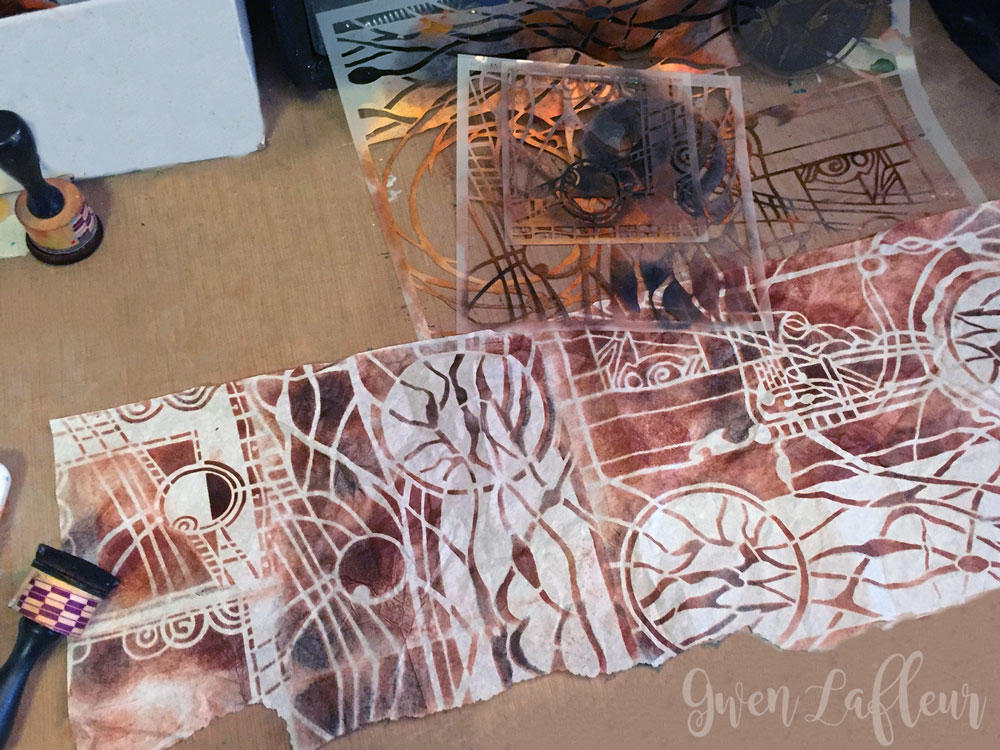
As I worked on the collaged section I found that I needed something for the torso of the figure that would go under and at the bottom of the collage images and fabric sections, so I pulled out some plain tissue paper and stenciled on it.
As I worked on the collaged section I found that I needed something for the torso of the figure that would go under and at the bottom of the collage images and fabric sections, so I pulled out some plain tissue paper and stenciled on it.
I used Archival Ink for the stenciling and then used some permanent spray inks over the top (turquoise and gold) and crumpled up the paper before distressing with black ink and then cutting and collaging it onto the background with matte medium. It was deliberately designed to not stand out, but if you look closely you can see that the pattern has a nice, subtle effect.
Here you can see a few more close-ups of the final piece. Click on any of them to see it larger.
Here you can see a few more close-ups of the final piece. Click on any of them to see it larger.
You might also like...

