In August 2018 I was fortunate enough to join in on a blog hop with StencilGirl and Emerald Creek. I don't think that it's really any secret that I love embossing powder. Love it. It's such a versatile medium and you can use it in so many different ways. Of course, embossing powder also pairs perfectly with stencils so I was thrilled to hear that StencilGirl and Emerald Creek were teaming up again. (We also collaborated in December of 2017. If you missed it, make sure to check out that post for even more inspiration!)
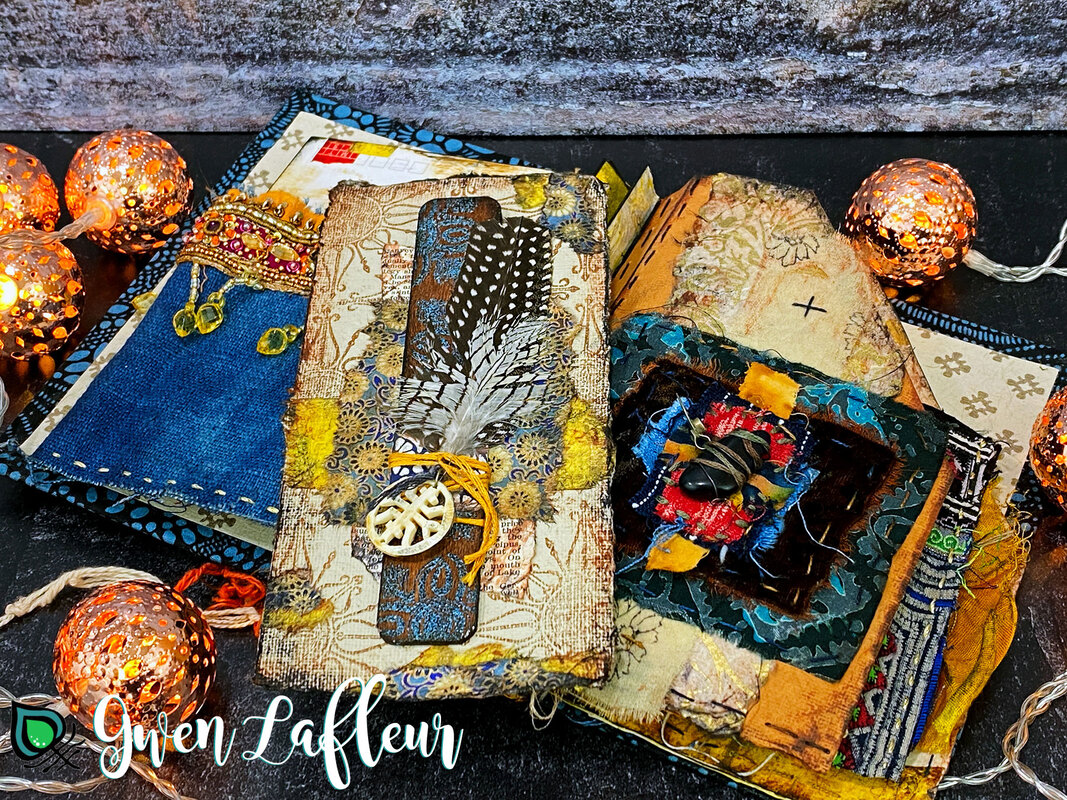
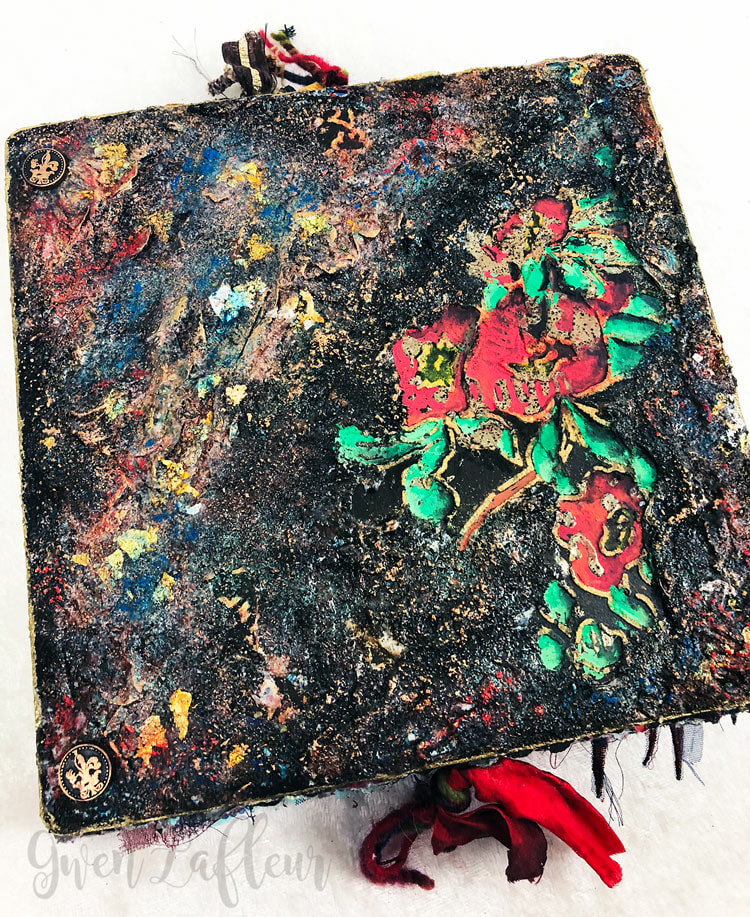
This time around, I decided to decorate the cover of a handmade artist book that I've been working in. I wanted something that was extremely textured and grungy, and yet still fit with the overall theme of the book, which is courage.
This time around, I decided to decorate the cover of a handmade artist book that I've been working in. I wanted something that was extremely textured and grungy, and yet still fit with the overall theme of the book, which is courage.
I also put together a short tutorial so that you can see how to recreate these effects in your own projects. Ready to give it a try?
To start, I coated the cover with black gesso, let it dry, then used a gold texture paste with my Chinese Garden Plum Blossoms stencil to get the flowers onto the background. You could do this with pigment or embossing ink and embossing powder, but I knew that I was going to do quite a bit of layering and melting in the vicinity of this design and I didn't want to lose the crisp lines, so I used the texture paste instead.
To start, I coated the cover with black gesso, let it dry, then used a gold texture paste with my Chinese Garden Plum Blossoms stencil to get the flowers onto the background. You could do this with pigment or embossing ink and embossing powder, but I knew that I was going to do quite a bit of layering and melting in the vicinity of this design and I didn't want to lose the crisp lines, so I used the texture paste instead.
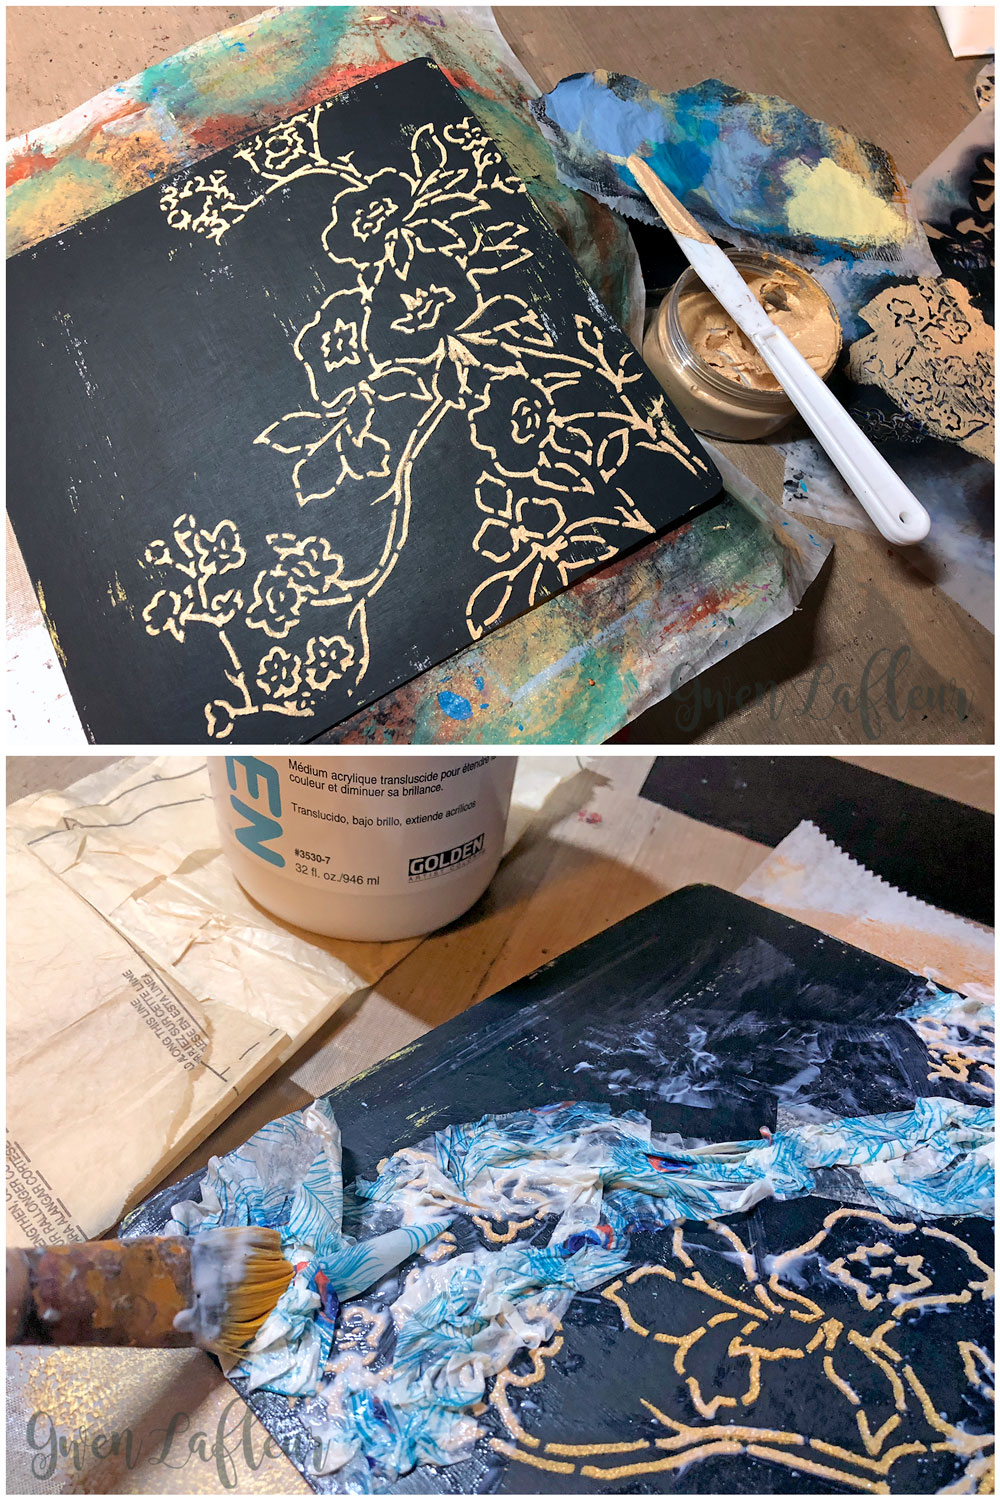
Once the texture paste was dry, I took out some scraps of tissue paper, matte medium, and a brush, and started laying the foundation of the texture in the background. It doesn't really matter what the pattern is on your paper, (or if there is one!) as it will all be covered up in the end. (Old sewing patterns also work great for this.)
I coated the background in matte medium, scrunched up some tissue paper and then coated the back of that as well, and then laid it on the wet background, manipulating it with my fingers as I went so that I created lots of peaks and valleys with the paper. I kept doing this until most of the cover was coated, leaving the flowers peeking through.
I worked fairly quickly at this point - this was partly to keep myself from overthinking the positioning of the tissue paper and partly because I needed the matte medium to be wet for the next step, which was the application of a lot of Baked Texture embossing powder. I started with Rocky Road, sprinkling it around the edges and right along the areas next to the flowers - I wanted something very textured and crusty looking and this was the perfect way to get that look. I tapped off the excess powder and returned it to the jar, then I used Dirty Sand Baked Texture powder, making sure to leave some areas open. I repeated that step one more time with Chunky Rust. I put the extra powder back in the jar each time so that I could use it again later.
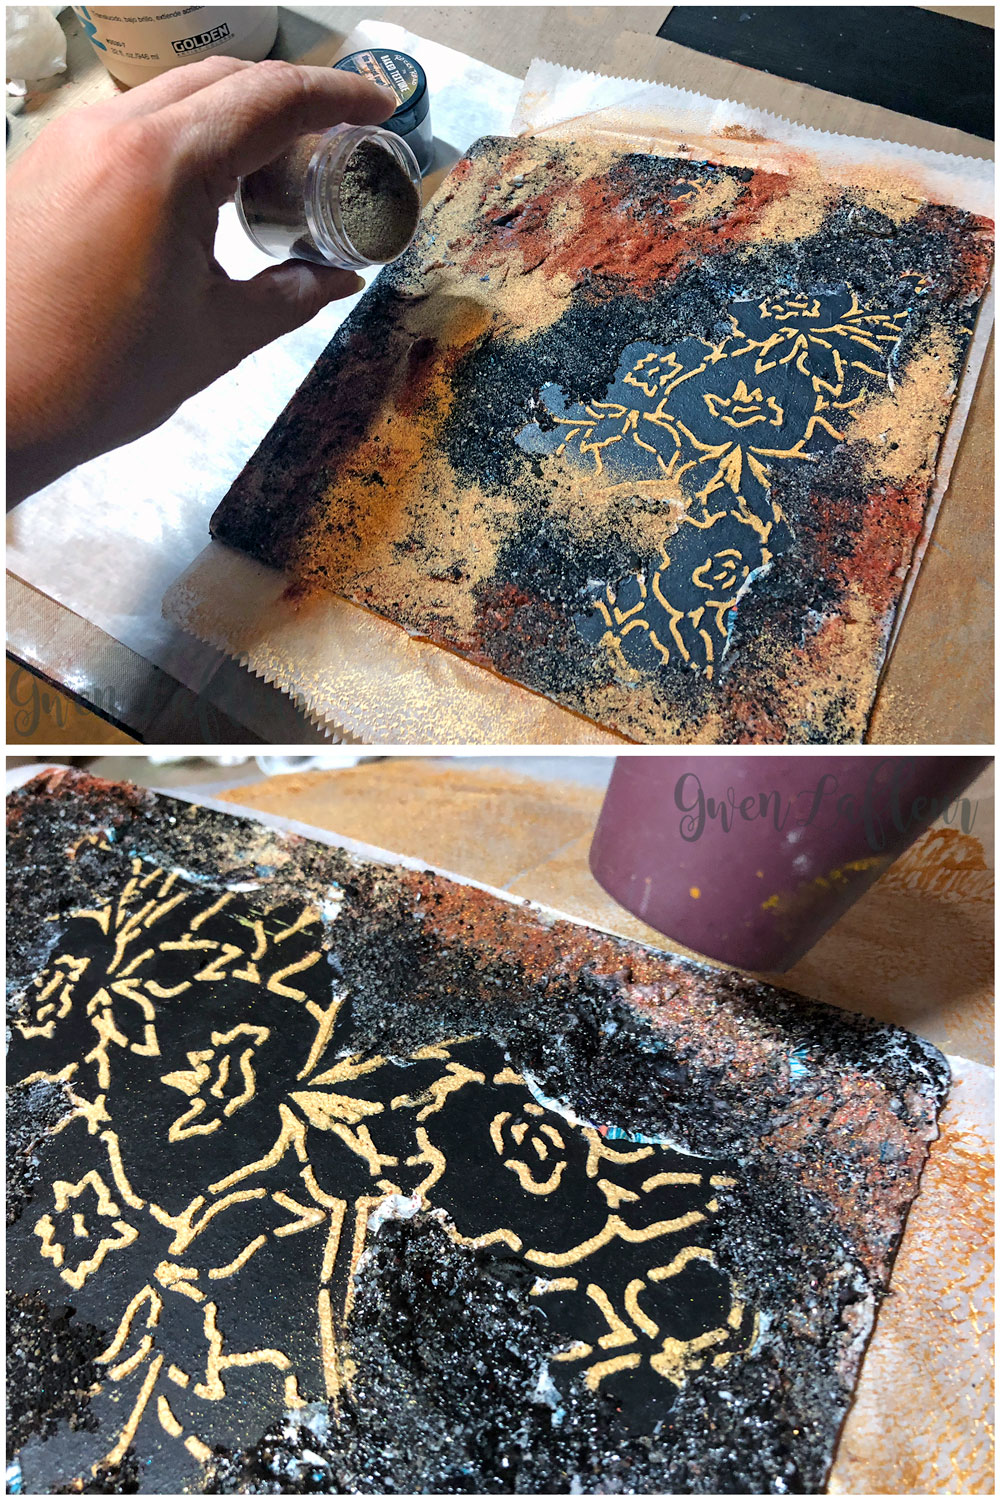
Once the entire background had its first coat of powder, I pulled out my heat gun and went to work. I kept it pretty close to the surface so that the medium and powder would bubble as it melted. The effect you achieve with this is fabulous! (Just a note that you may have heard from me before, but because you're heating acrylic mediums here, you get fumes. I always cover my nose and mouth for this process - I even have a respirator in my studio for really extended embossing sessions!)
After the first layer was melted, I took out Ancient Amber, Deep Sea, and Patina Oxide and alternately re-melted the surface with the heat gun, sprinkled powder on the hot surface, and then heated again to fuse it into the surface. The result is a gorgeous, mottled look that you really can't get any other way.
Once I'd gotten the texture I wanted in the background, I pulled out a blend of gold leafing flakes and applied some on the background, then used some Treasure Gold wax from PaperArtsy and applied with my finger on the tops of the texture - it adds depth and shine, all at the same time.

Next I used Seth Apter's Discovery stencil along with clear embossing ink and Charred Gold embossing powder to add a few words into the openings of my flowers.
To this point I'd done a pretty good job of adding the grunge factor, but I needed some boho - bright colors to the rescue! I used my Posca paint markers to color in the flowers. I like to add in a few shades of the same color or two similar colors and blend them with my finger while they're still wet.
To this point I'd done a pretty good job of adding the grunge factor, but I needed some boho - bright colors to the rescue! I used my Posca paint markers to color in the flowers. I like to add in a few shades of the same color or two similar colors and blend them with my finger while they're still wet.
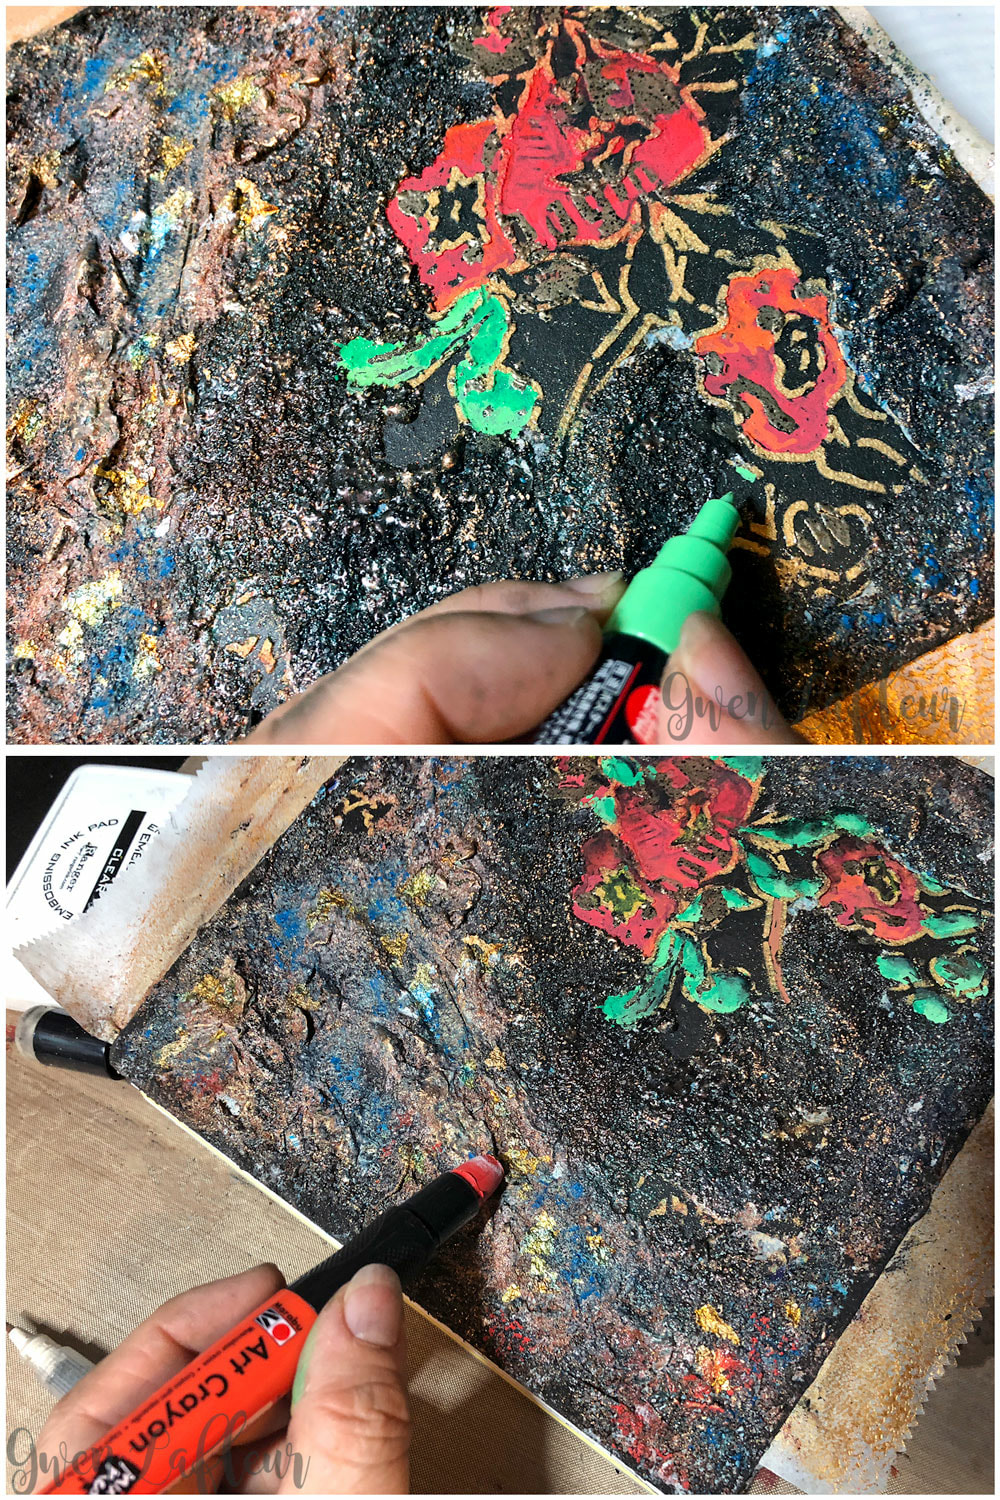
I also pulled out my Marabu Art Crayons and added bits of color into the background, using my finger and a water brush to spread it out a bit.
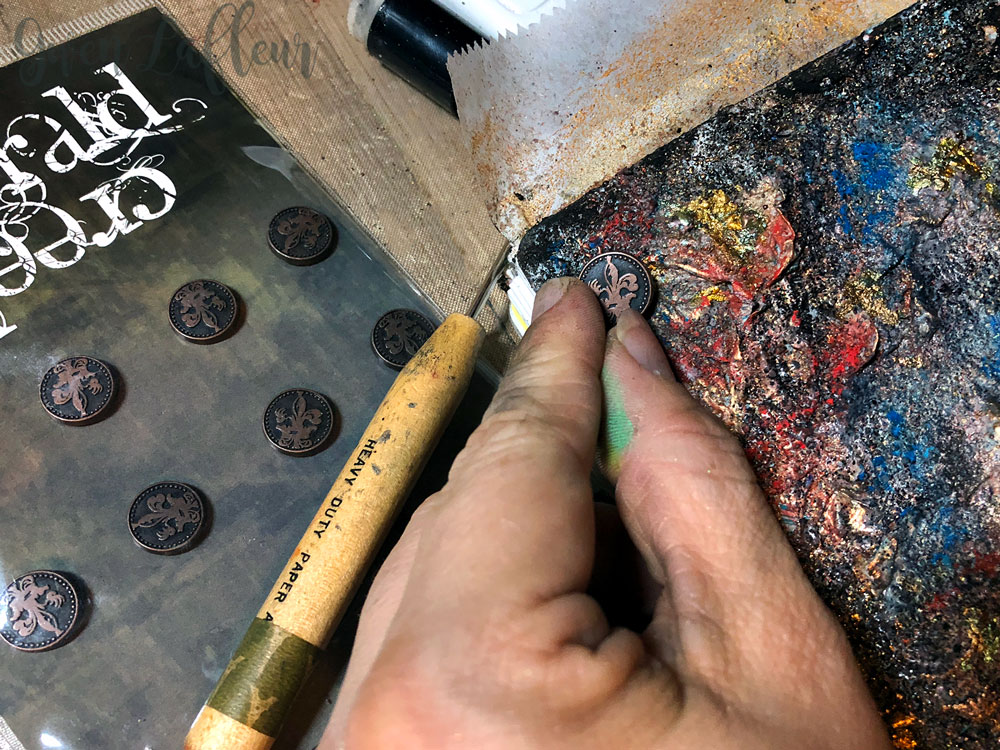
Finally, I took some Emerald Creek Fleur brads, poked holes in the cover with an awl, and then inserted them to give a subtle, decorative touch to the cover. I used my finger to wipe a bit more of the gold PaperArtsy Treasure Gold wax over the surface - the raised design on the brad really picked it up beautifully.
Finally, I took some Emerald Creek Fleur brads, poked holes in the cover with an awl, and then inserted them to give a subtle, decorative touch to the cover. I used my finger to wipe a bit more of the gold PaperArtsy Treasure Gold wax over the surface - the raised design on the brad really picked it up beautifully.
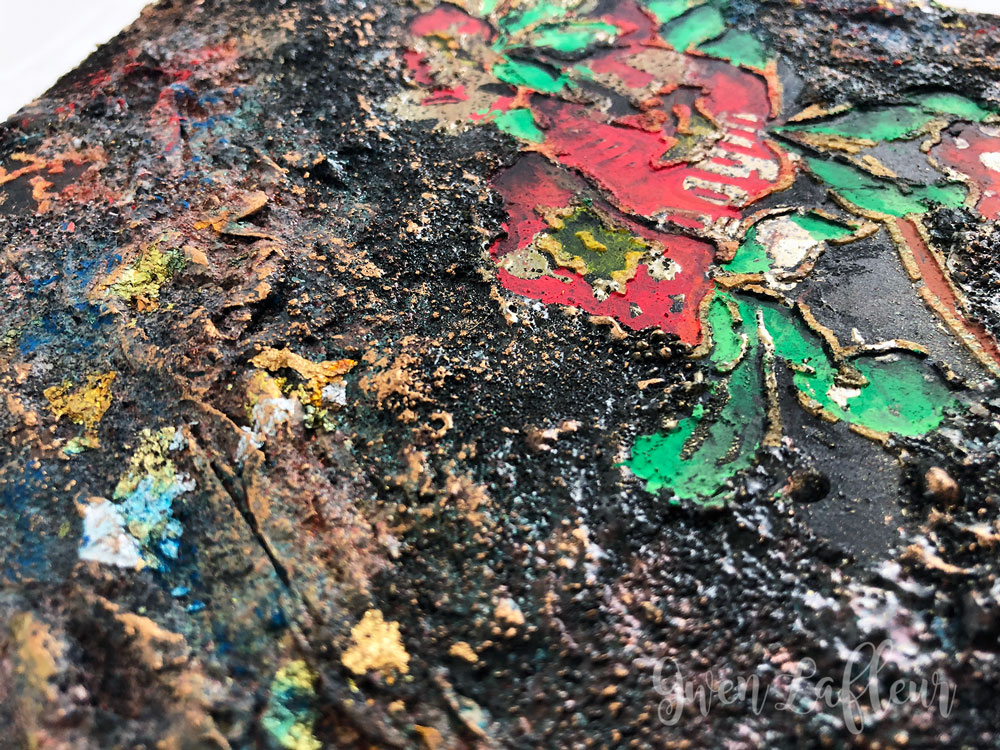
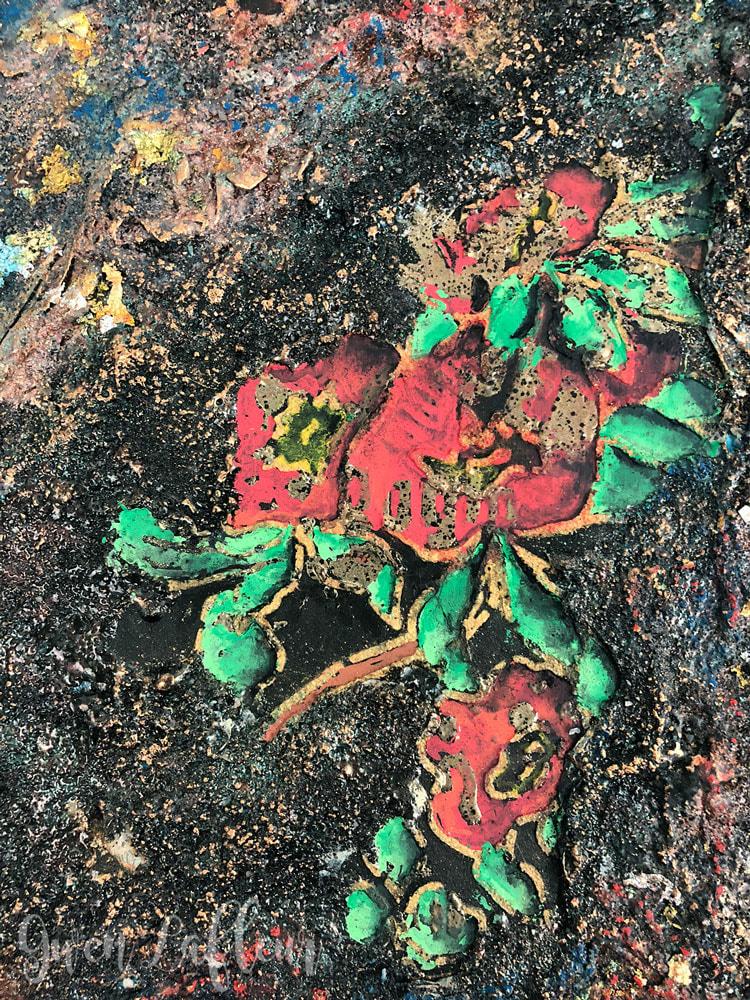
Voilà! The finished cover and a few close-ups...


Thoughts, comments, or questions?
|
|
You might also like...