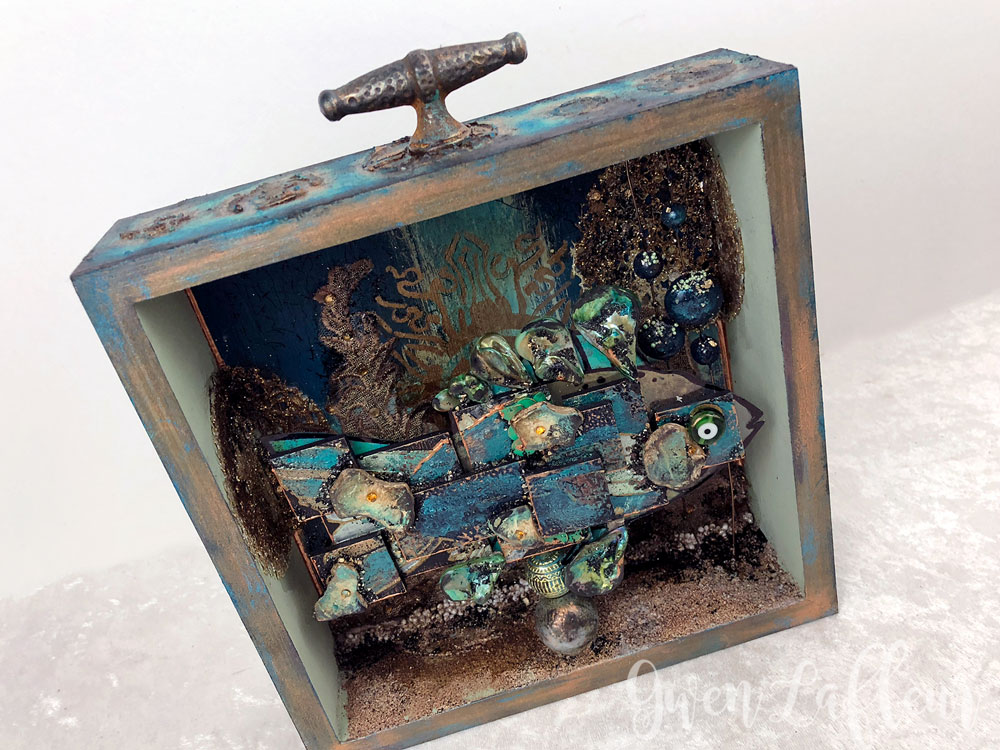
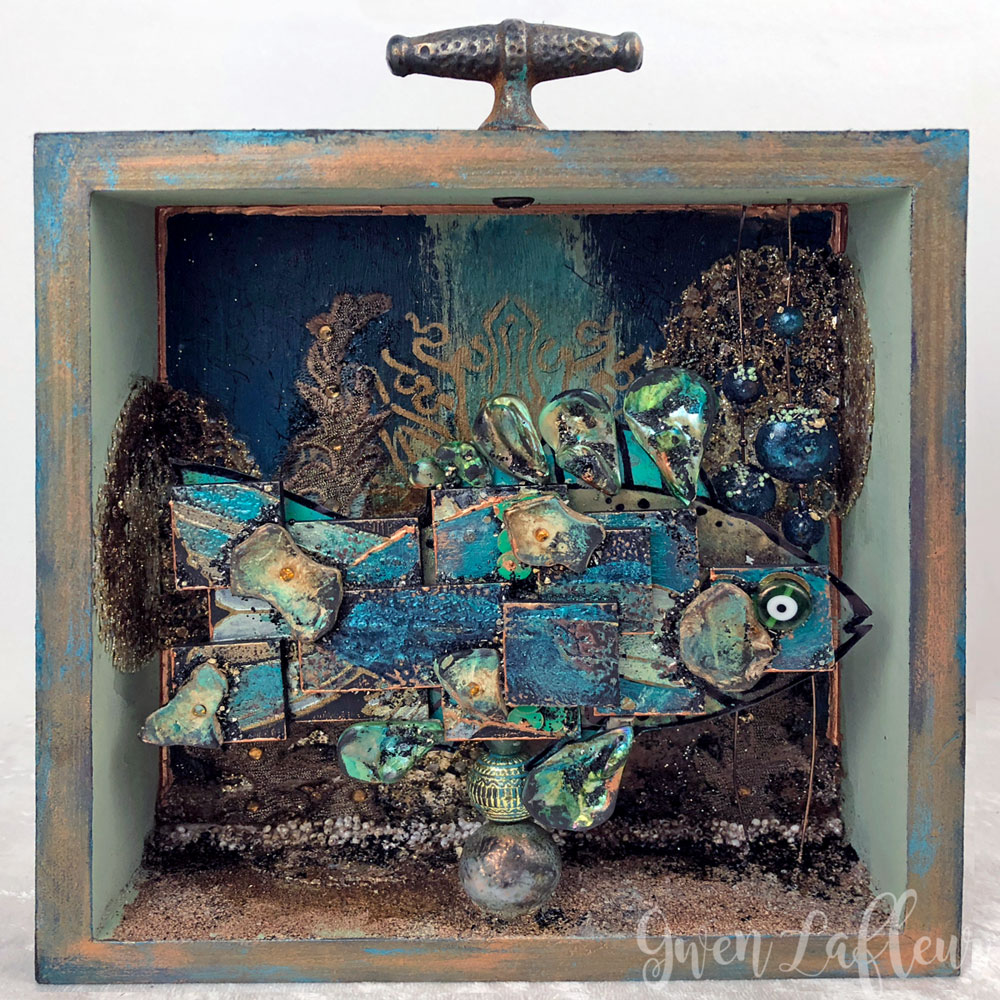
In November 2018 I was fortunate enough to participate in a blog hop with StencilGirl Products and Ampersand (the makers of some truly fabulous panels, art boards, and other art products.) For my post I tried out some new-to-me products including an Ampersand 8" x 8" Gessoboard Shadowbox and a package of Ampersand Stampboard - I used the 1/2 lb bag in assorted sizes. I combined that with stencils, paint, fabric, beads, embossing powder, and a few other supplies to make this underwater-themed mixed media shadowbox.
Of course, I also put together a tutorial showing how I made the fish as well as some of the details on the box itself. Ready to get started?
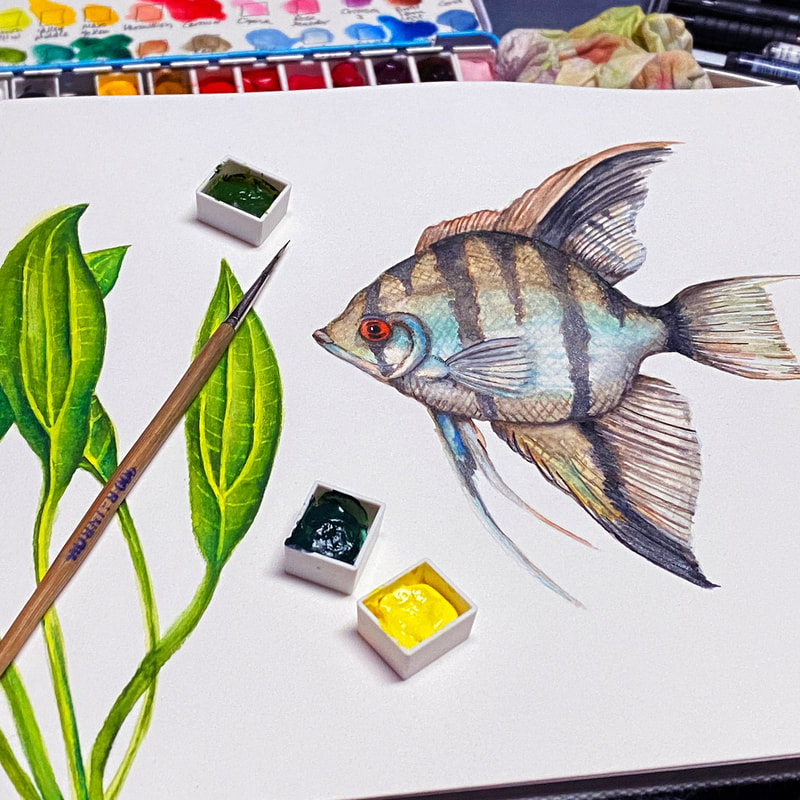
To begin, I took my Boho Fish stencil and stenciled one of the images onto a .20mm thick piece of acetate using black StazOn ink and then traced over the lines with a black Sharpie.
To begin, I took my Boho Fish stencil and stenciled one of the images onto a .20mm thick piece of acetate using black StazOn ink and then traced over the lines with a black Sharpie.
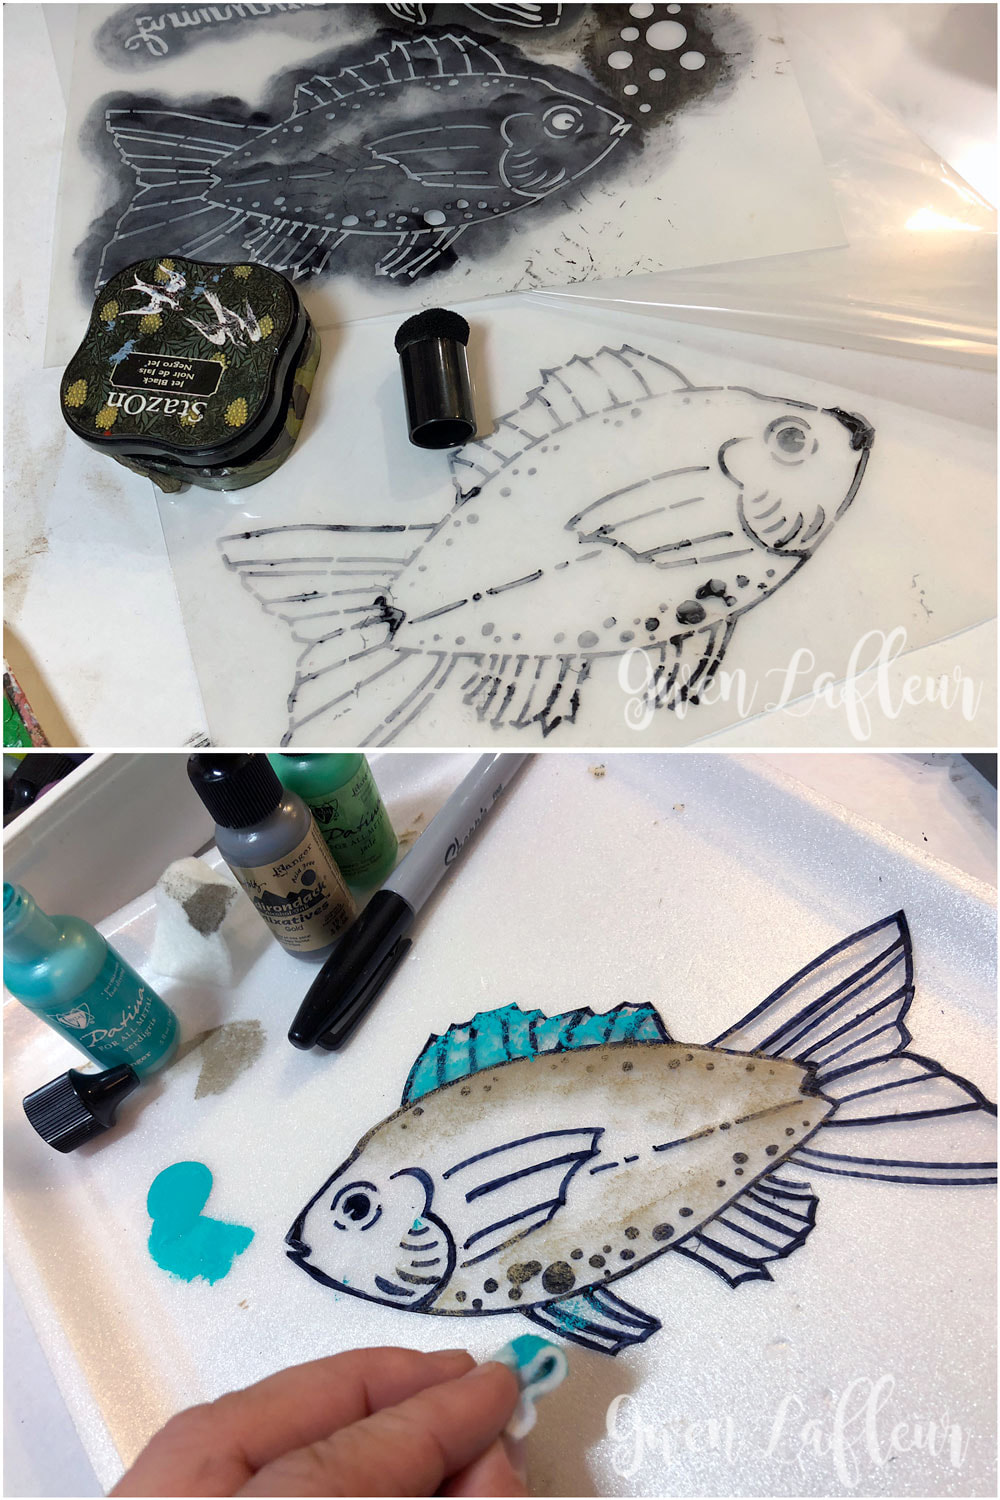
I cut out the fish and then flipped it over and used some metallic alcohol inks and Vintaj Patina inks (both from Ranger) and dabbed color onto the back of the acetate with a felt pad. I wanted it on the back of the image so that none of the ink would be scratched or wiped off of the plastic as I added layers onto the front.
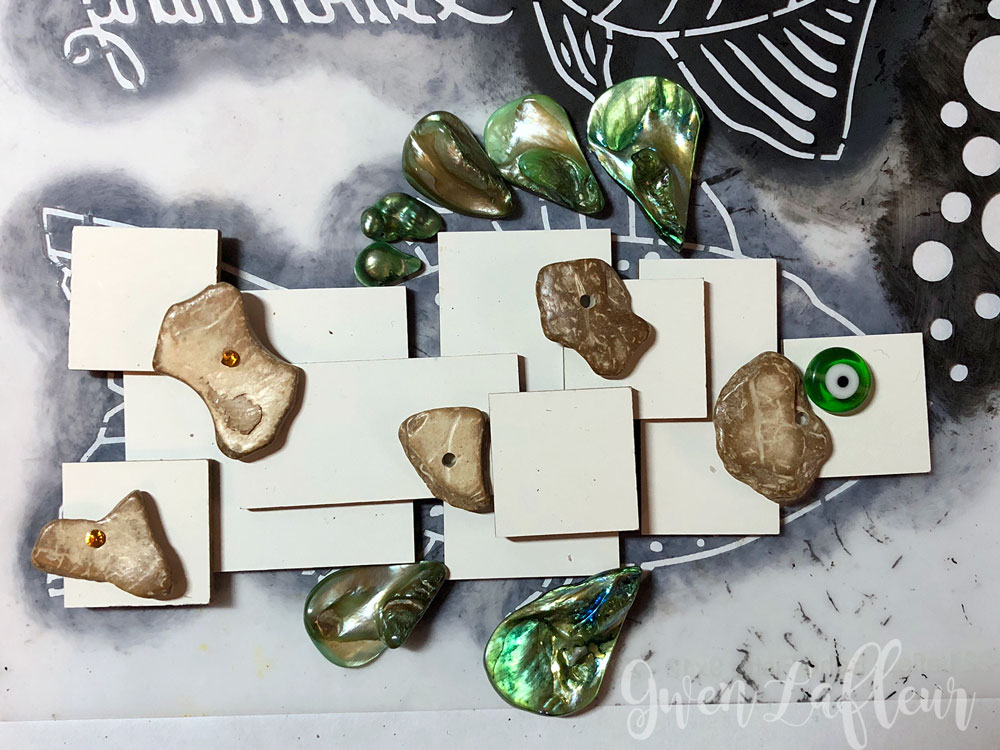
Next, I took out some of the pieces of Stampboard and started laying them out - I had the idea in my head to do a kind of layered, cubist approach (with lots of boho flair, of course!) and so I played around with the arrangement of the tiles until I liked it, then auditioned several different materials for fins and accents. For those, I landed on a few types of shell beads. Once I had everything laid out the way I wanted it, I took a photo so I could match it all back up as I worked on each layer.
Next, I took out some of the pieces of Stampboard and started laying them out - I had the idea in my head to do a kind of layered, cubist approach (with lots of boho flair, of course!) and so I played around with the arrangement of the tiles until I liked it, then auditioned several different materials for fins and accents. For those, I landed on a few types of shell beads. Once I had everything laid out the way I wanted it, I took a photo so I could match it all back up as I worked on each layer.
Once I had a plan for how it would all come together I took the Stampboard and coated the front and sides of each piece with black gesso then laid out the bottom layer on top of the acetate fish and glued the pieces down. (I used Weldbond glue - this works especially well when I'm gluing anything to glass or plastic.)
When the glue was mostly dry and the tiles didn't wiggle, I took some gold embossing paste, lined up my Boho Fish stencil so that it matched the outline of the acetate one on the base, and then used a palette knife to add the texture paste. I carefully removed any overhanging bits of paste and let it dry.
When the glue was mostly dry and the tiles didn't wiggle, I took some gold embossing paste, lined up my Boho Fish stencil so that it matched the outline of the acetate one on the base, and then used a palette knife to add the texture paste. I carefully removed any overhanging bits of paste and let it dry.

Once my texture paste was dry to the touch, I used some iridescent paints from Finnabair and Viva and added some color to the first layer of stenciled Stampboard blocks.
When the texture paste and paint were both dry, I repeated the process with the next layer of Stampboard, adhering them in place and then lining up the stencil and stenciling with more gold embossing paste. I also tucked some small green vinyl disc beads into place to give the suggestion of scales. Since they're fairly thin, I cut some of them so they'd follow the contours of my fish.
When the texture paste and paint were both dry, I repeated the process with the next layer of Stampboard, adhering them in place and then lining up the stencil and stenciling with more gold embossing paste. I also tucked some small green vinyl disc beads into place to give the suggestion of scales. Since they're fairly thin, I cut some of them so they'd follow the contours of my fish.
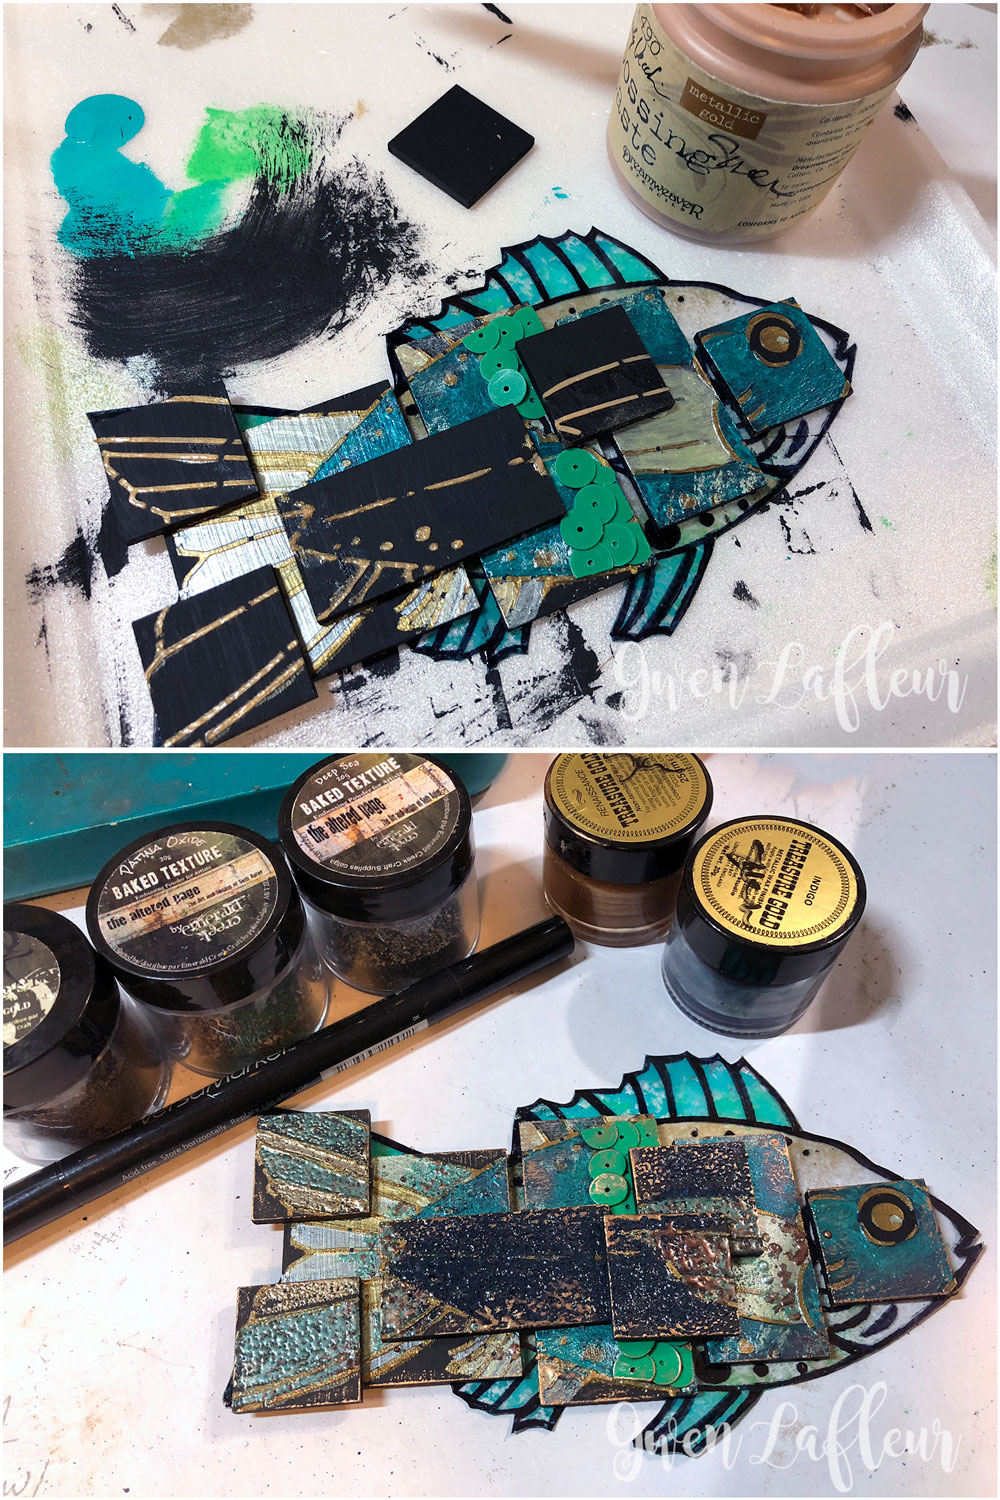
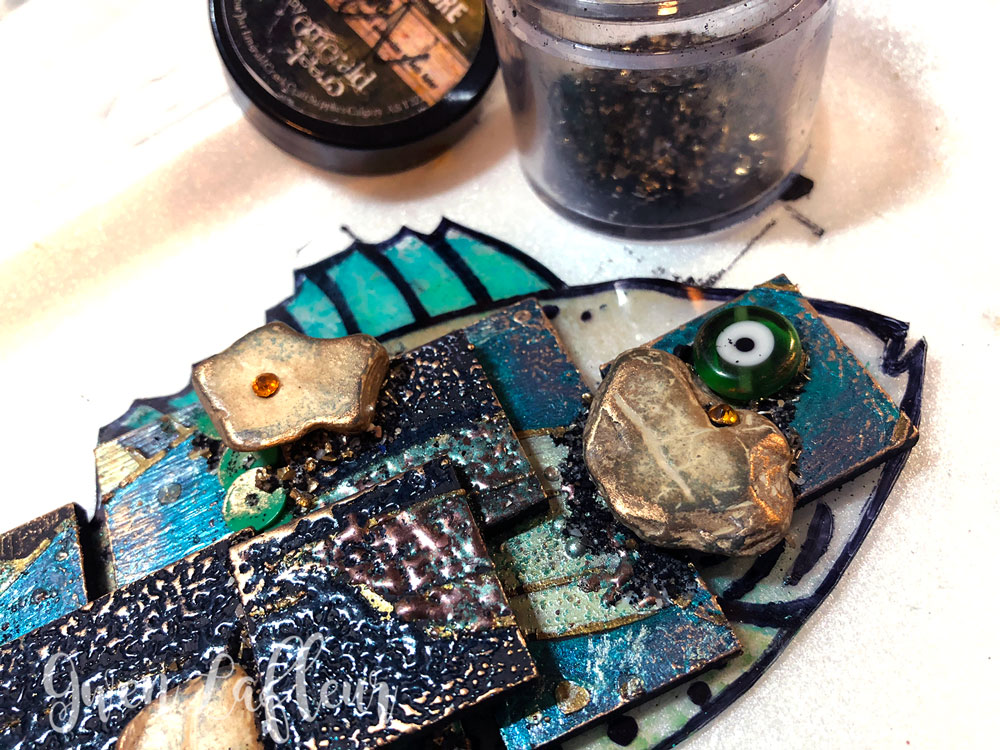
When the texture paste on this layer was dry I used clear embossing ink and a VersaMarker to coat the areas where I wanted color and then used some Baked Texture embossing powder from Seth Apter and Emerald Creek to add the colors. I added the powder one color at a time and then heated it all at once. You have to be careful with this step as the heat will curl the acetate in the base layer if you don't watch what you're doing. If that starts to happen, just press the plastic back into place while it's still warm and put something flat and heavy on top until it cools again.
I added one more layer of Stampboard and more embossing powder, then I adhered my shell bead accents in place. I put some vintage rhinestones in the bead hole openings, then used a mix of Rocky Road Baked Texture embossing powder and chunky gold glitter and added it like shading around some of my elements, then carefully heated and melted those sections. I also added a glass Nazar bead as the eye of the fish. I used a bit of gold wax over the tops of the shells and embossed sections to highlight the raised areas.
I added one more layer of Stampboard and more embossing powder, then I adhered my shell bead accents in place. I put some vintage rhinestones in the bead hole openings, then used a mix of Rocky Road Baked Texture embossing powder and chunky gold glitter and added it like shading around some of my elements, then carefully heated and melted those sections. I also added a glass Nazar bead as the eye of the fish. I used a bit of gold wax over the tops of the shells and embossed sections to highlight the raised areas.
When the fish was done I moved onto the shadowbox. I painted the inside with a few colors of Matisse background paints and then used bronze gesso on the front edge around the opening and let it all dry.
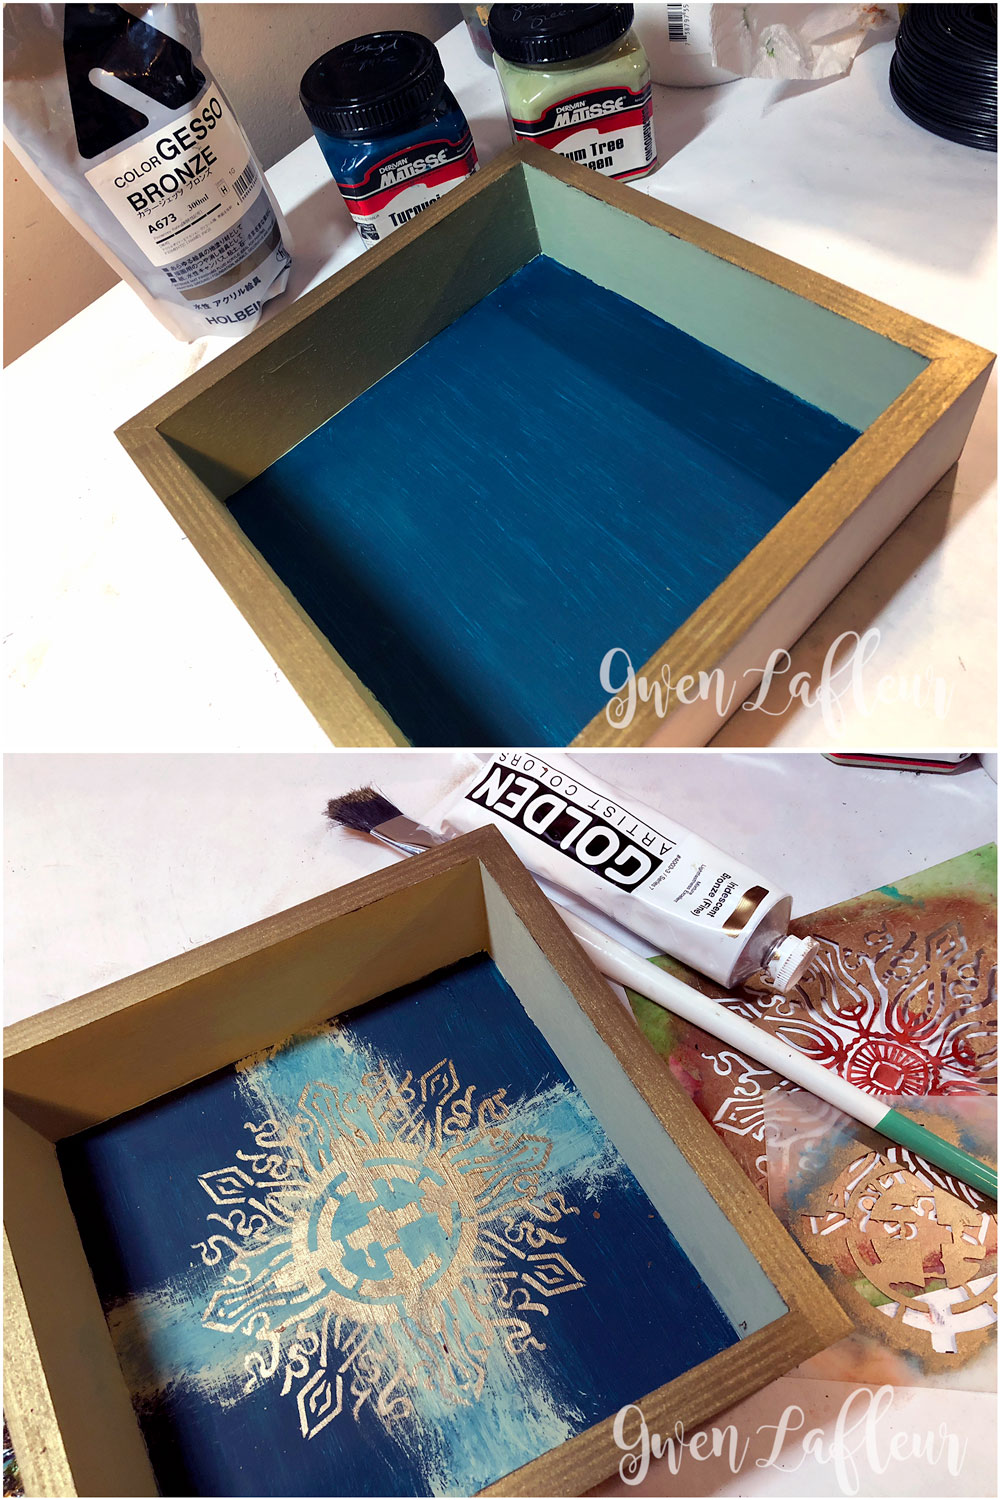
I used a bit more paint to add a cruciform in the background, then stenciled Seth Apter's Spinner stencil in the middle in bronze paint and layered my Decorative Medallion stencil over top and carefully stenciled so that the design looked like it was coming out of the one already in the middle (I love to do this with my medallions - you can mix them with other circle elements to create something totally new!)
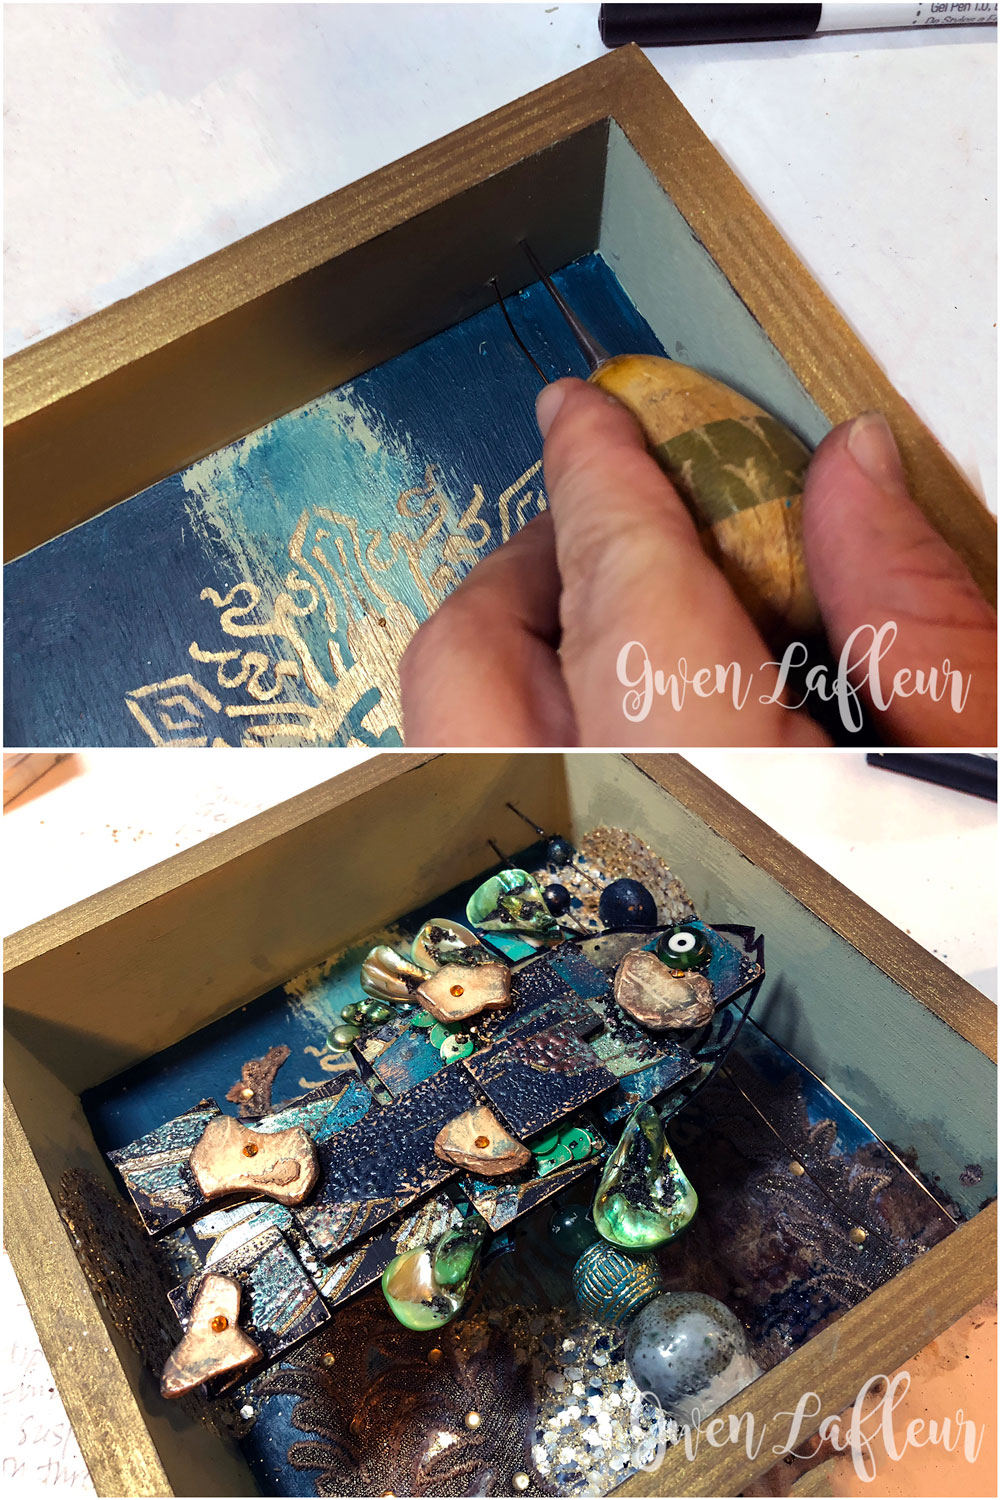
I knew I wanted to "float" some beads as bubbles coming from the fish, so I used an awl to bore some holes inside the shadow box where I could insert some wire, as well as a hole in the bottom where I was going to anchor my fish focal point.
I knew I wanted to "float" some beads as bubbles coming from the fish, so I used an awl to bore some holes inside the shadow box where I could insert some wire, as well as a hole in the bottom where I was going to anchor my fish focal point.
I didn't really take pictures of the decorating portion, but I had some embroidered and embellished fabrics that were shaped a bit like sea plants and added those to the background (I adhered those with soft matte gel,) as well as some gold glitter circles from a holiday floral pick I'd bought at a craft store.
For the bubbles I took some beads that I'd coated with Deep Sea Baked Texture embossing powder that had some glitter and microbeads embedded in the enamel and strung them along a wire that runs from the top to the bottom inside the box - I used crimp beads between the "bubbles" to hold them in place. I also used a coat of Dirty Sand Baked Texture embossing powder along the bottom - it seemed like the obvious choice and it gave me the perfect texture and color to mimic the ocean floor.
For the focal point, I took a thick gauge of wire and attached it to the back of the fish with Aves Apoxie Clay, then ran the wire through some beads and into the hole in the bottom of the box, anchoring that with more Apoxie Clay. I used some props to hold the fish in place while the clay cured. To finish it off, I added a piece of white Kuchi beaded trim along the inside bottom and glazed that to integrate it.
Finally, I did some more stenciling around the outside of the panel. First I collaged on some pieces of newspaper from India, then I used my Collage Textures & Patterns, Circles stencil as well as one of the splats from Seth Apter's Text and Texture Discovery stencil and added a few of the circles along the top and sides with some molding paste and a palette knife.
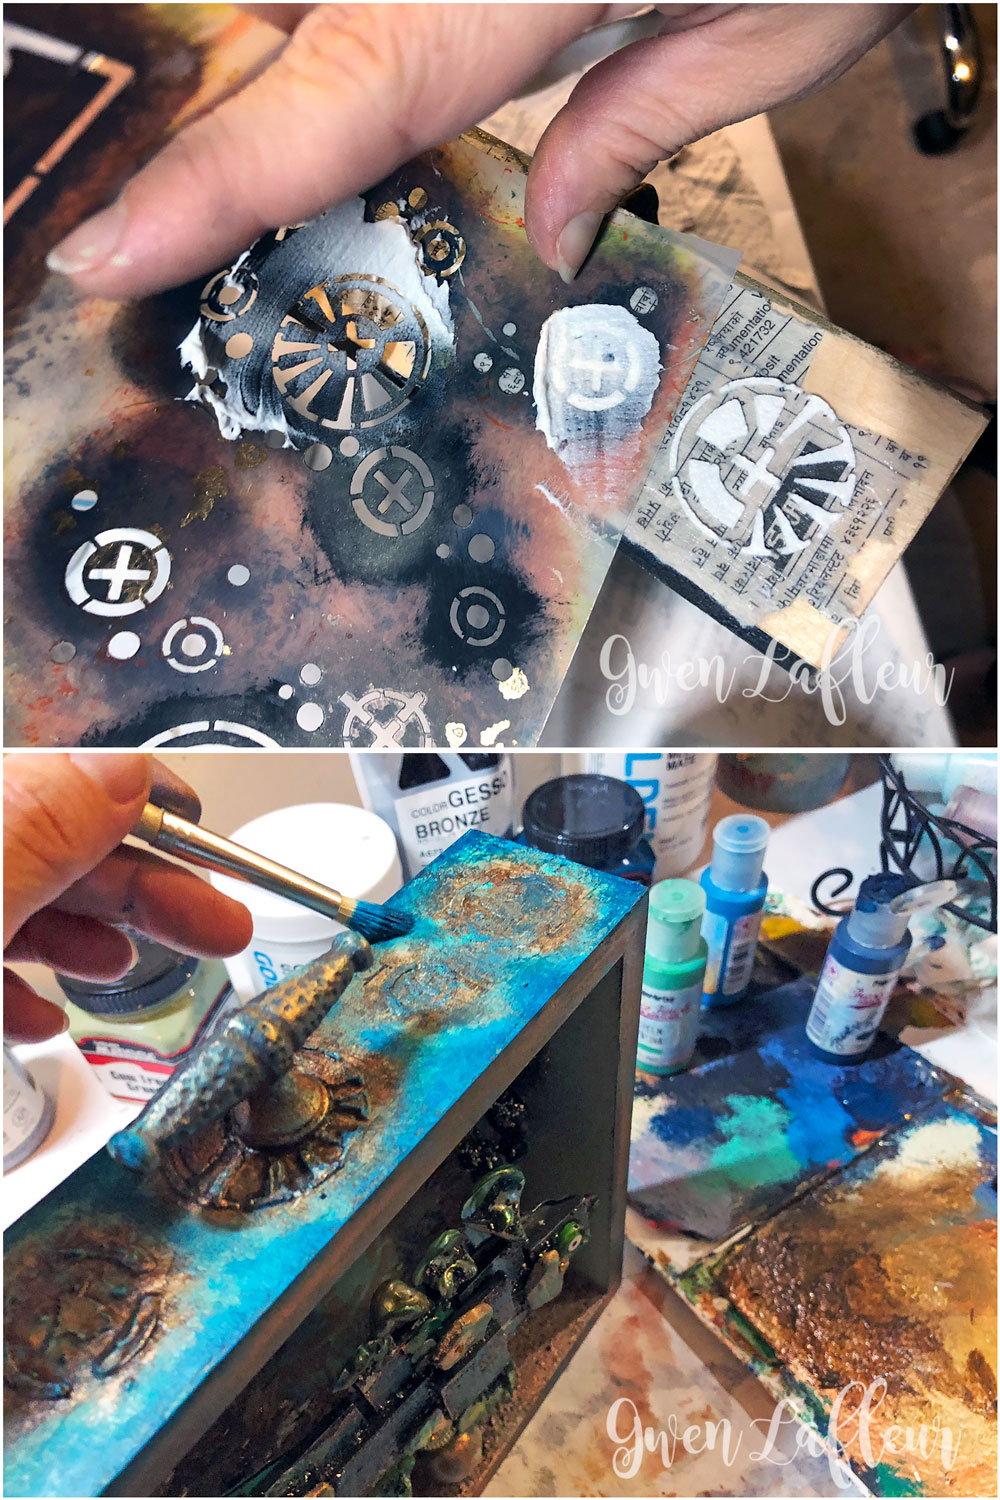
When the molding paste was dry, I coated it all with a brown glaze, then added some paint around it (I used PaperArtsy paints,) leaving a bit of the newspaper in the background showing around each stenciled design. I highlighted the raised areas with some gold and indigo wax. I also drilled a hole in the top and inserted a cool vintage drawer pull as a handle.
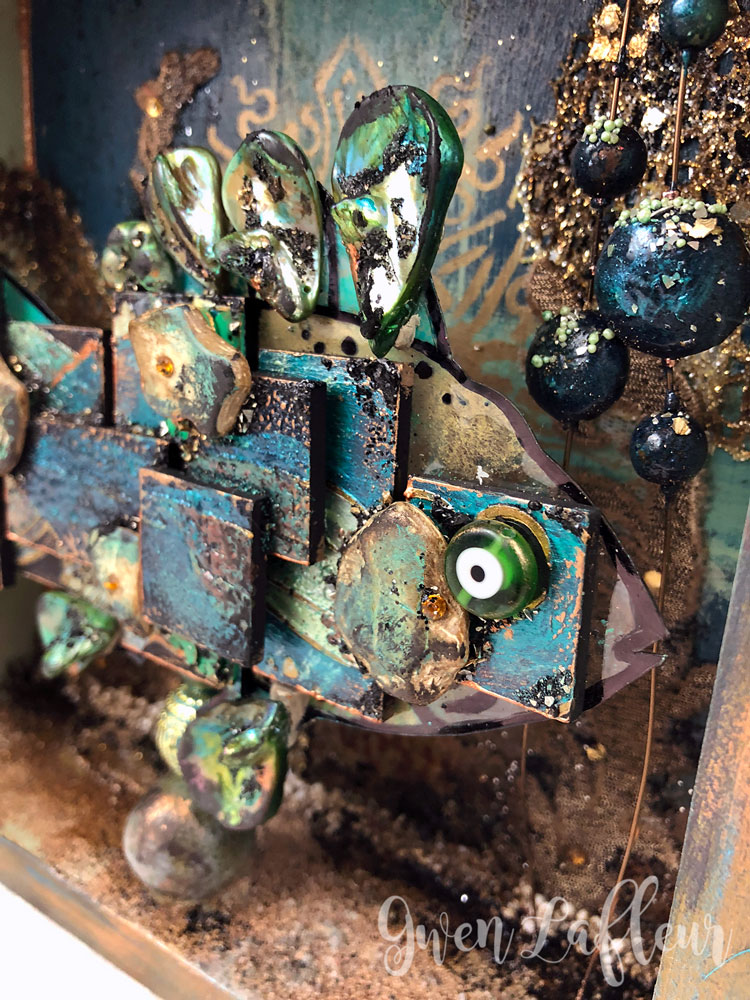
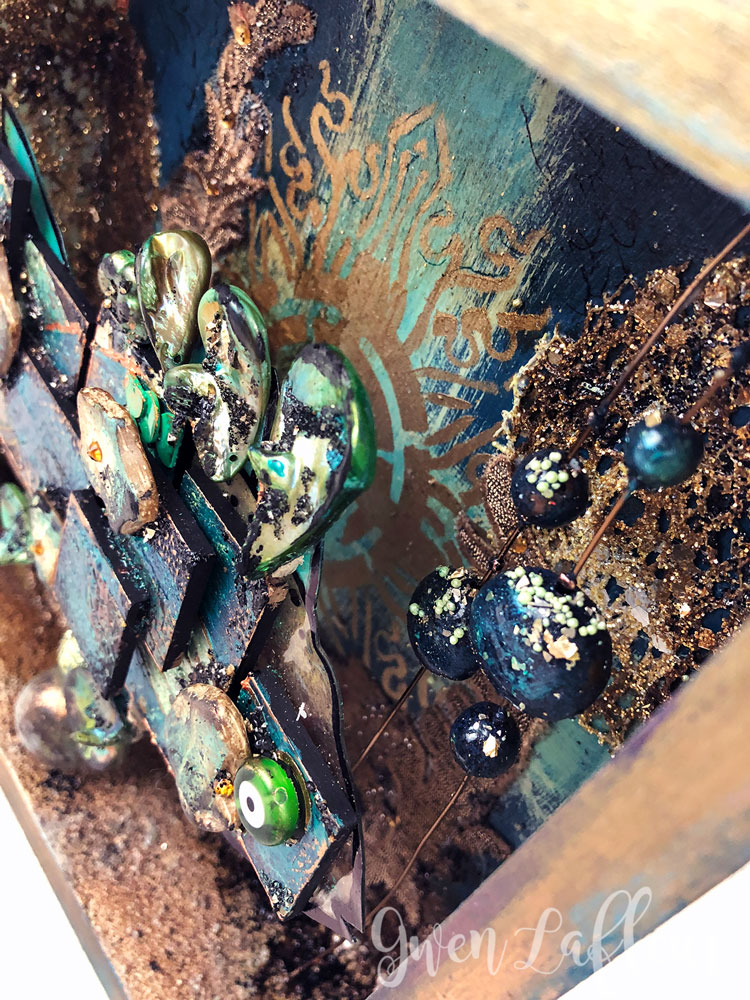
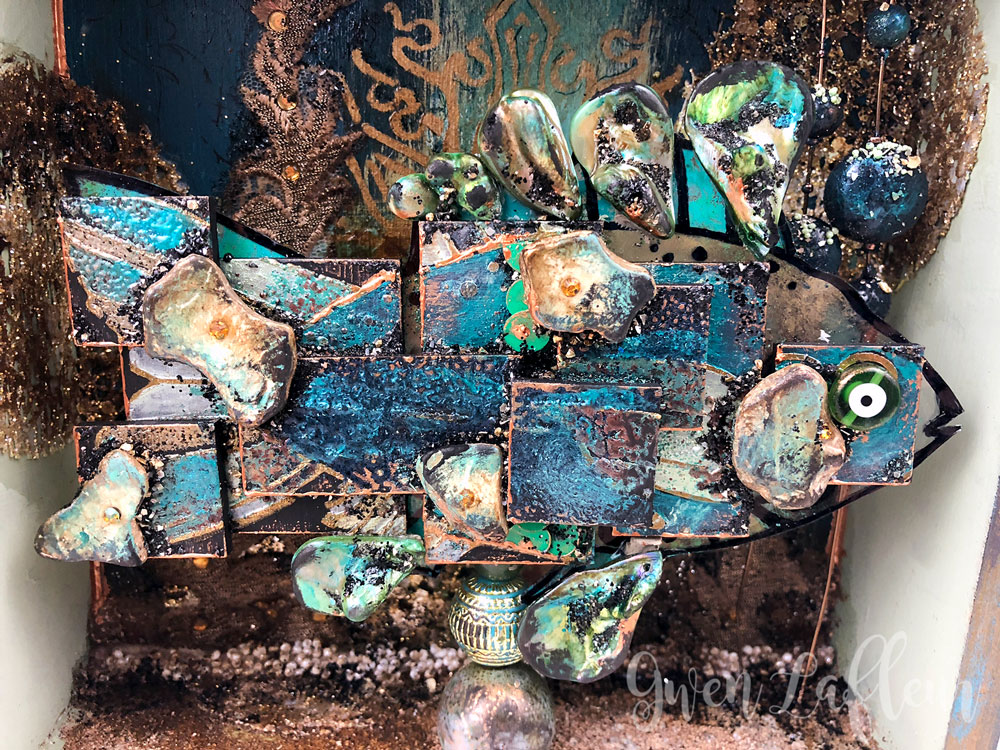
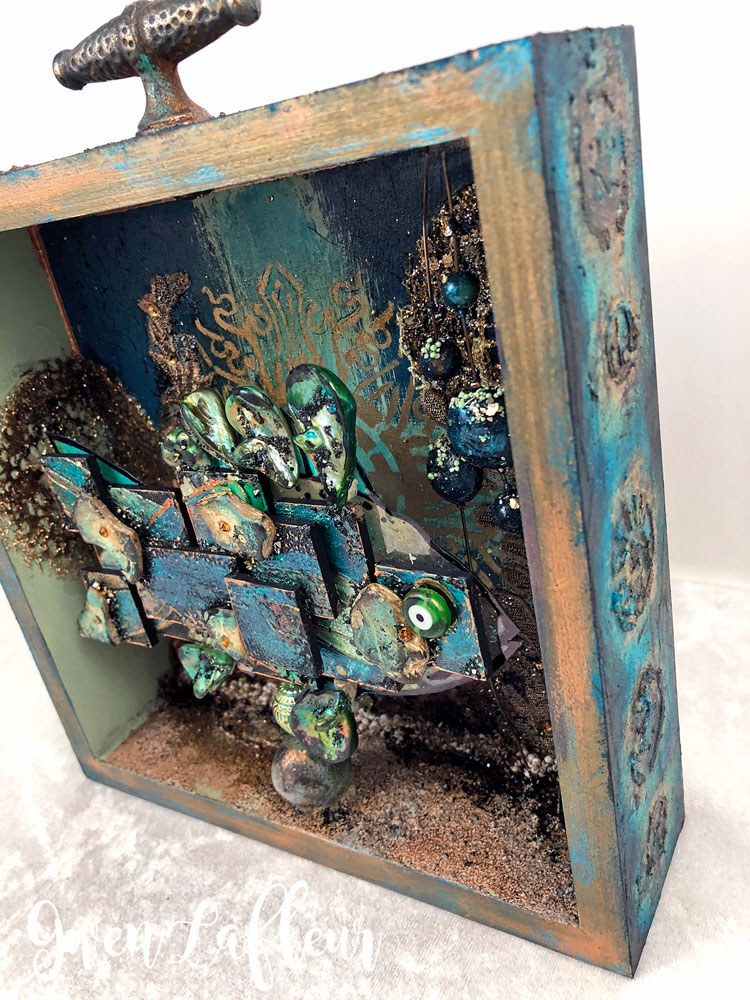
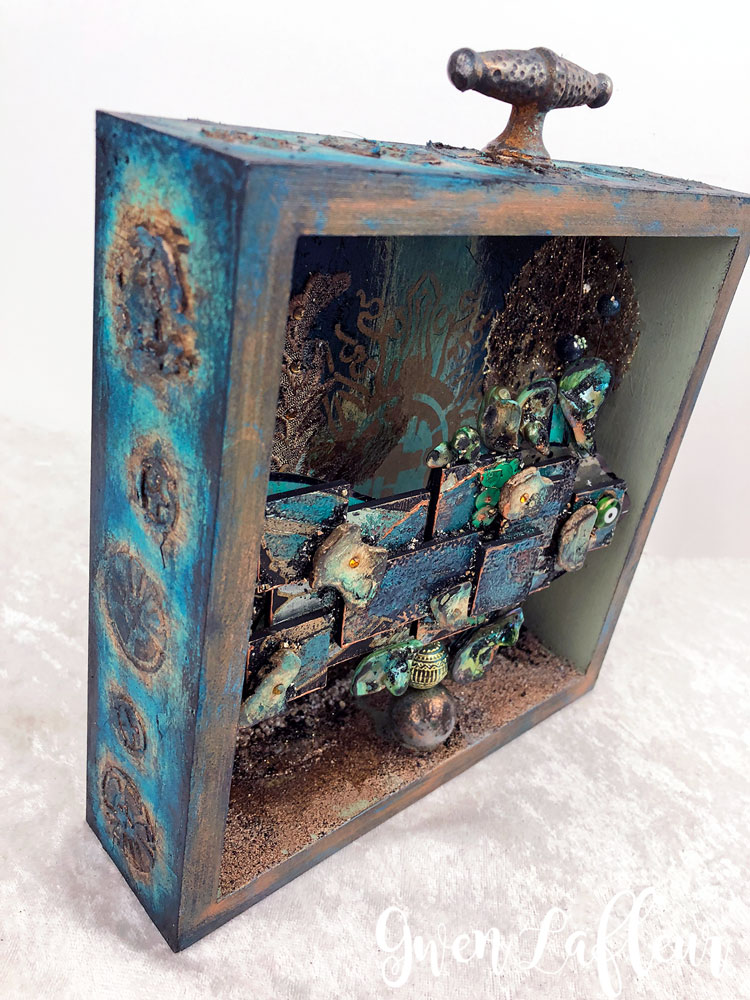
Voilà! My finished layered and stenciled cubist-esque boho fish shadowbox (that's a mouthful! lol.) Here are a few more photos so you can see some of the details:
Voilà! My finished layered and stenciled cubist-esque boho fish shadowbox (that's a mouthful! lol.) Here are a few more photos so you can see some of the details:
Thoughts, questions, or comments?
|
|
You might also like...