Over the last few years I've been working a lot with the idea of making 3D sculptures based on stencil designs; my original idea started with inspiration from a class I took at a Create retreat in 2014 as well as some old grade-school art class techniques, but I've slowly been evolving my process as I find new supplies and tools and get more experience in this area.
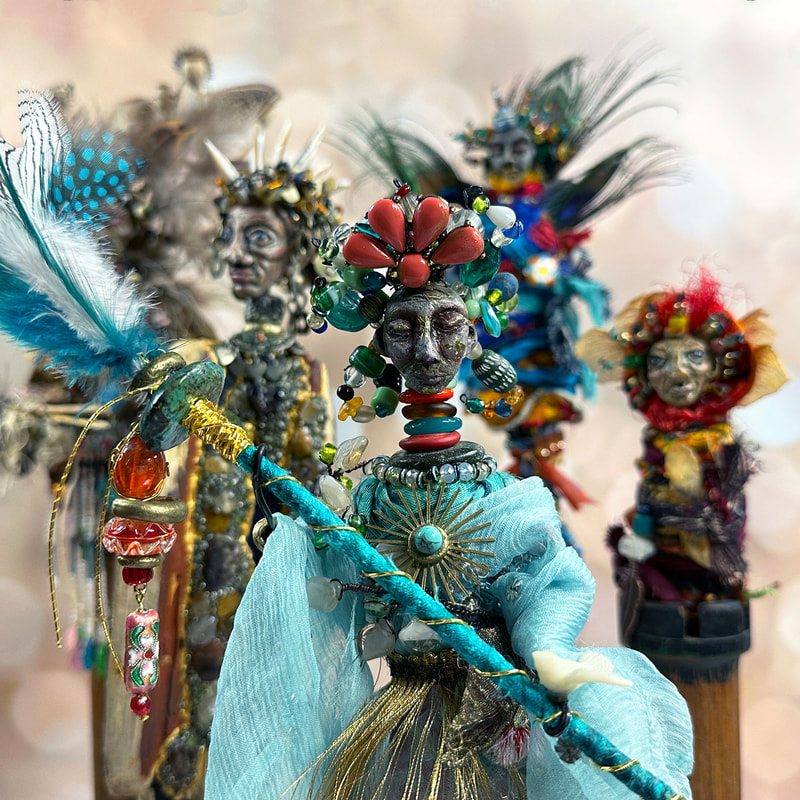
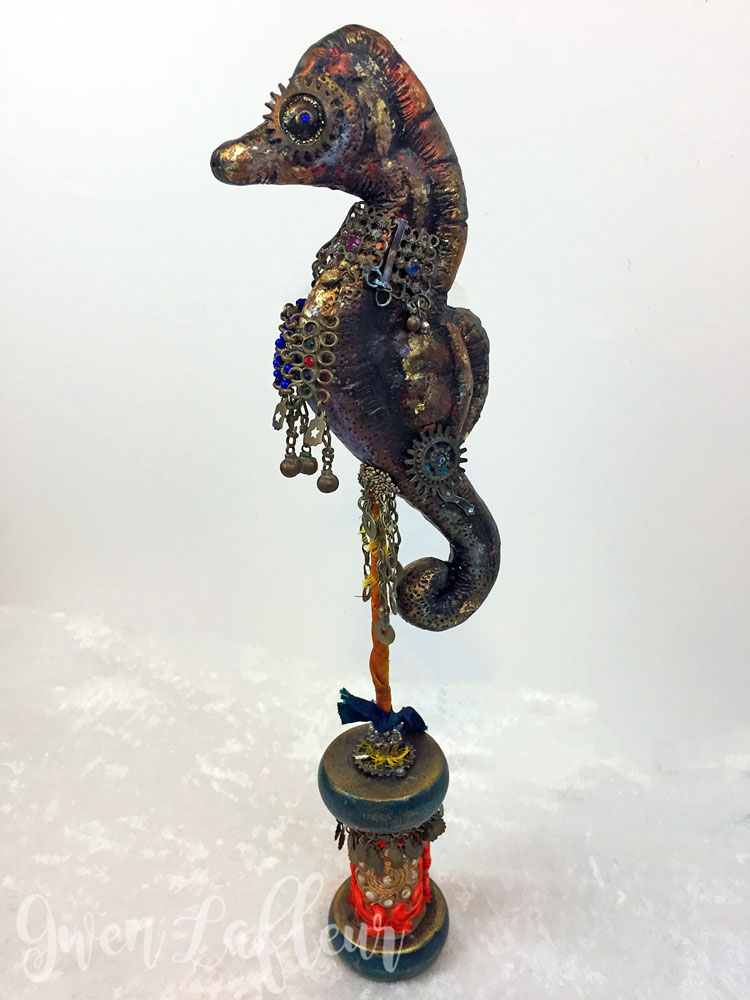
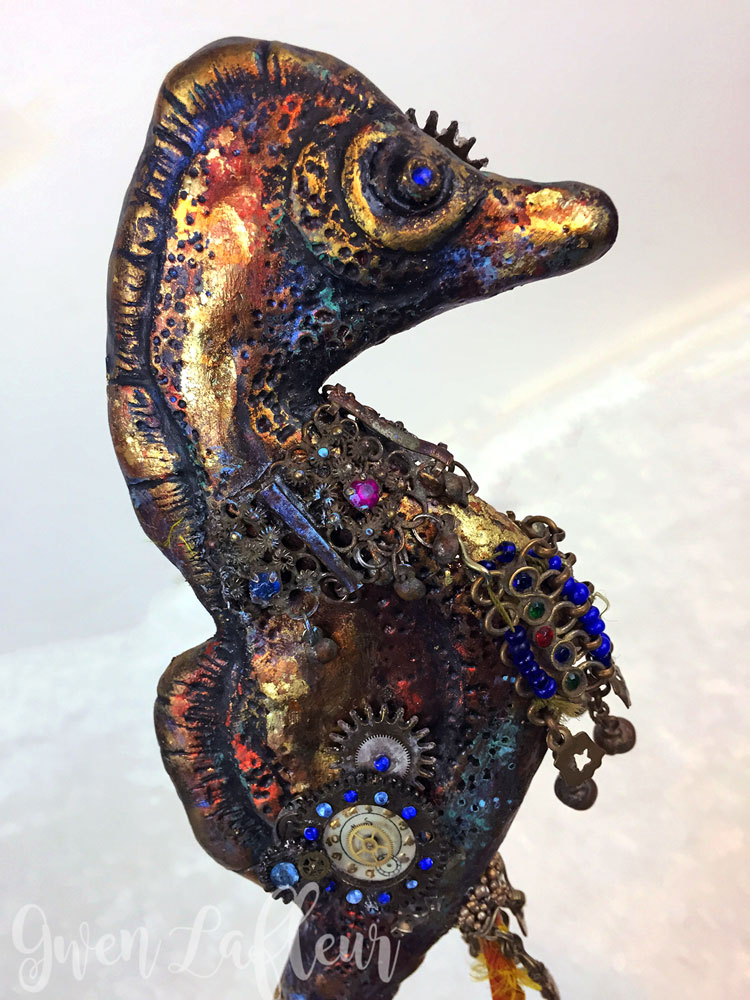
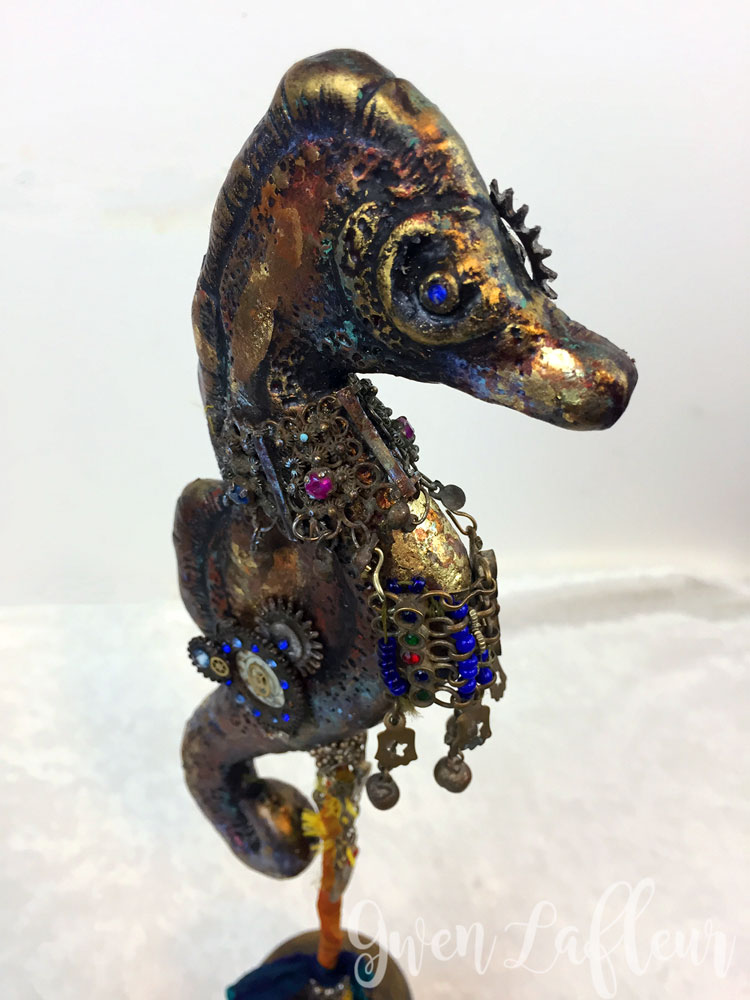
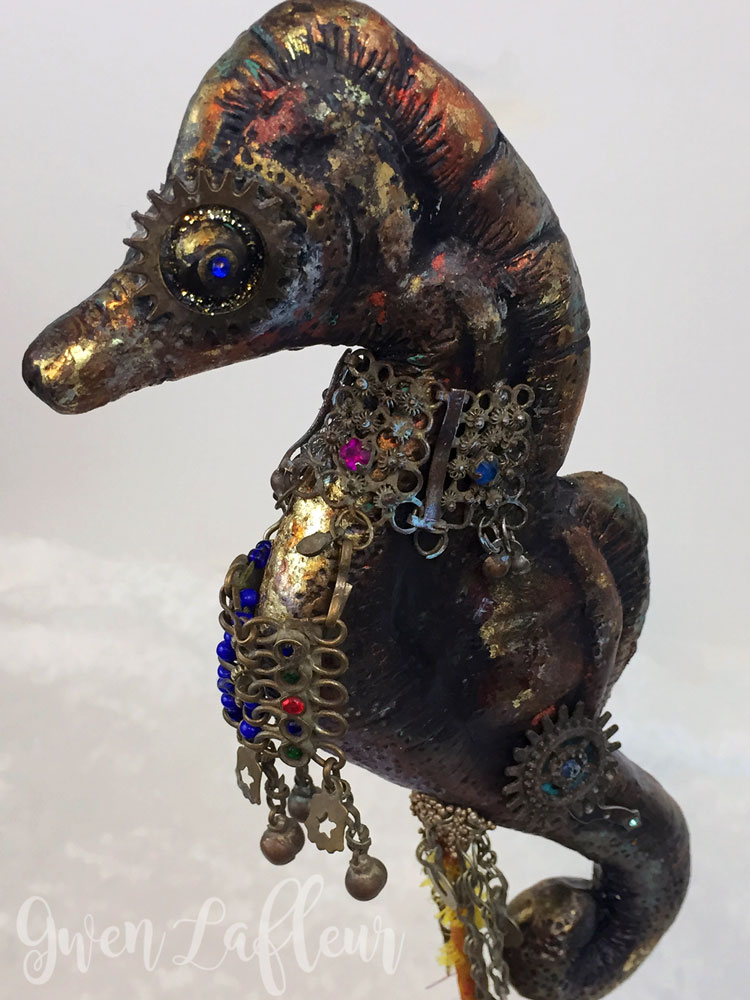
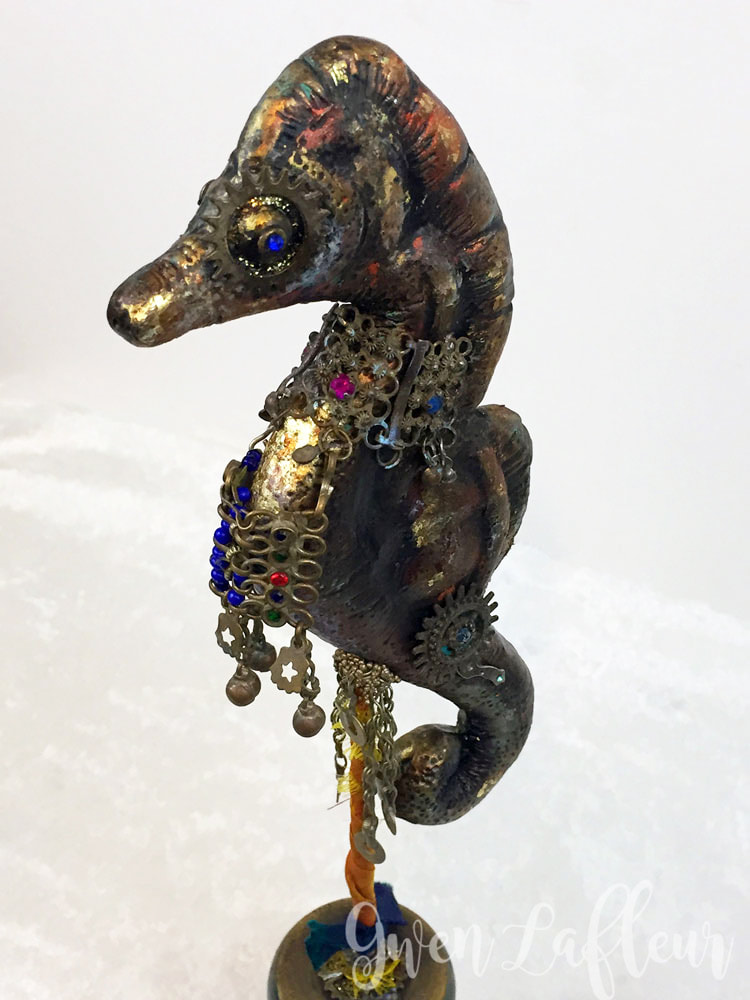
For this piece I found myself returning to my fondness for sea creatures and created a steampunk-esque seahorse sculpture.
For this piece I found myself returning to my fondness for sea creatures and created a steampunk-esque seahorse sculpture.
I don't have a full tutorial for how this piece came together (I'll probably offer it as a class at some point,) but I took a few photos along the way so I could share a general overview of the process.
I started with the Seahorses stencil by June Pfaff Daley and inked it onto cardboard, then cut out the general shape.
I started with the Seahorses stencil by June Pfaff Daley and inked it onto cardboard, then cut out the general shape.
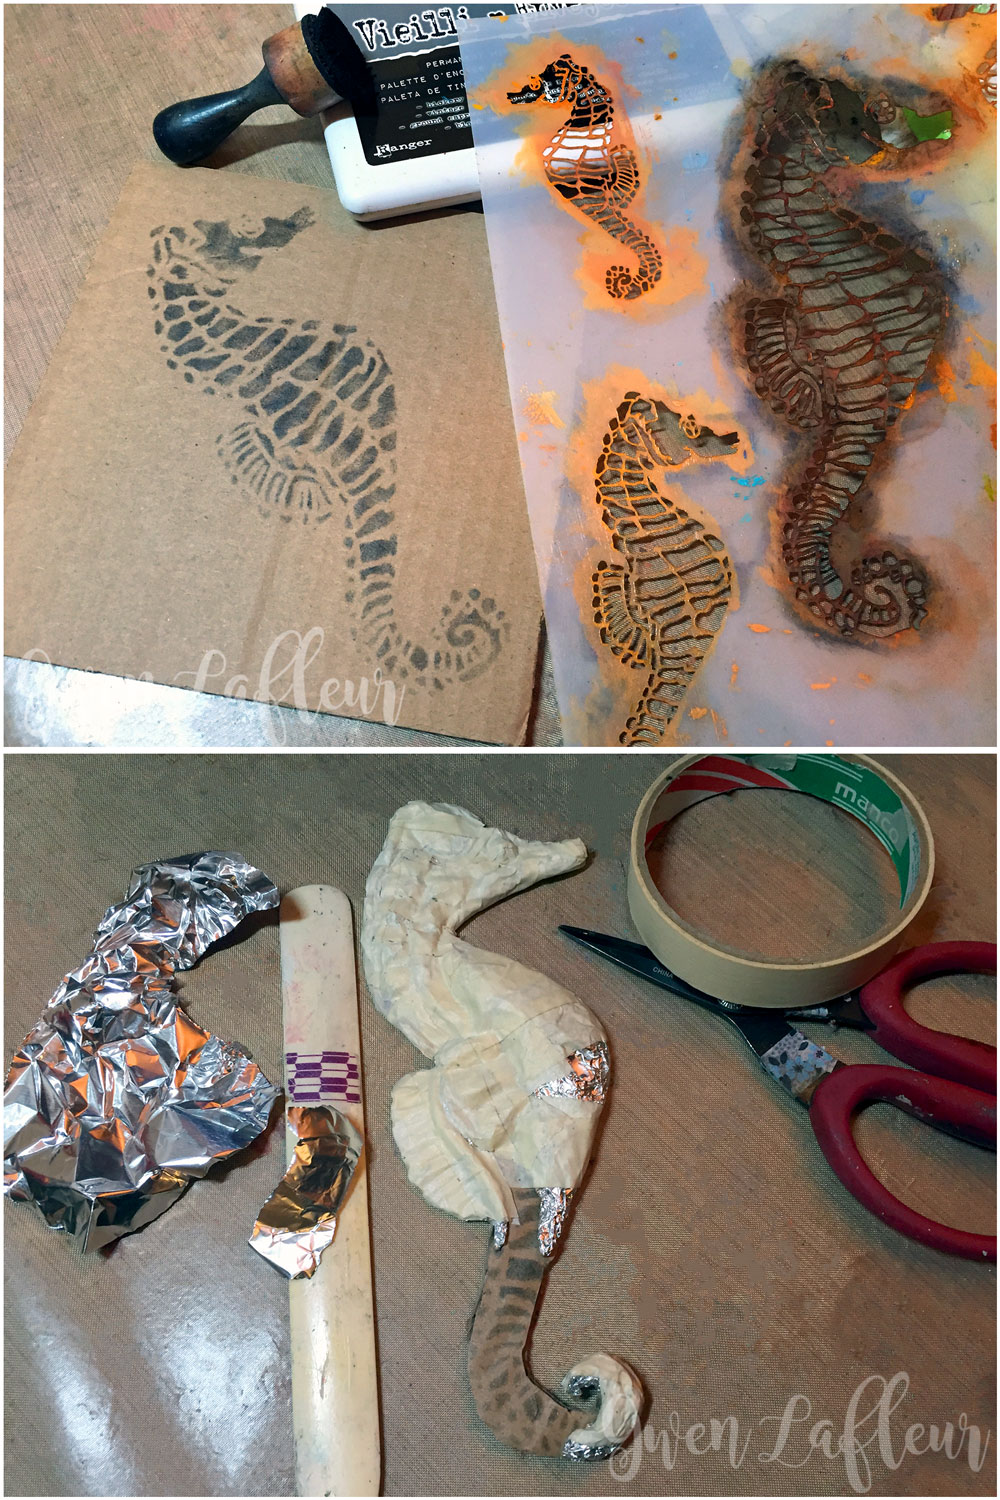
To build the armature I used aluminum foil and masking tape; I've found that the tip of a bone folder is really helpful for molding some of the details. When the armature was finished I covered it with Aves Apoxie Clay and then once the clay was no longer water soluble I went back in and added details. While the clay was still workable, I made sure to insert a wood skewer so that the figure could be attached to a base later. From there I let the whole thing cure overnight.

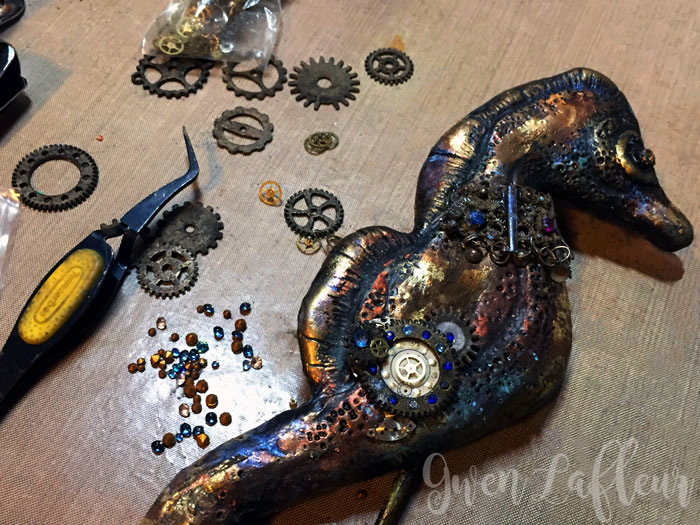
Once it was cured, I coated the figure with gold gesso and then started adding layers of paints and washes as well as some waxes and gold leafing until it looked the way I wanted it. Along the way, the piece started to take a very metallic and steampunk-esque turn, so I decided to keep going in that direction.
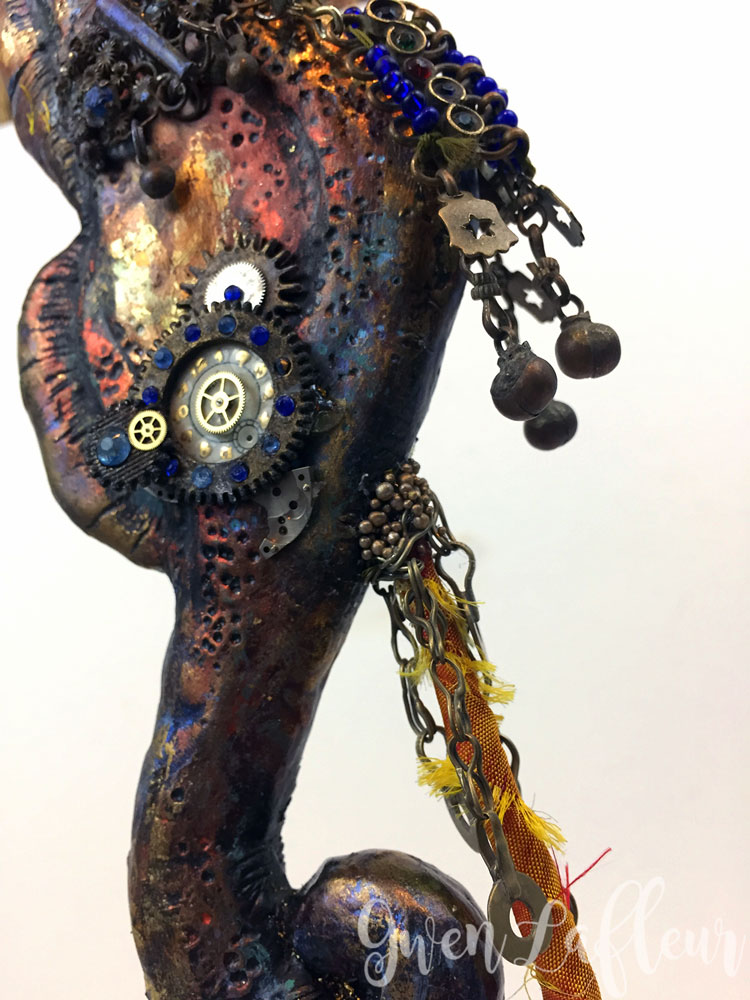
When all of the paint was dry, I brought in more steampunk details by adding some metal gears that I aged in Jax solution as well as some old watch parts and vintage watch faces. I also inserted some vintage rhinestones to tie in with the broken Turkmen bracelet piece I had added as a collar.
When all of the paint was dry, I brought in more steampunk details by adding some metal gears that I aged in Jax solution as well as some old watch parts and vintage watch faces. I also inserted some vintage rhinestones to tie in with the broken Turkmen bracelet piece I had added as a collar.
At this point I still felt like the piece needed something, so I pulled out my collection of broken Turkmen jewelry (which is admittedly large and also pretty fabulous,) and started searching for the perfect finishing pieces.
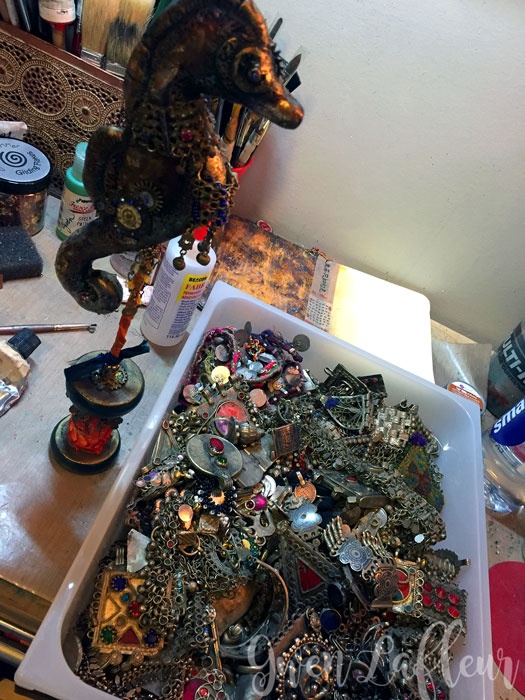
I found a few pieces of broken chains and the absolute perfect section of another bracelet to attach to the collar as a kind of pectoral piece. That was the exact detail it needed to feel finished.
For the base I added a bit of sari yarn around the skewer and inserted it into a vintage wooden spool that I'd glazed, waxed, and accessorized with some embellished sari trim and more broken jewelry parts. (The skewer is held in place with more Apoxie Clay.) On the post, I added more chains and some bronze microbeads to cover the join with the sculpture. (And let's face it... I really just wanted an excuse to add more bling!)
I'm really pleased with how the entire piece came together - it's one of my favorite sculpted pieces to date. Here are some more photos so you can see details of the finished piece (click on any of the images to see the full photo):
Eventually I plan to create an entire series of sculpted animals - the themes and embellishments may vary, but I'm picturing quite the menagerie!
Thoughts, questions, comments?
|
|
You might also like...