|
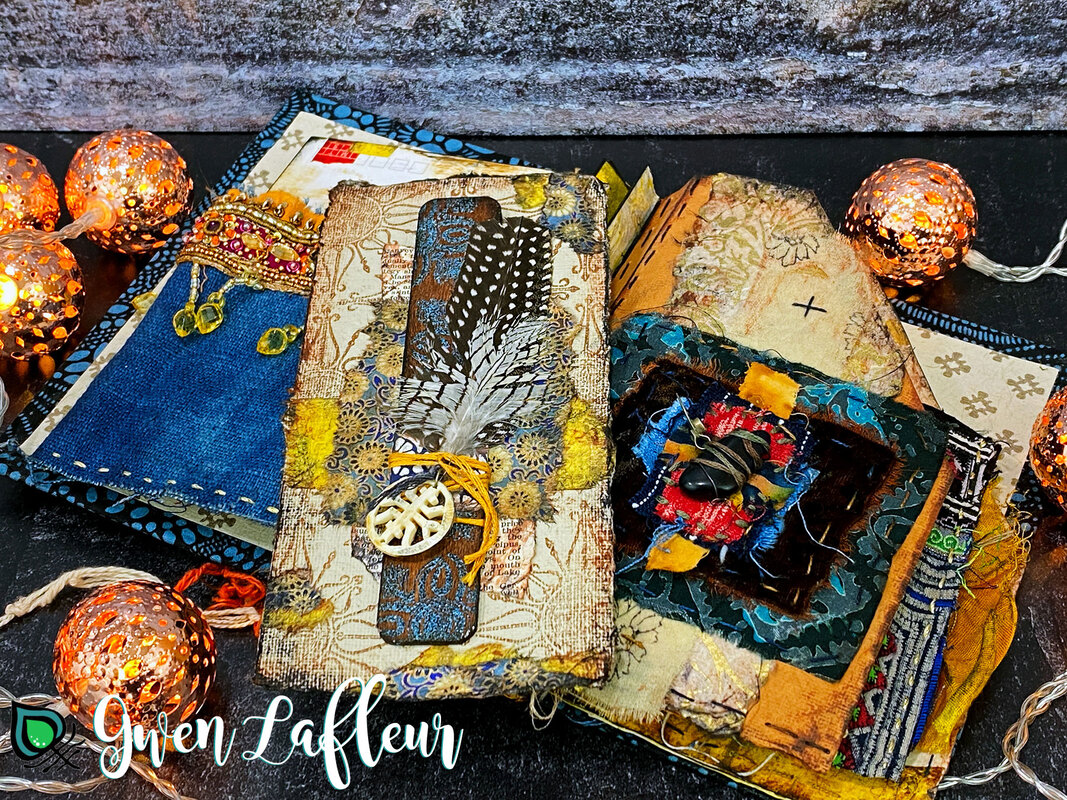
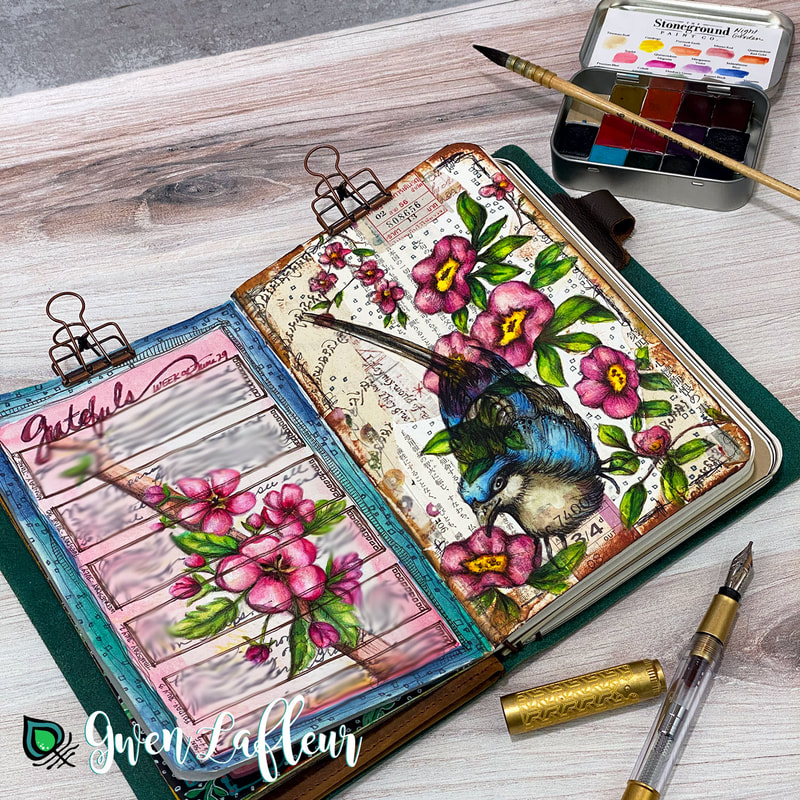
It's been a while and my poor blog has been neglected, but that doesn't mean things haven't been just as busy, if not more so, than ever! Today I want to highlight my latest free tutorial on the StencilGirl blog as well as two upcoming online class opportunities (which will be my last classes in 2021.) First up, 5 Step Collage Fodder... with stencils! 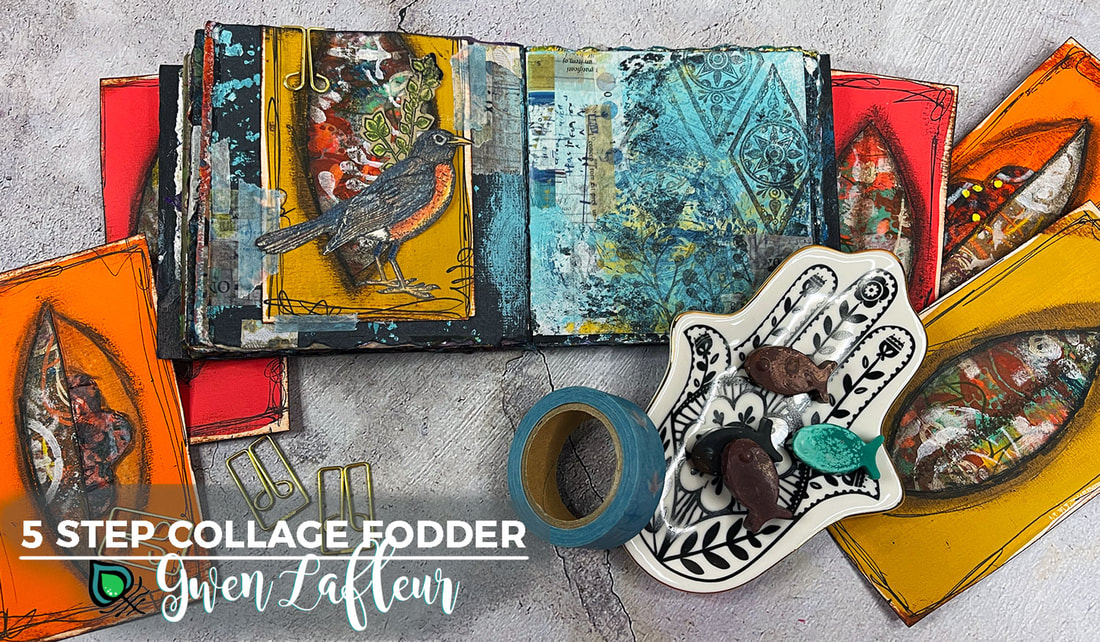 In my latest Paint & Texture column on the StencilGirl blog, I'm sharing how I used paint with my stencils for 5 quick and easy steps to collage fodder. I'm also showing how I used my resulting pieces to complete this fun mini art journal spread. Second, I have a stand-alone live online class coming up this Saturday, October 23rd. Wrap & Roll is happening in partnership with my local store, Artistic Artifacts. The pre-class video is already done and archived in group, but there's still time to join in for the class! 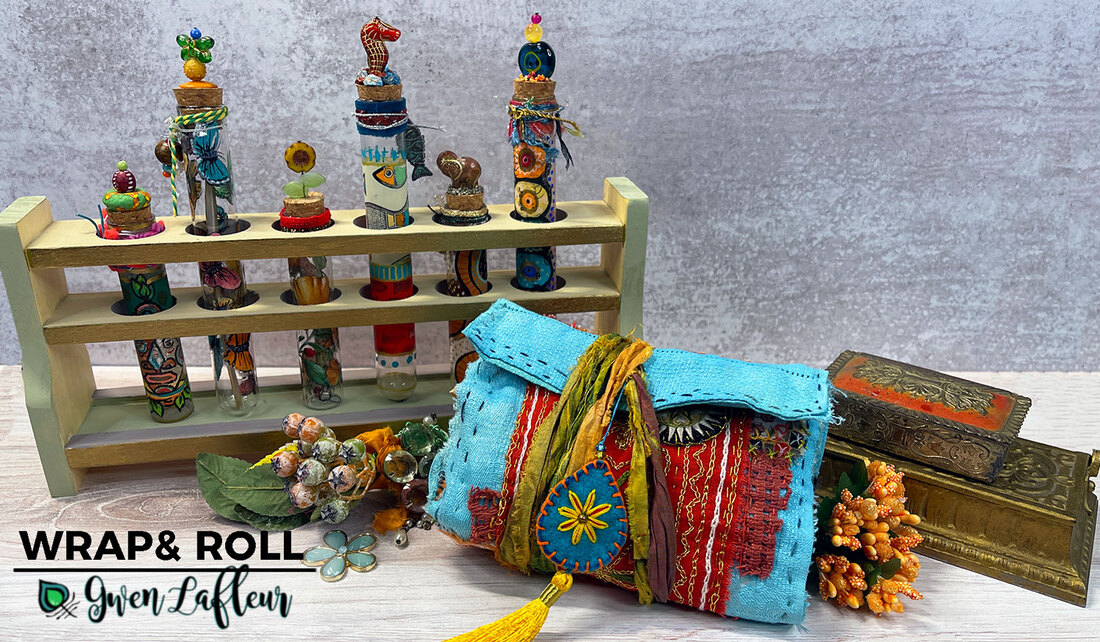 Registration will be close before the live class begins on Saturday. If you can't make the live but are interested in the class, be sure to sign up - the videos will both be archived and available indefinitely, but as of right now there are no plans to allow signups after the class has begun. There are lots of fun ideas and techniques, so I hope you'll join us! Class is Saturday, October 23rd at 1pm eastern time. Last but definitely not least, I'm excited to be one of the participating artists in Gratitude Junk Journal 2021! This is a great opportunity to join in and learn from 14 different artists as we share how we document things we're grateful for in our art journals (plus, you'll learn how to turn an ordinary notebook into a fab junk journal!) Here's a peek at all of the amazing artists participating in this year's class: 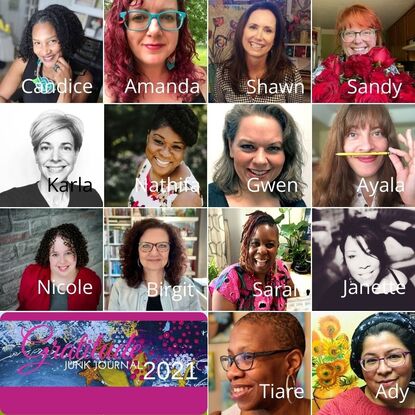 And... a little sneak at the project that I'm sharing in my lesson (which is almost an hour long!) 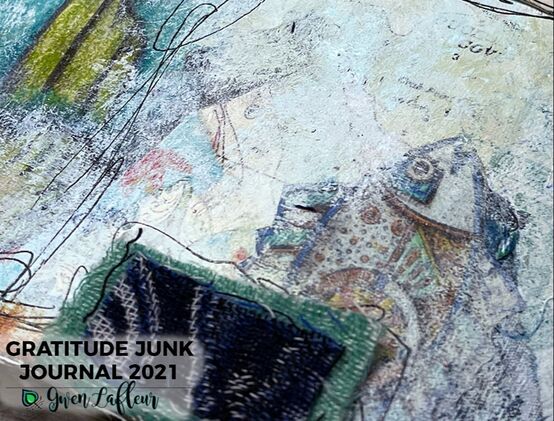 Need a little extra incentive? The course is only $69 to start, but if you sign up between now and October 31st, you can get 20% off when you use the code JOY2021 at checkout.
0 Comments
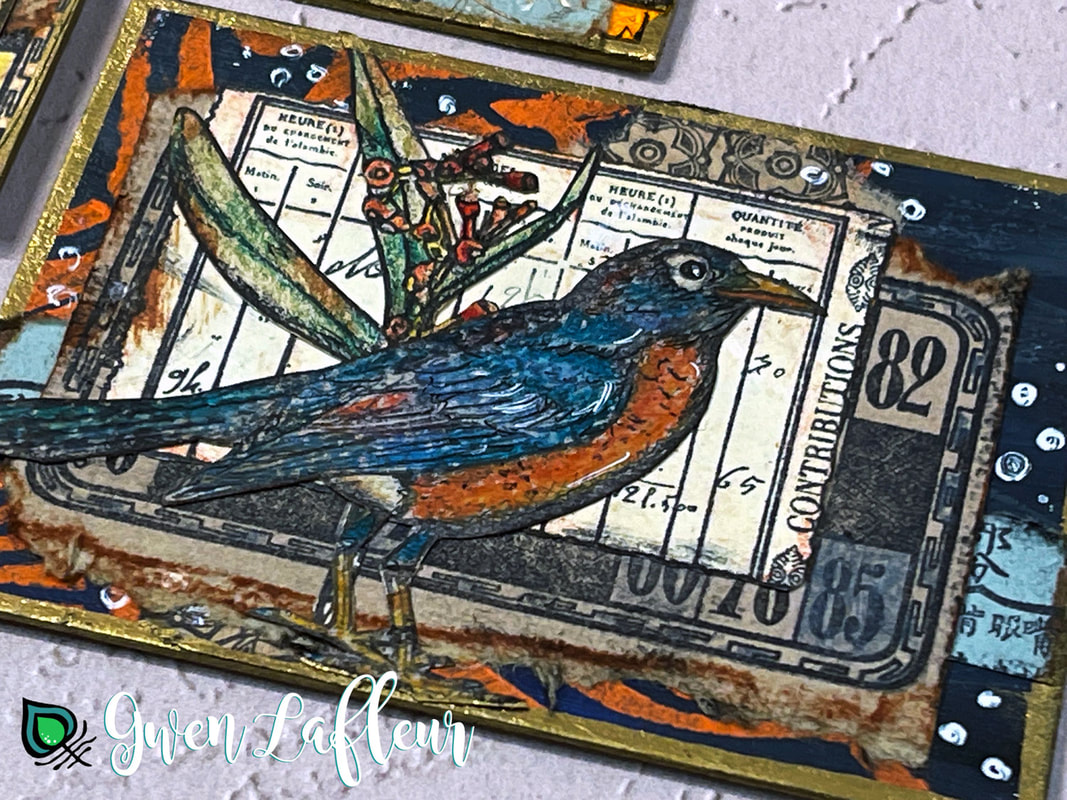
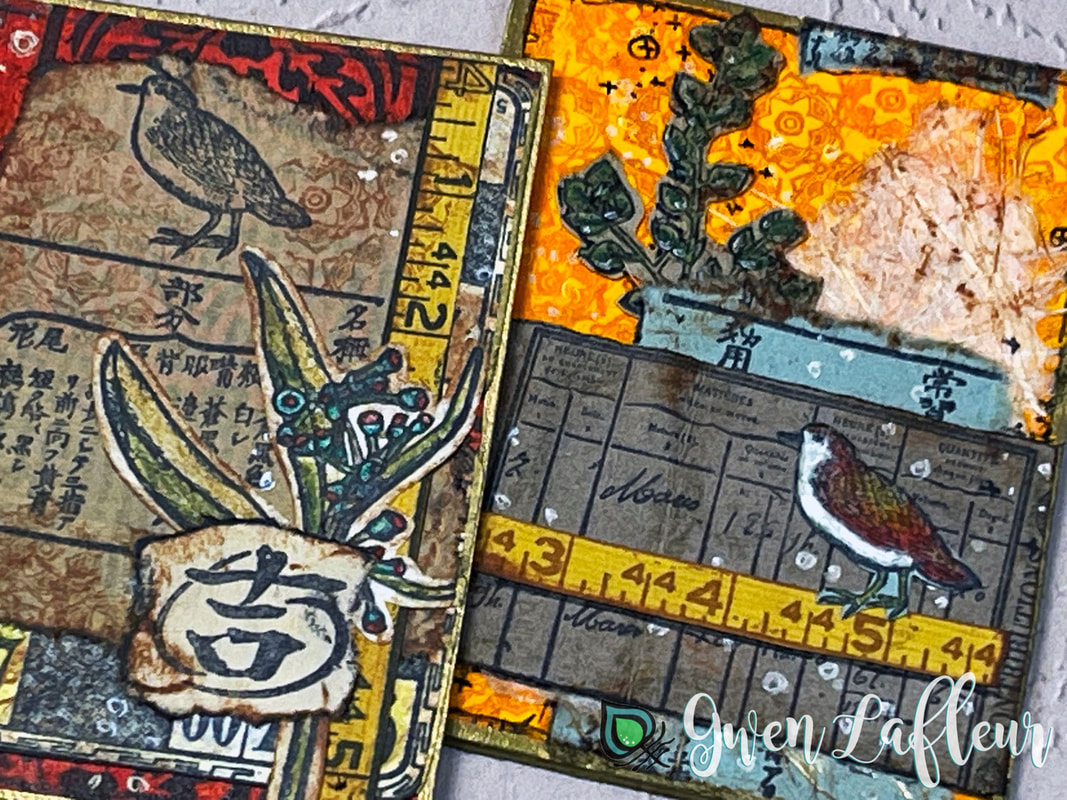
I'm excited to have two fun announcements to share today! First up, I'm thrilled to have three more deeply etched rubber stamp sets from PaperArtsy now available... EGL19, EGL20, and EGL21. 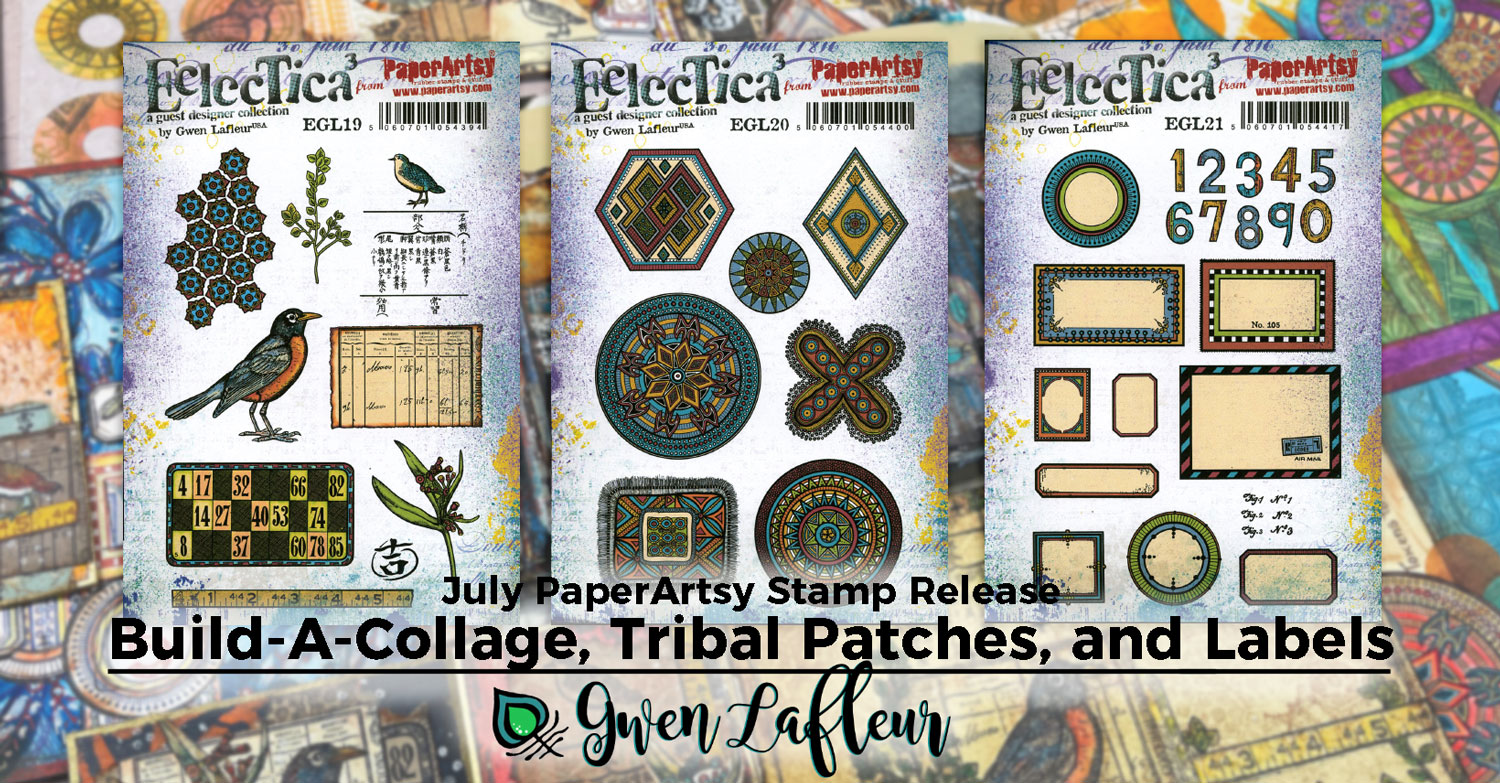 EGL19 is my Build-A-Collage - Birds set... I designed this with the idea that you could have all of the elements you need in a single stamp set to create collaged ATCs, cards, tags, or mini journal spreads. Or you have some quick and easy elements that you can mix in with other projects (like my tutorial projects that were part of this release.) I spent a few hours stamping on a variety of papers and then coloring and cutting them out, and now I have a little container full of pieces that I can draw from and quickly add into my projects. I used those prepped pieces to make three ATCs in just 30 minutes! 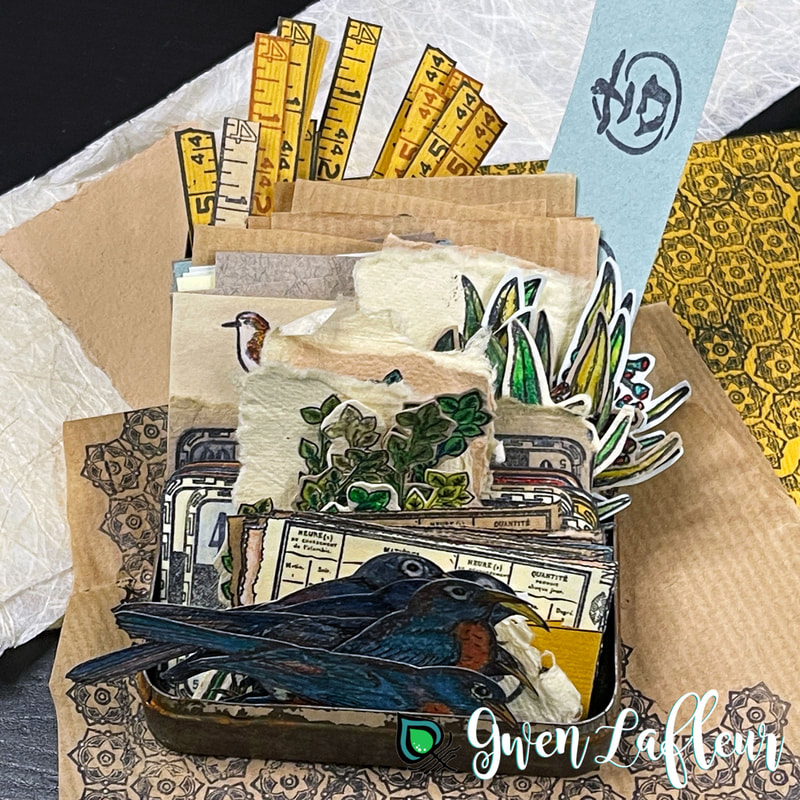
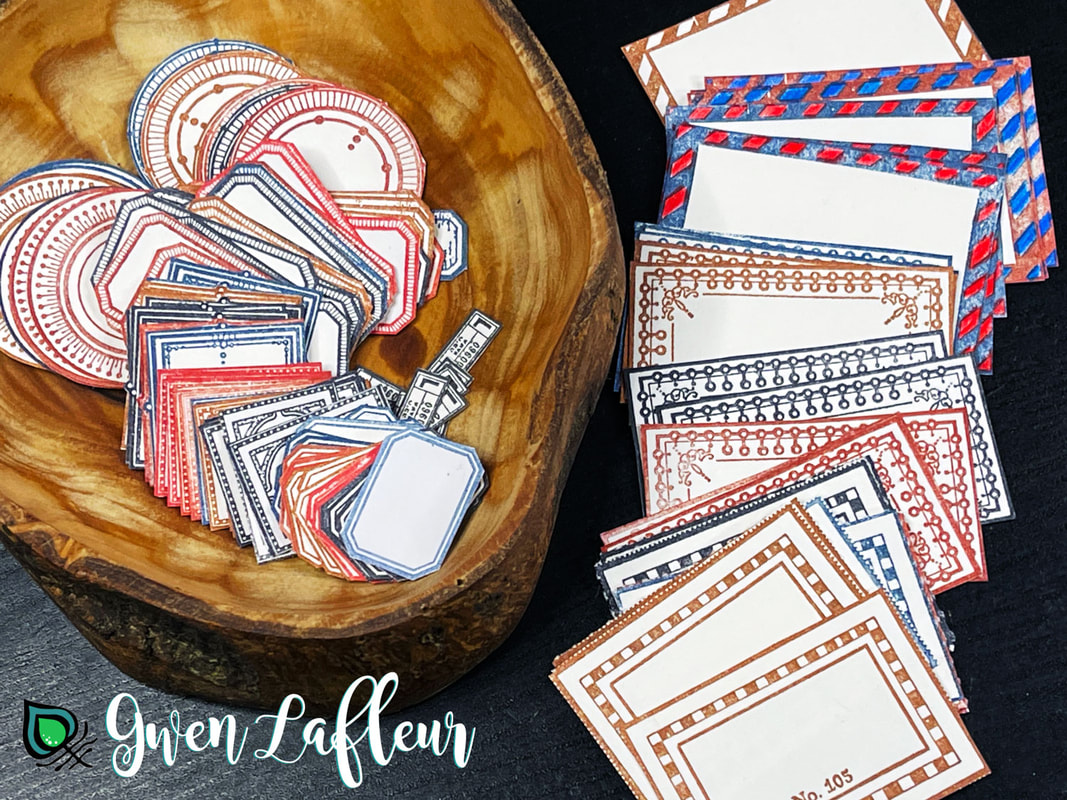
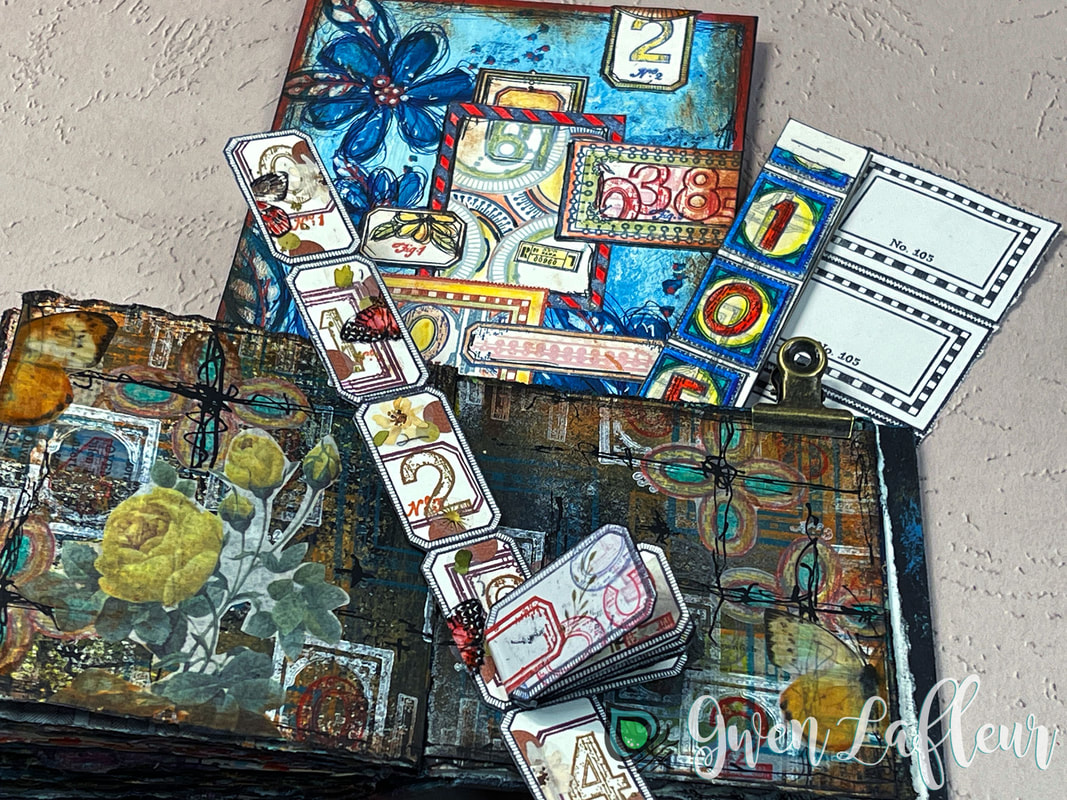
My EGL20 set is my "Tribal Patches" set and was inspired by beaded and embroidered Kuchi patches from Central Asia, Banjara patches from India, and Hmong stars from Thailand. I thought it would be wonderful to have those beautiful patterns and the sense of detail without the bulk for when I want to work in a journal or other flat projects. 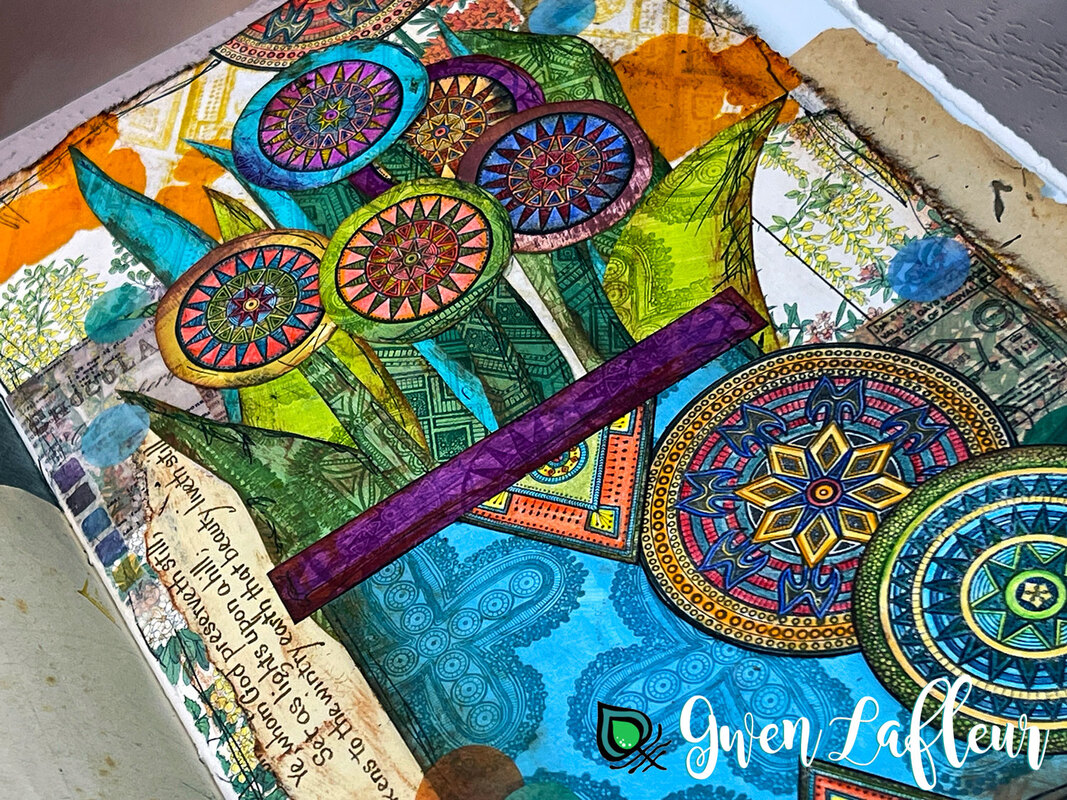 EGL21 is the last set for this release and it's my Labels & Numbers set. This is the latest addition to what I call my "Gwenified" basics... super versatile shapes and images that can be used in lots of ways but with my own personal flair added in. I love just having a whole bunch of stamped and cut labels at the ready and, as you can see, I went a bit nuts with the samples for this set!
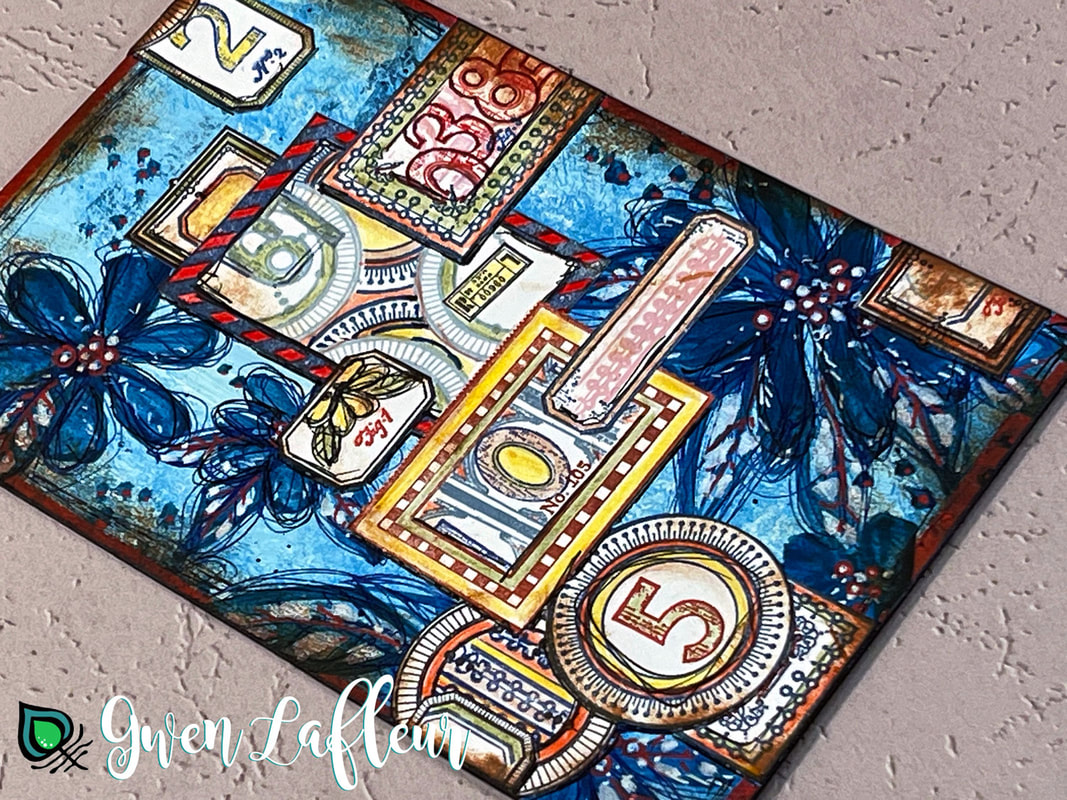
I also have two projects combining all three sets and each of them has a photo tutorial over on the official release post on the PaperArtsy blog.
That's it for the stamp release... I hope you're as excited to use these as I am! And don't forget to head over to the PaperArtsy blog for the full release with more background on each set, more photos, and the two project tutorials. Next up is the announcement for my latest online workshop, Bits & Pieces. This will be a live online class in partnership with Everything Scrapbook & Stamps, so if you're interested, make sure to sign up in advance... you can watch the class on replay if you can't join live (as often as you want!) but registration will close before the live begins. 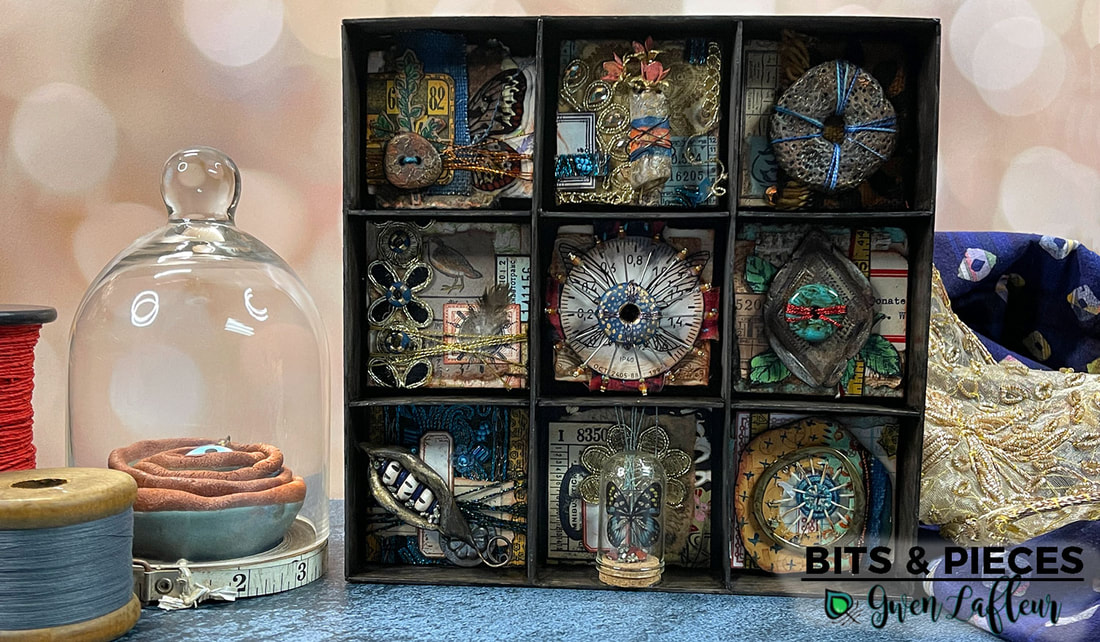 Bits & Pieces will be held on Saturday, August 7th at 1pm eastern time. (Or, go straight to registration.)
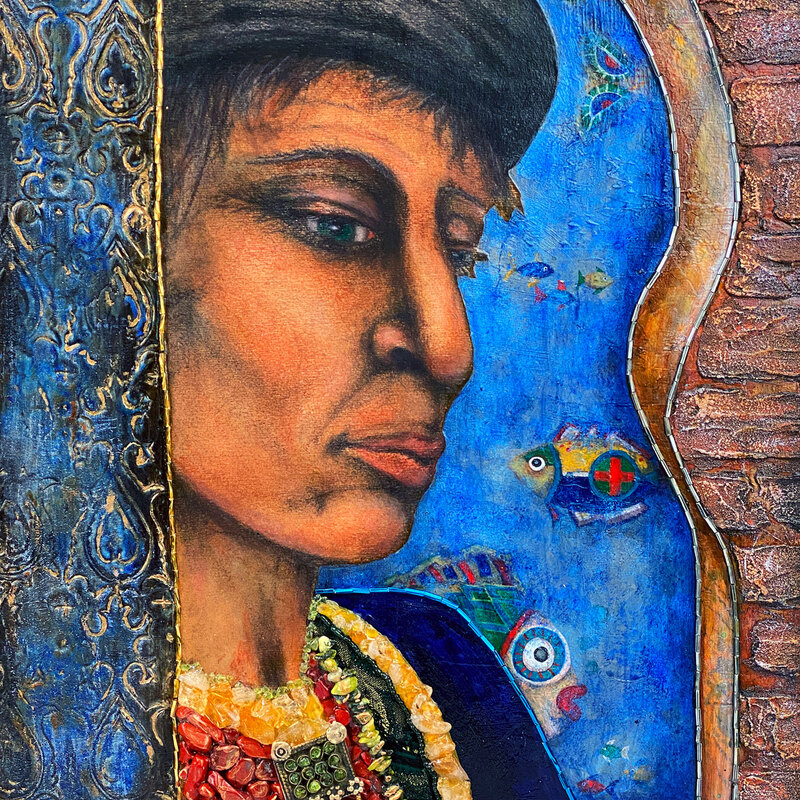
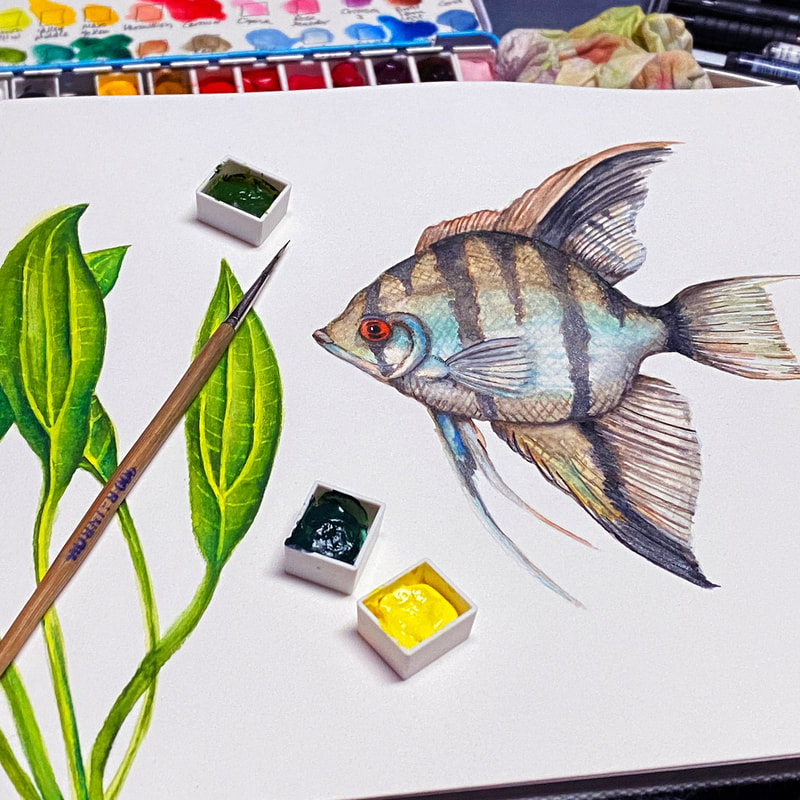
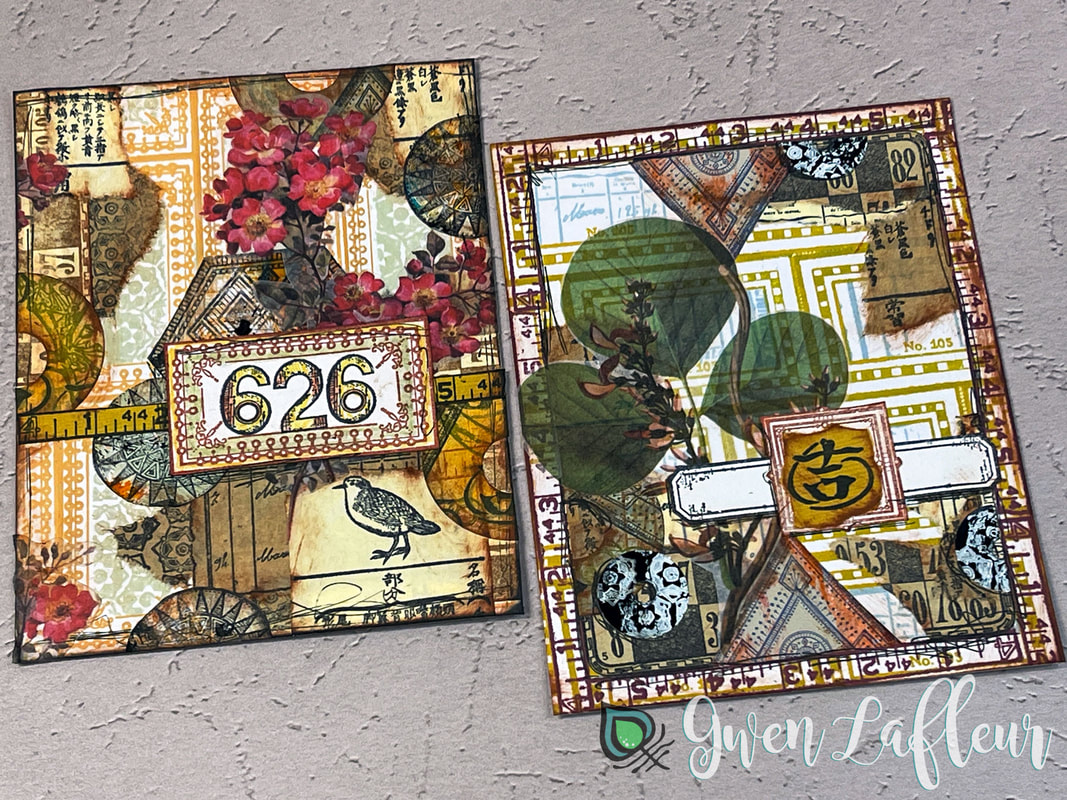
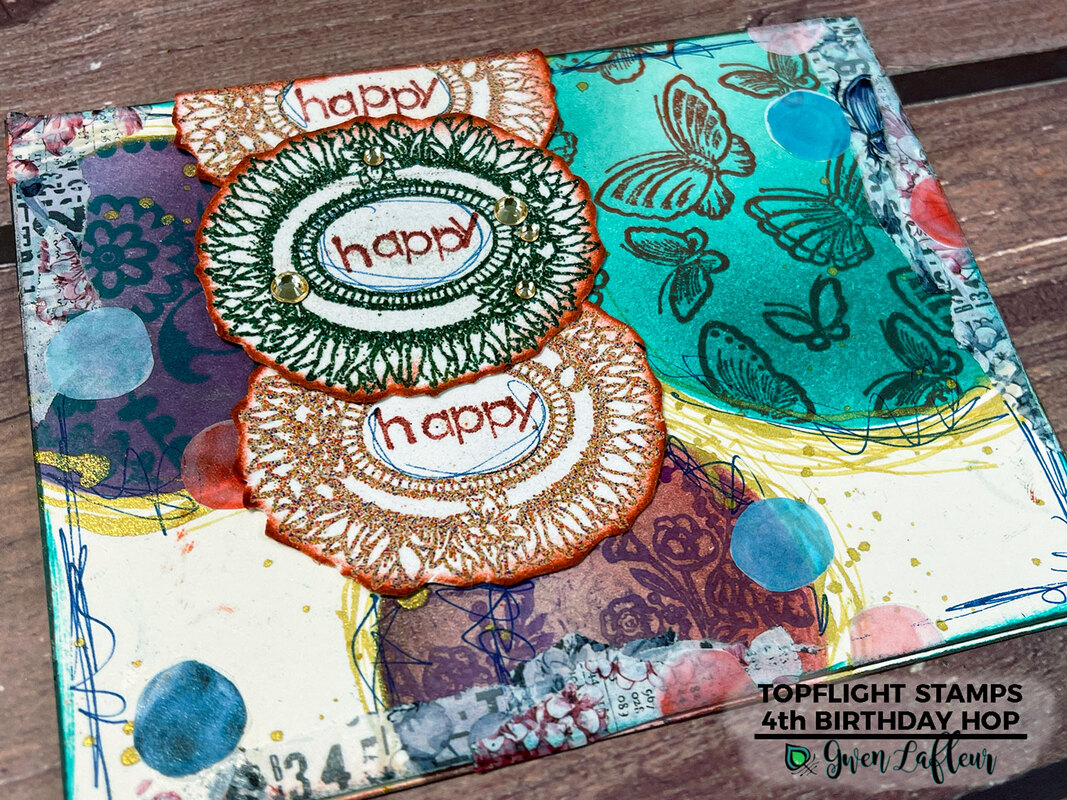
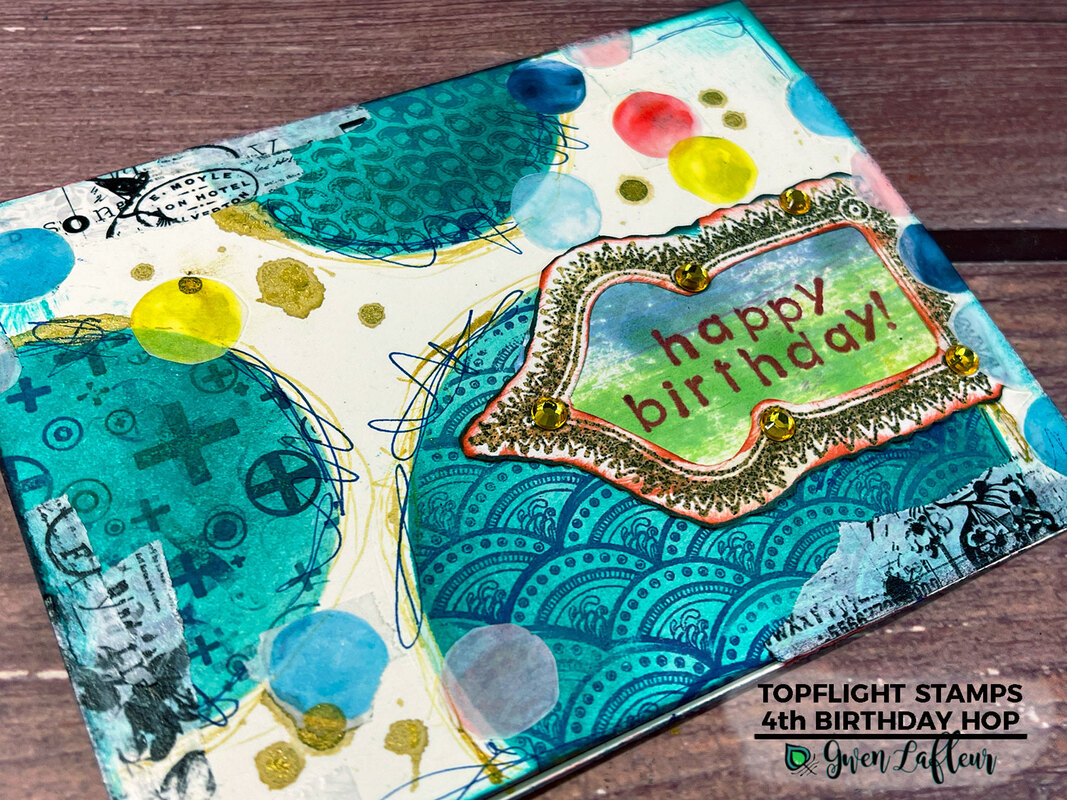
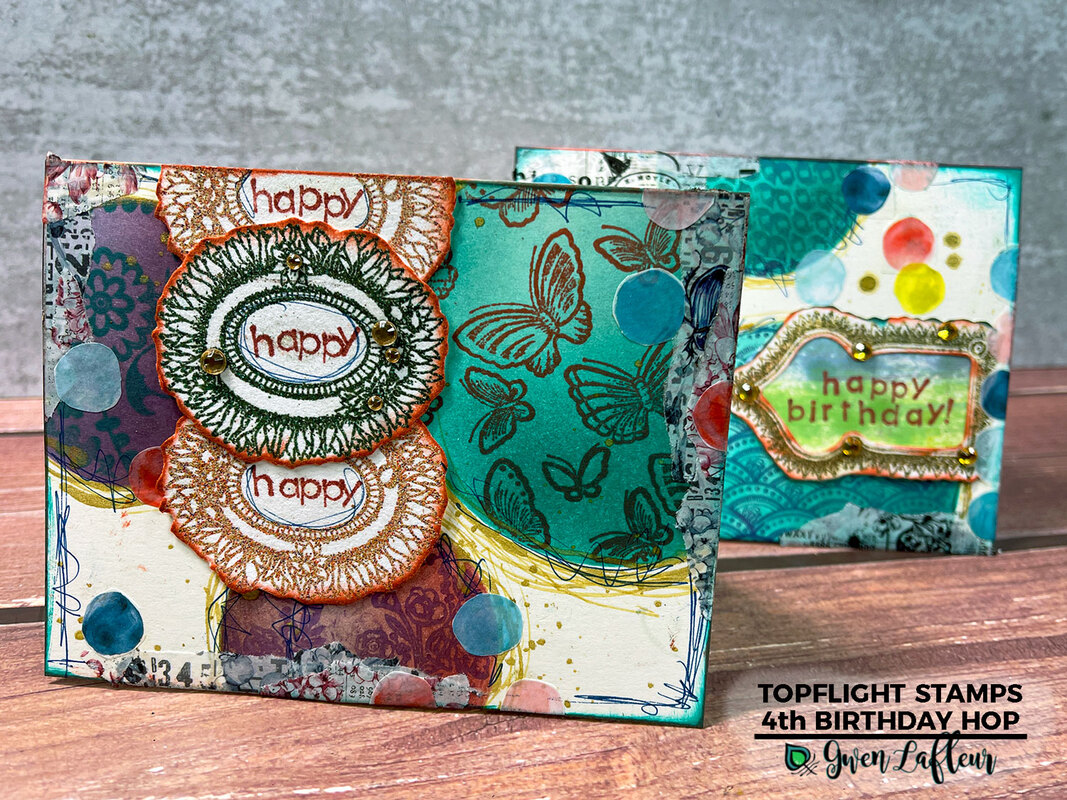
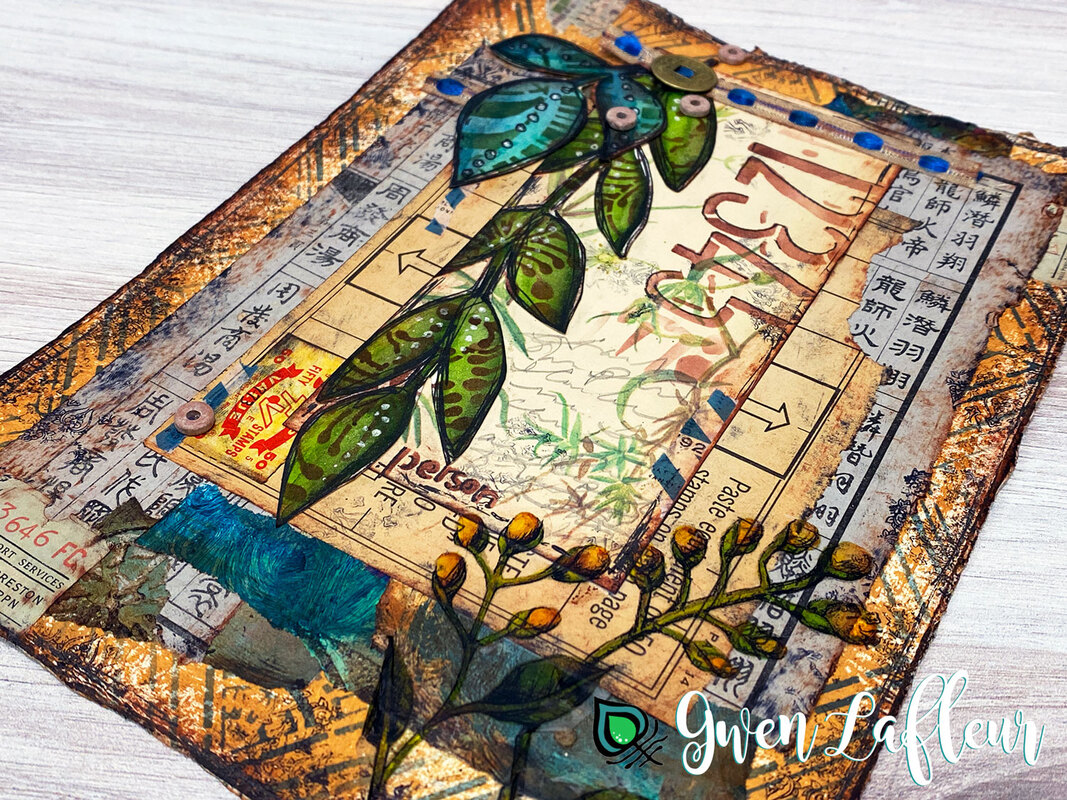
 Just popping in with a heads up that my most recent quarterly Paint & Texture column on the StencilGirl blog is live today! This month I'm sharing how you can use printmaking and stencils for quick, easy, and deceptively simple layered mixed media art. Products from this project... 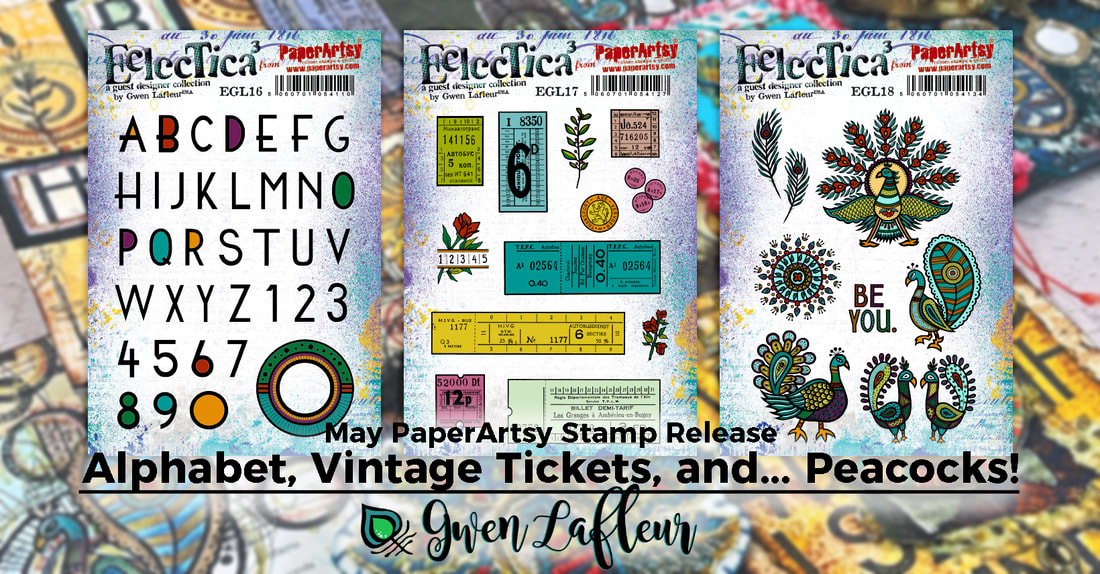 It seems like just yesterday that I was typing up the post announcing my last stamp release in February and at the same time, it feels like it's been forever that I've been waiting to share; this round of stamp designs was done and submitted for production in early December of last year. But it's finally time to let this particular cat out of the bag! This month I'm thrilled to be sharing a few super versatile new sets in my new release with PaperArtsy - an alphabet and vintage transportation tickets and accents along with, at long last, peacocks! You can see the entire reveal post with more photos of the samples, lots more background information, and a project tutorial over on the PaperArtsy blog. But in the meantime, here are a few of the things I've been working on to prepare for the big reveal. First up, a few projects using EGL16, my new hand-drawn Art Deco inspired alphabet and number set (with a great frame that works to create a monogram with any of the letters or numbers or that you can use as a design element.) I really wanted to show how you can create with just this set and still have some great versatility for making different backgrounds as well as titles. 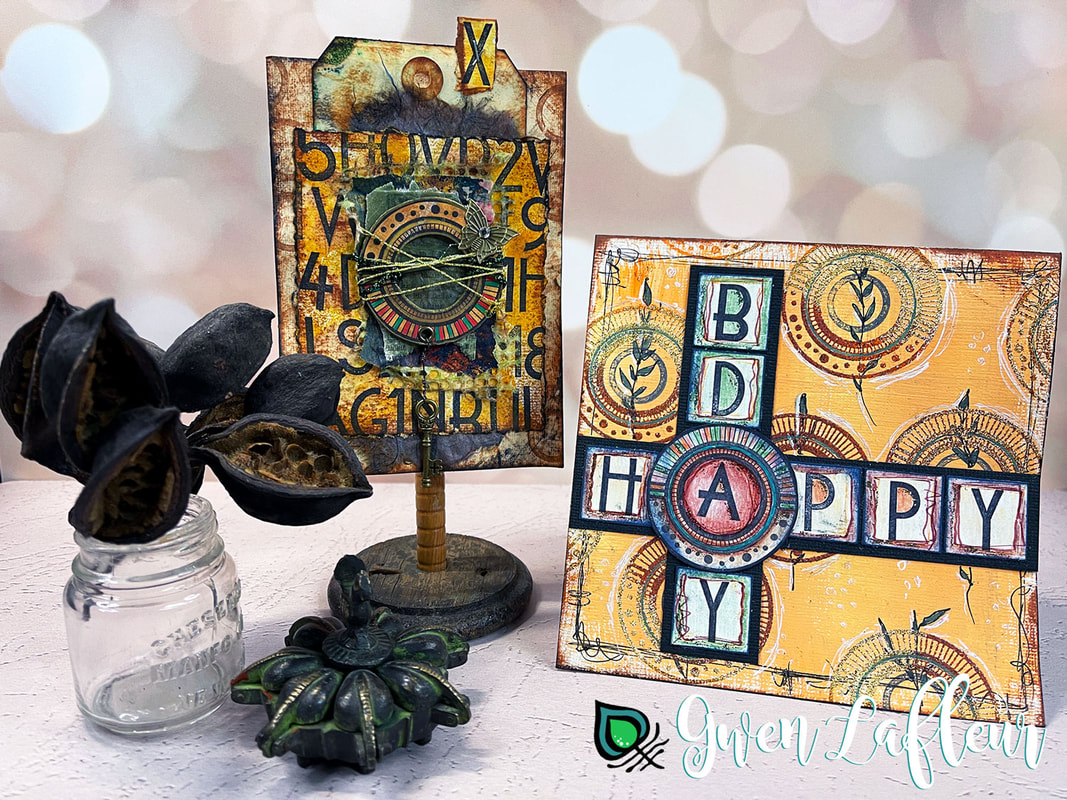 Next up is a group of stamps that I'm extremely excited about... EGL17 features 12 designs; seven of which are based on vintage or antique tickets from around the world. I pulled some of my favorite vintage and antique tickets from my collection of ephemera, specifically from countries where I've visited and ridden a train, bus, or subway, and drew my own versions. Yes, you read that right - all of the designs, down to the tiniest letters and numbers, are hand-drawn. I wanted to draw my own versions to customize them and put my own hand in each element of the set. To complement the tickets I included five accent stamps - two are registration type marks that you can layer on your tickets in a different color of ink. I added some floral elements as well which I thought would be fun embellishments on or overlapping the tickets or great elements used on their own. Think travel scrapbooking or travel journals, bullet journaling, mixed media, bon voyage cards, and more. 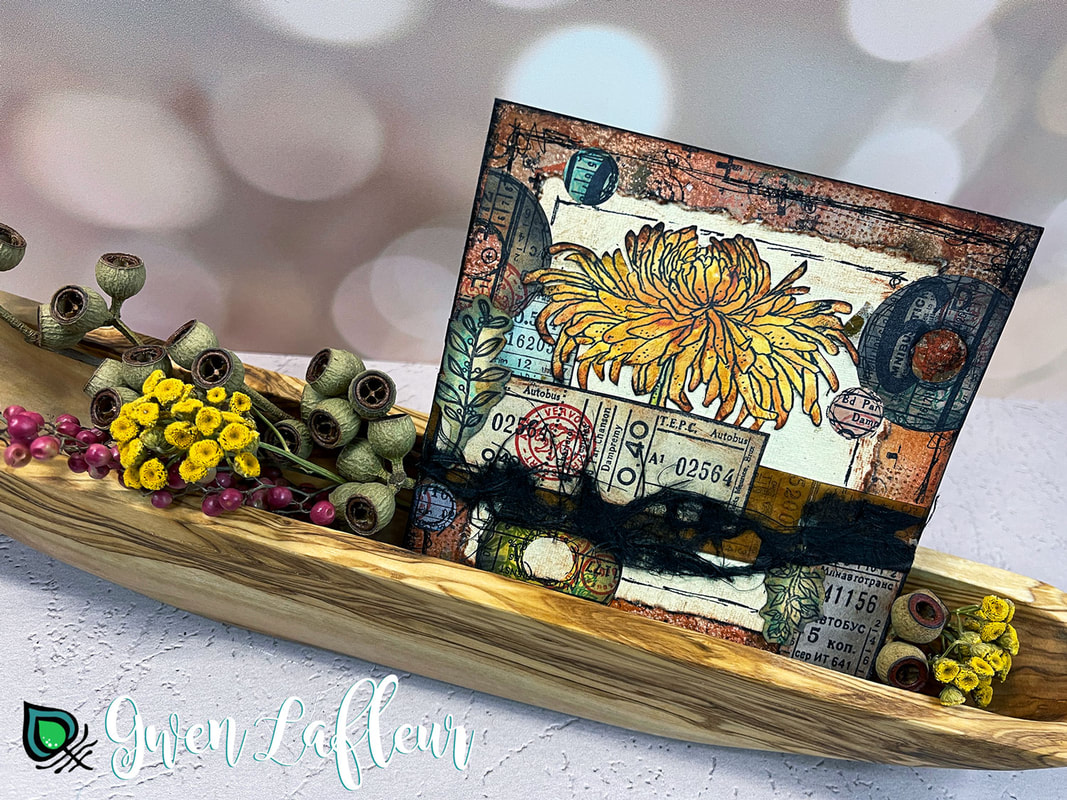 Here you can see just how realistic the tickets look when they're stamped! I also used them to make my own set of jumbo reinforcement-style stickers to create accents for some of the sample projects in this release. Those might be one of my favorite things that I've made so far. 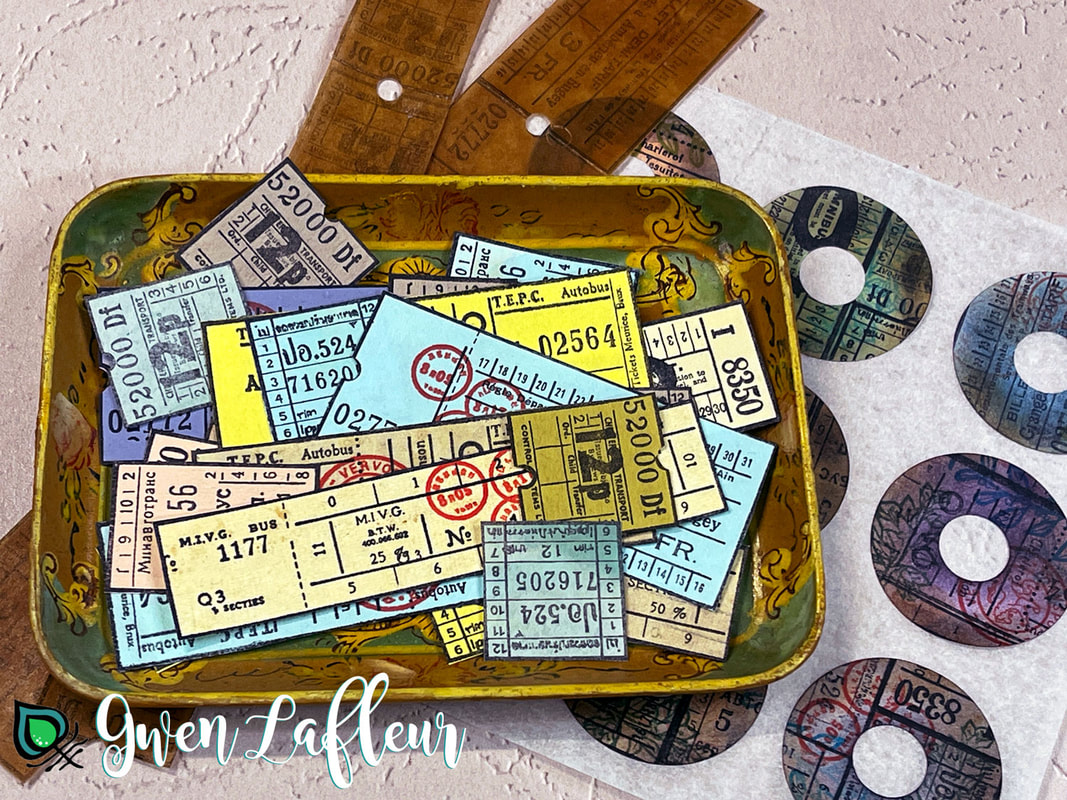 Next up, EGL18 - peacocks! I know those who know me are probably wondering what took me so long... 17 other stamp sets before the peacocks made their appearance! But I wanted to do the idea justice; I'm glad I waited. This set is based on Indian woodblock designs with my own patterns and twists added in. As you can see here, I've used them for mixed media artwork, an embroidered embellishment (which will likely end up on a journal cover,) and also a heavily embroidered and beaded piece that I turned into a brooch. 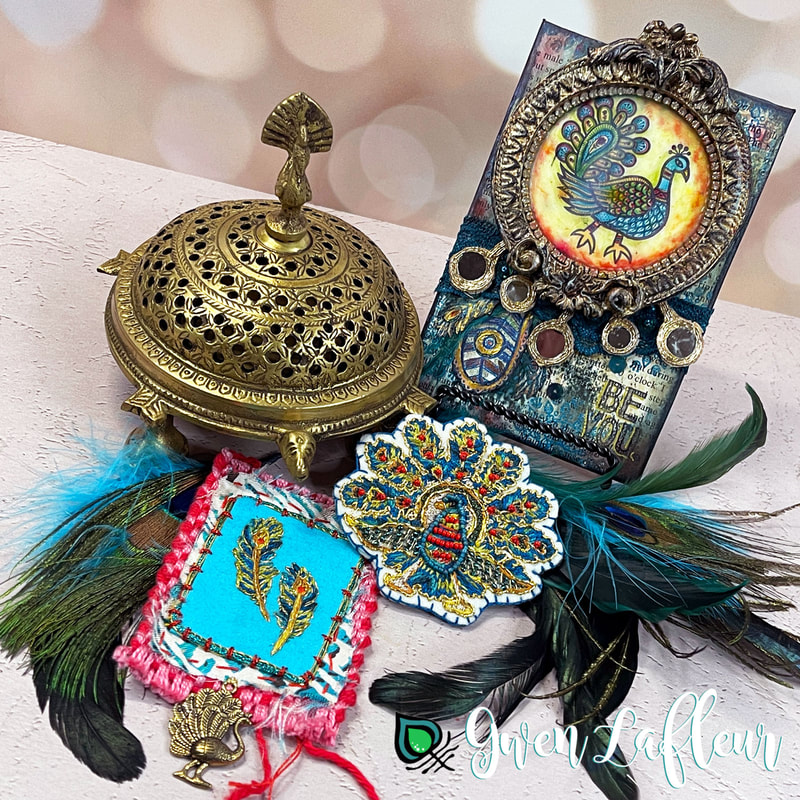 To wrap up the samples for this release I combined all three sets on these two mixed media Art Cards and put together a step-by-step tutorial (which is over on the PaperArtsy blog) to walk you through how you can create this type of project yourselves. You can translate the steps and techniques to handmade greeting cards, tags, art journal pages, or even scrapbook layouts. 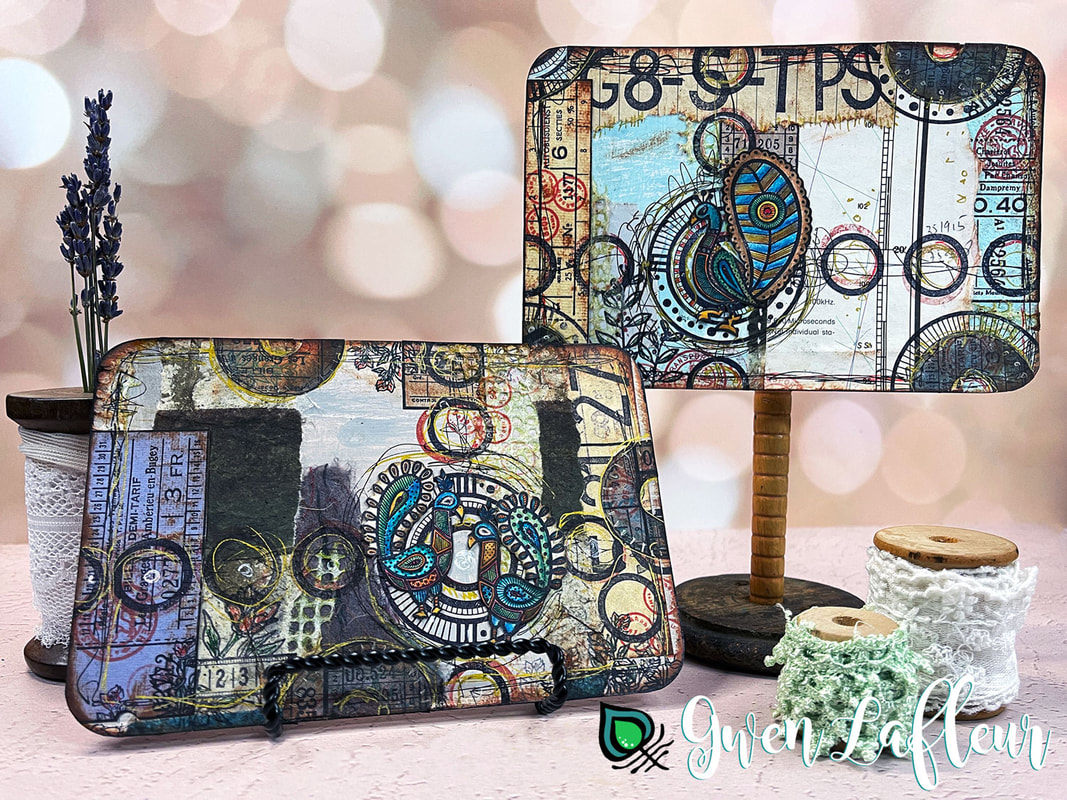 I'm thrilled with this release and the versatility of the designs as well as how well they mix in with my previous stamp sets and also with my stencil designs. I can't wait to incorporate these into upcoming workshop projects and to continue to create and share. Of course I'm doubly excited to see what you all create with these new stamps! So make sure to tag me with your creations so I can see. In the meantime, be sure to hop over to the PaperArtsy blog for my full release post as well as the tutorial for the Art Cards using all three of the new sets.  Products from this post... 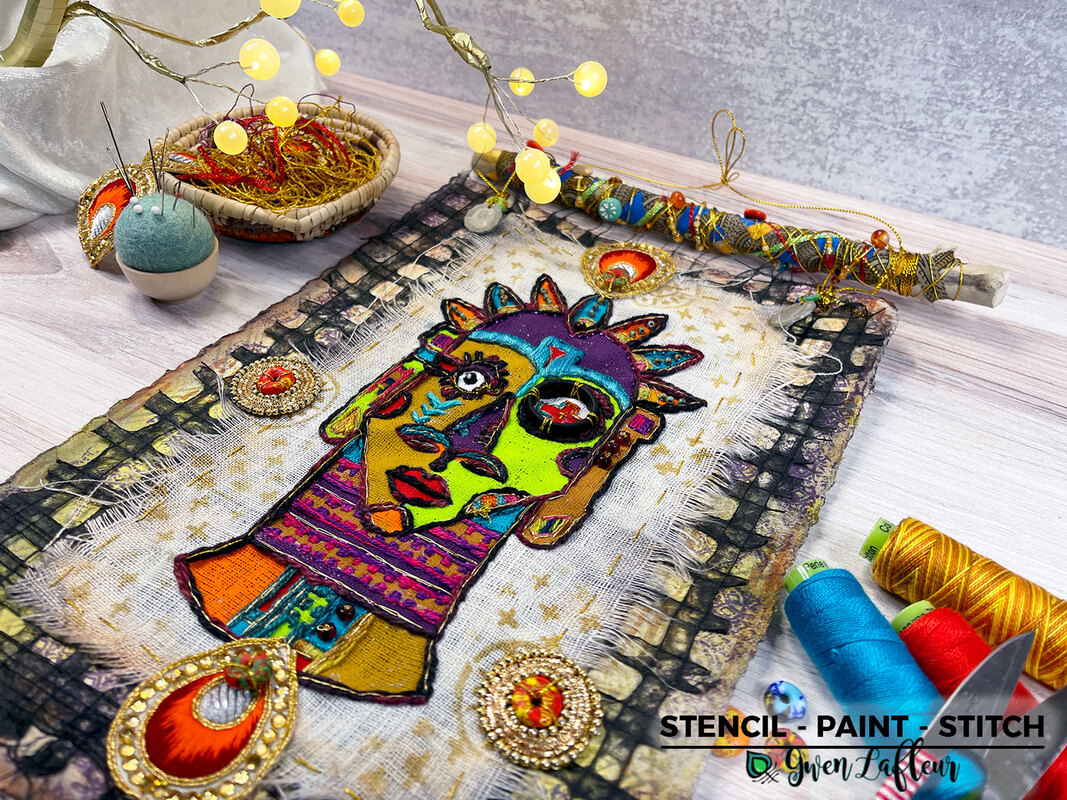 It's that time again... my quarterly Paint & Texture column is up over on the StencilGirl blog. This month I'm using my Boho Faces stencil with paint and stitching to show how thread (and a few beads, of course,) is a great way to add texture to your artwork. Head on over and check it out! I've got a free photo tutorial showing how the painted and embroidered face focal point came together. And if you like this project, you may also be interested in my next Live online class, Make a Statement - it's this Saturday, April 24th, at 1pm Eastern time (but you can watch the archived version at any time as long as you register in advance.) The samples are mixed media statement jewelry, but you can just create the components and use them for other projects if jewelry isn't your thing. Hope to see you there! 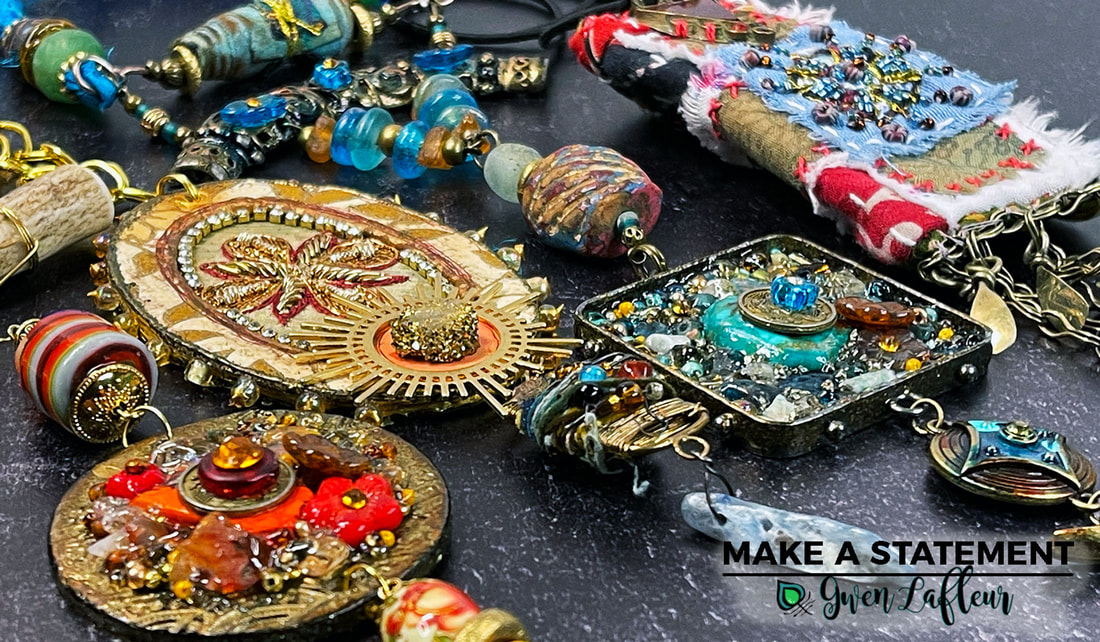 Products for this tutorial:  It's Topflight Stamps 4th birthday! I'm joining in the celebration along with a group of fabulous designers to share handmade birthday cards that showcase many of the unique products available at Topflight Stamps (including my stamps and embossing powders!) I hope you'll enjoy my cards and tutorial and then continue to hop along with us to see the variety of fantastic products from this talented bunch. (And make sure to stick around to the end to find out how you can win a gift card.) Updated... winner is on the bottom of the post! If you're following in order then you should have arrived here from Rachel Greig's blog, but if not - no worries! Get the full list of participants and links to their blogs at the bottom of this post. For my contribution I've used my stamps from PaperArtsy and my Boho Blends embossing powders from Emerald Creek to make a pair of mixed media birthday cards. 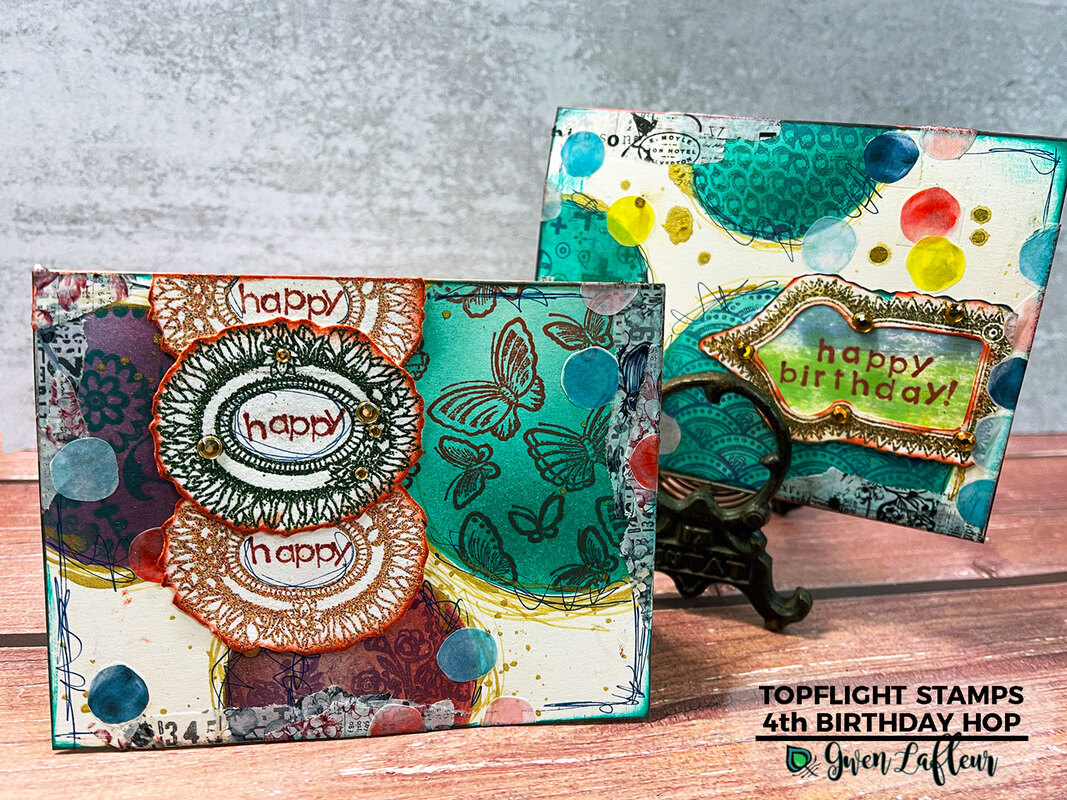 I put together a little tutorial to show you how I made these and which products I used to achieve the various effects. Ready to get started? Step 1: I started out with Neenah Extra Heavy folded cards and used Lavinia Acetate Circle Masks along with Prism dye ink from Hunkydory and a blender brush to put down three circles of ink on the front of my card. 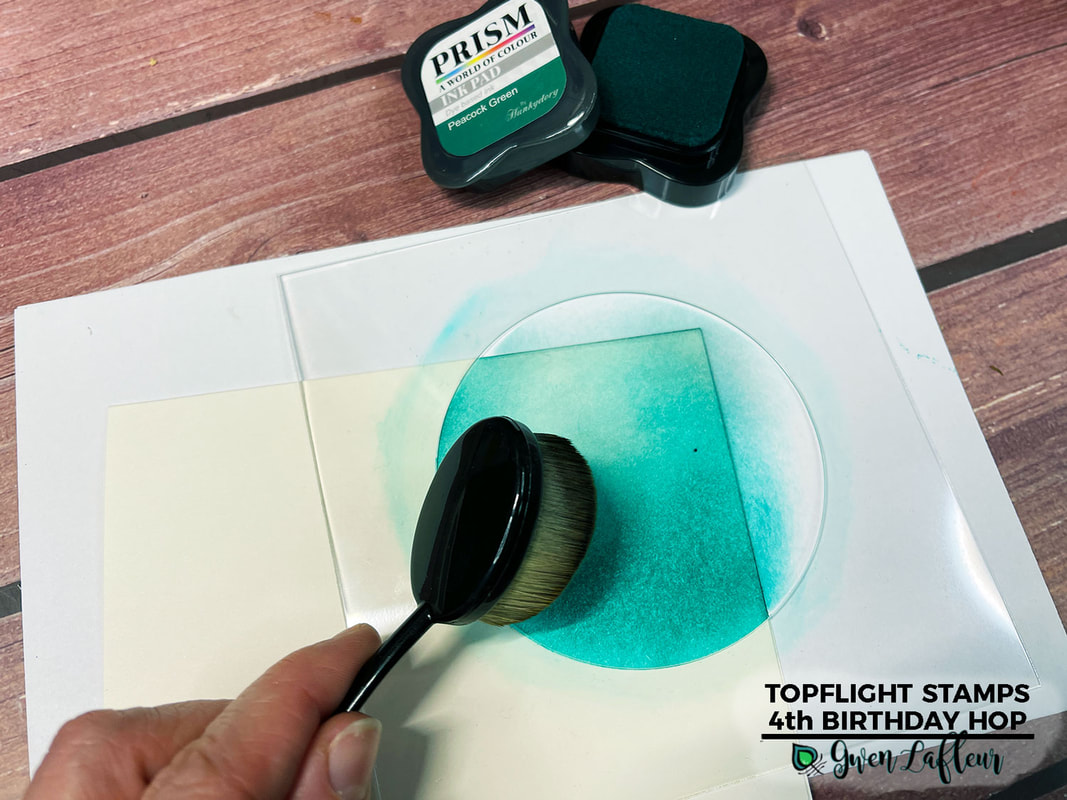 Step 2: I traced the Lavinia masks onto plain copy paper and cut out the circles to create masks for my stamps (the acetate masks will work too, but they're a bit thicker and so it creates a bigger gap between the stamp and the edge of the circle when you stamp over the mask. The thickness of the acetate is perfect for inking, though.) I laid the paper masks over top and matched them up with the inked areas, then used designs from my different PaperArtsy stamp sets, stamping repeatedly, to fill the inked circles with pattern. (The set in the photo is my EGL10 set - Japanese Patterns. I also used EGL11 - Suzani Florals as well as my new EGL13 set, Botanical Illustrations.) I stamped with a combination of the Prism Dye Ink Pads as well as Hero Arts Ombré pads.  Step 3: I took the Prism Glimmer Mist in Glamour Gold and instead of spraying, I opened the bottle and used the tube for the sprayer as a skewer and drew rough outlines around my circles with the gold ink. 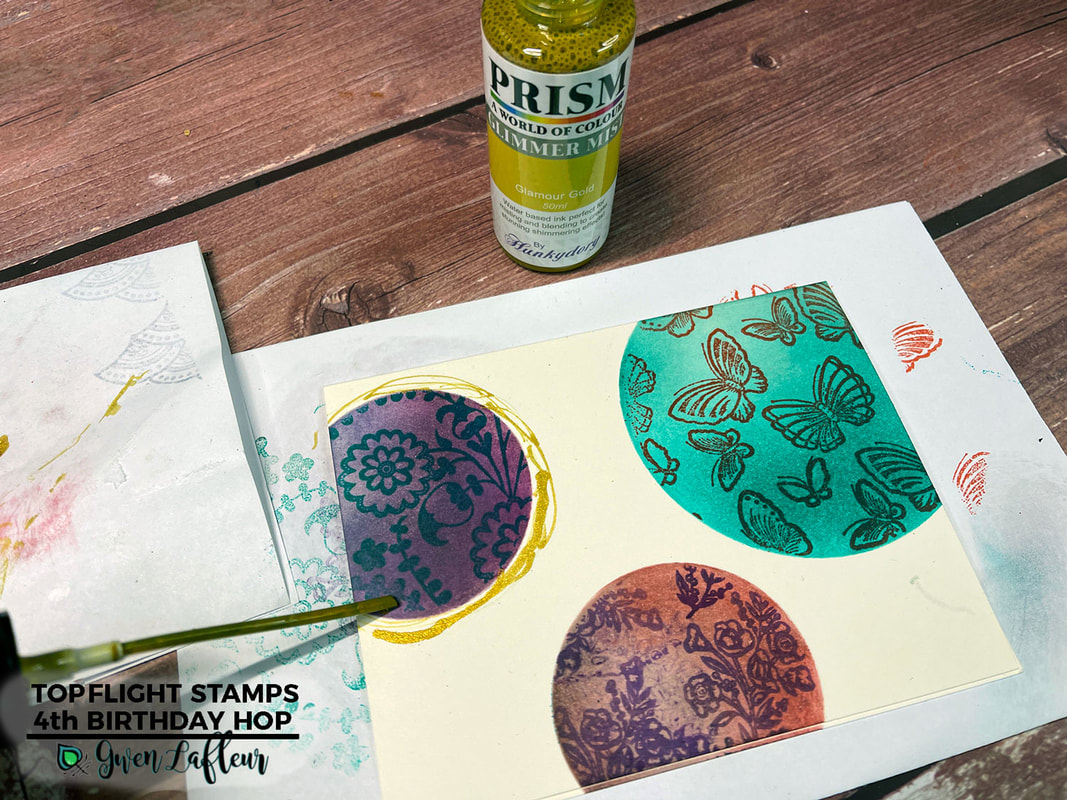 Step 4: I used bits of washi tape along the edges (two of the designs by Tracy Evans for AALL & Create) and then cut circles from the Colorful Circles washi from l'Encre et l'Image and adhered them onto the card (I used a glue stick since handling them during cutting takes away a lot of the stickiness.) 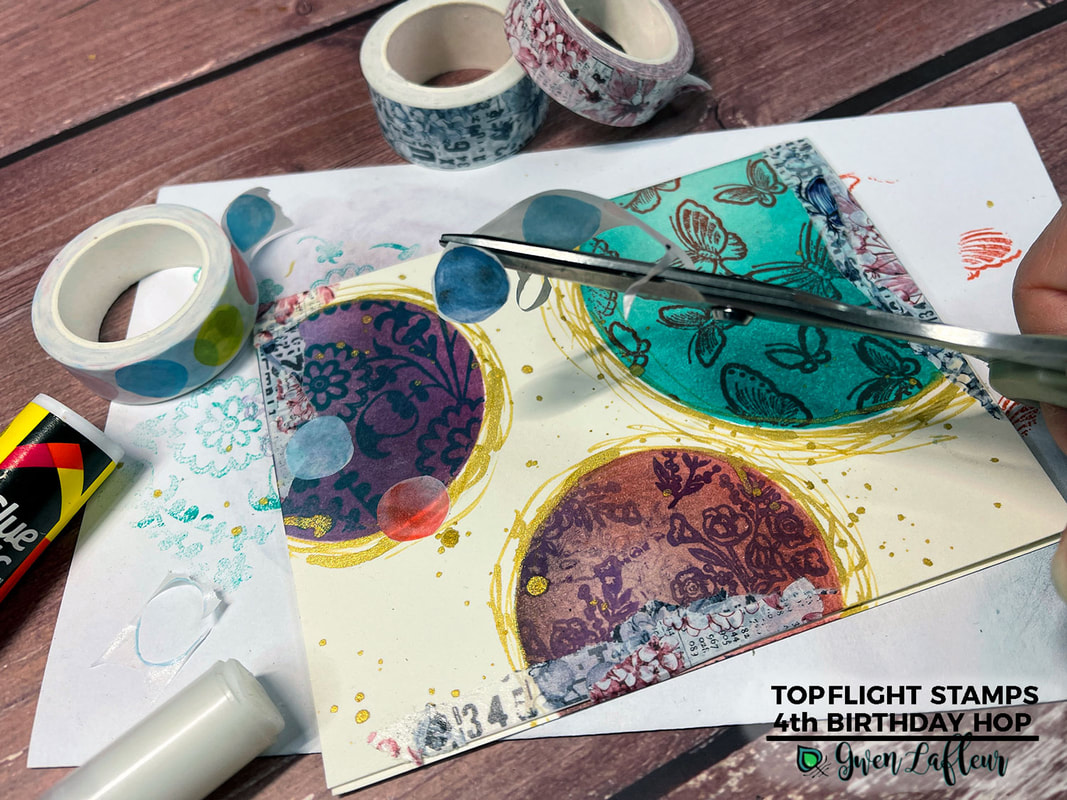 Step 5: For each of the cards, I chose one of the frames from my new EGL14 (Ornate Frames) stamp set and stamped on watercolor paper with embossing ink and then used some of my Boho Blends embossing powders to heat emboss the images. (For this piece I used Kano Green and Moroccan Sun.) 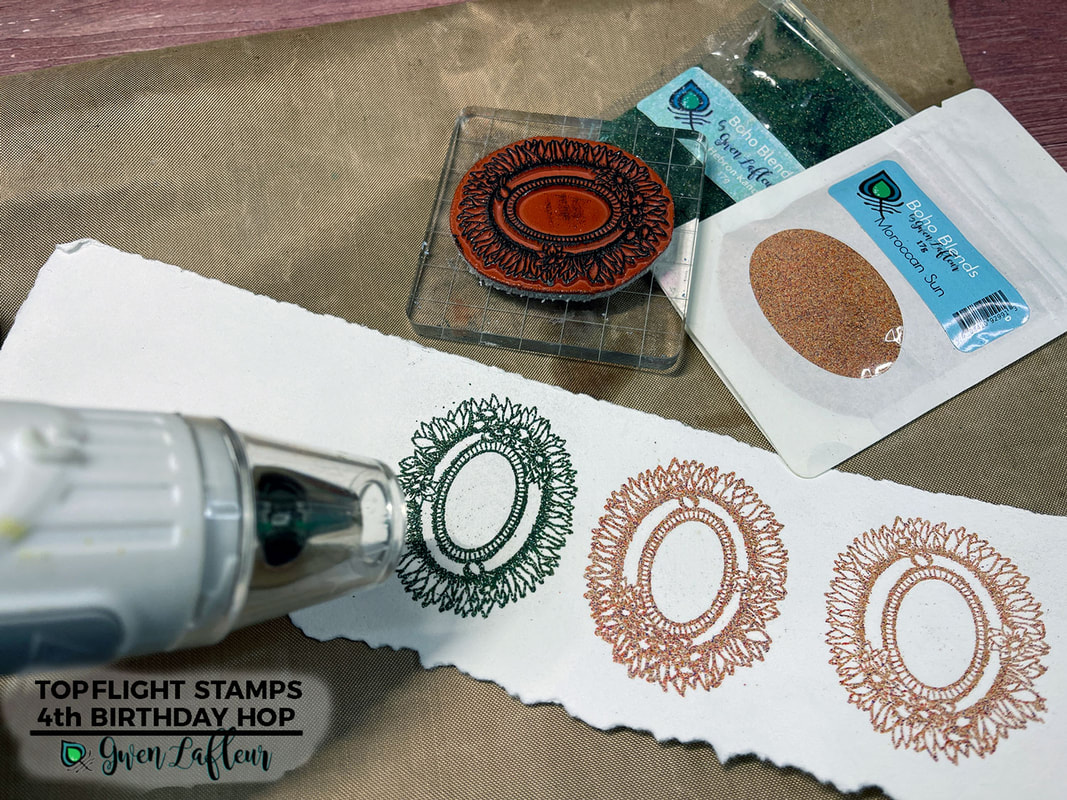 Step 6: I added sentiments to the birthday cards by using a small alphabet set to stamp my words, then I cut out my frames and edged them with more Prism ink (I used Smoked Paprika here) and then adhered them onto the card with Hunkydory Finger Lift Double-Sided tape.  Step 7: To finish, I added some self-adhesive rhinestones (Hunkydory Diamond Sparkles Glitter Gemstones - Gold Sparkles) onto the main frame to highlight my stamped sentiment and then just used a regular pen to scribble borders and add a few marks. 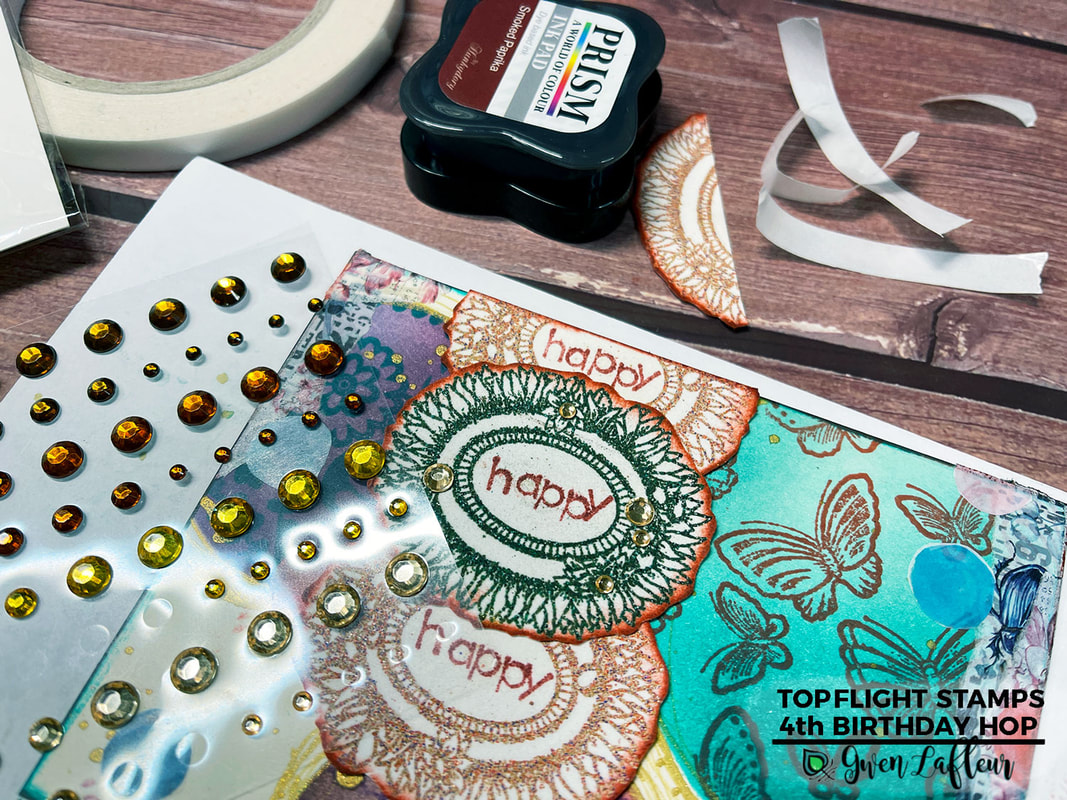 Voilà! Completed mixed media birthday cards. I love the look of layering ink, stamping, embossing, and washi tape all mixed together to highlight the celebratory sentiments and I'm excited to have these ready and waiting for the next time I need a birthday card :) I hope you enjoyed both the cards and the tutorial... here are a few more close-ups so you can see both of the completed cards.
Of course, it wouldn’t be a birthday celebration without prizes! Topflight Stamps is giving one lucky winner a $100 Gift Certificate to the store!
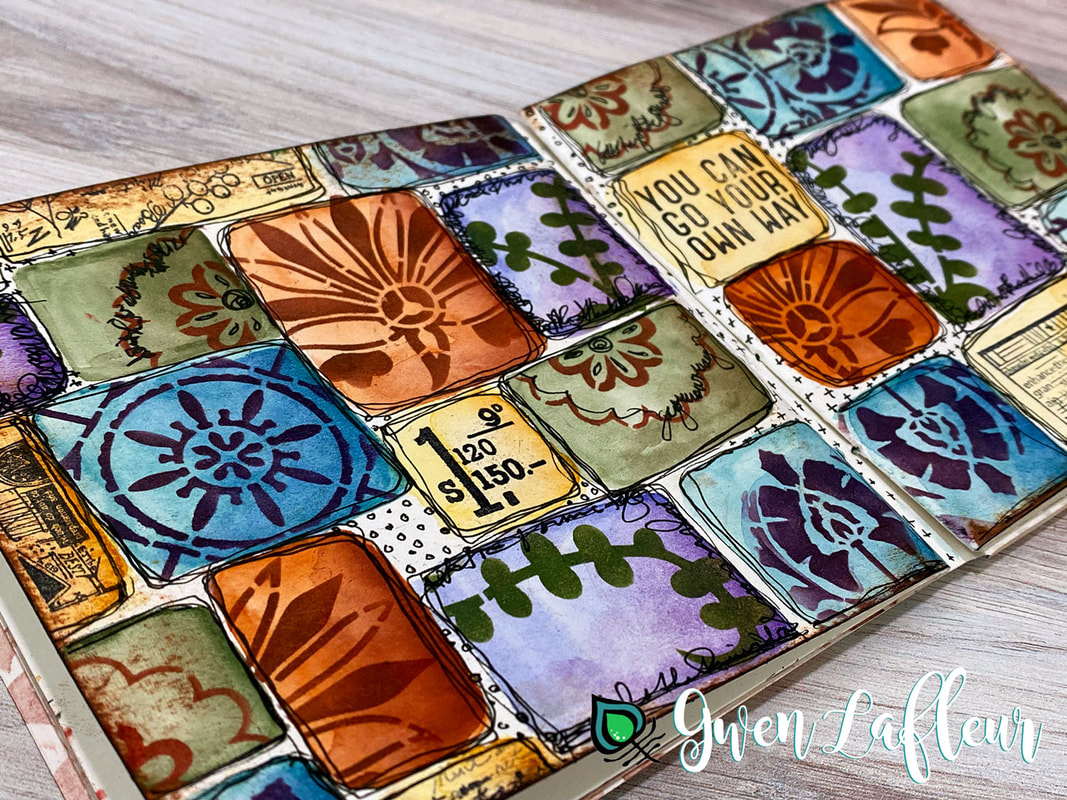
But wait, there's more. Each stop on the hop has an additional $25 Gift Certificate up for grabs for some lucky commenter. For a chance to win, make sure to visit every stop on the blog hop and leave a comment by March 29th. Winners will be announced on the Topflight Stamps blog on March 31st. Updated with the winner - congratulations to Mary Herman! Please contact me or Topflight Stamps to get the code for your $25 gift certificate. If you want to follow along and see all of the posts in the hop (and comment on each to enter to win one of the gift certificates!) here's the list of participating designers: 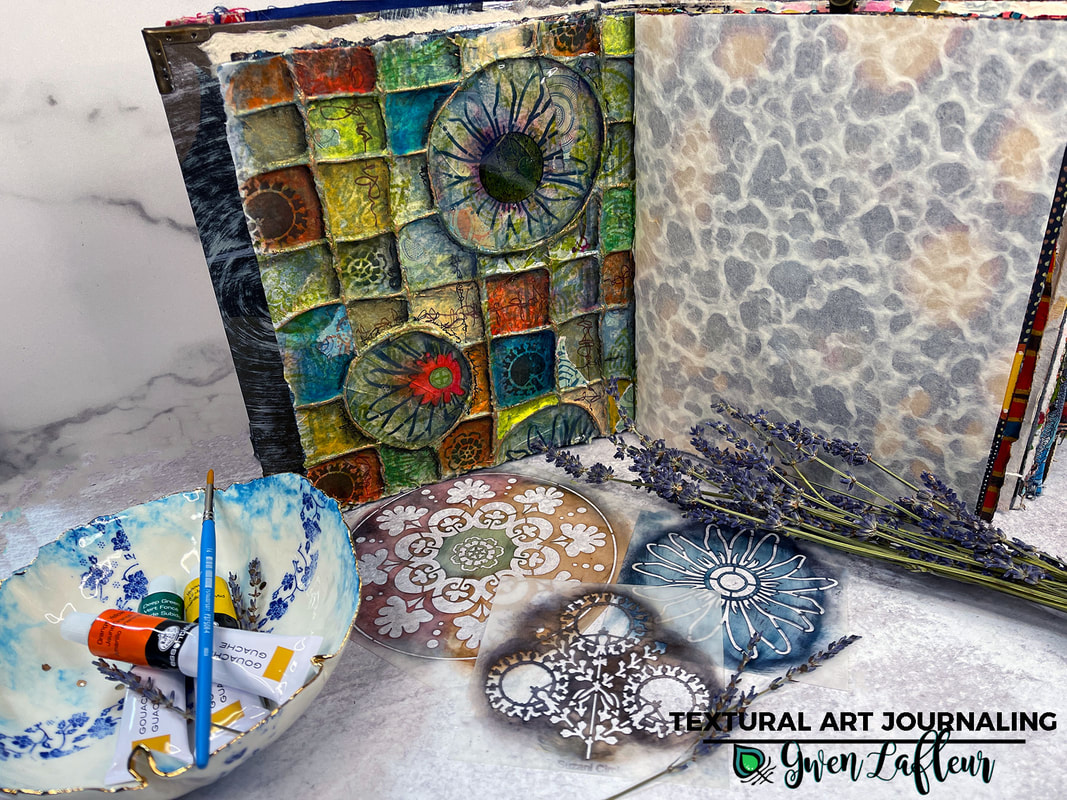 I have a new mixed media / art journaling tutorial available today! Today on the StencilGirl blog I'm sharing a step-by-step photo overview of how I created this art journal page, including an amazing textured grid in the background. It's full of fun tips and techniques and I'm excited to also be showcasing a few of my latest stencil designs in this project. I hope you'll stop by and check it out! Products from this post... 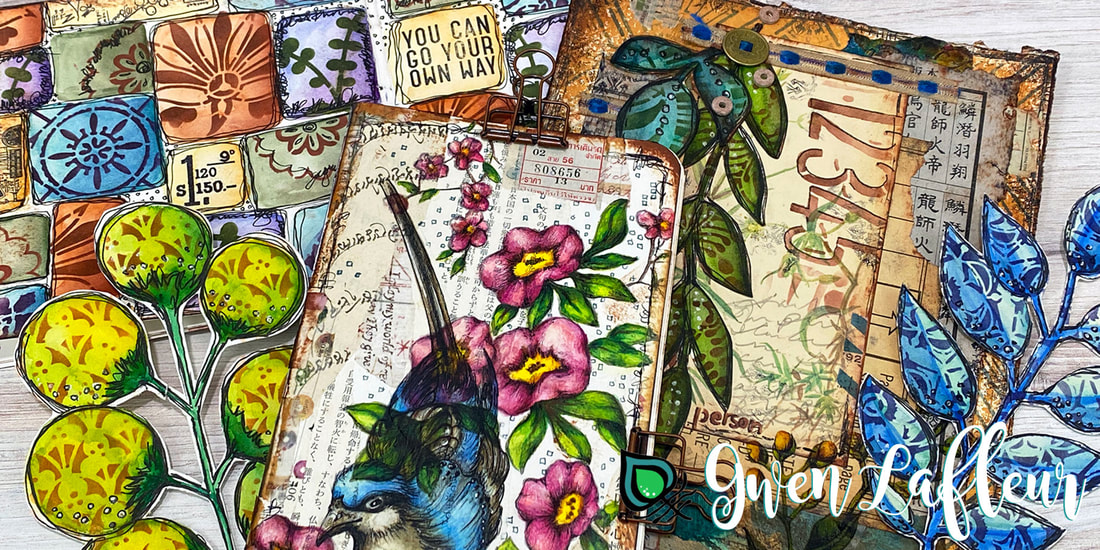 Hi all! Just a quick post to let you know that I'm up on the StencilGirl blog today with my quarterly Paint & Texture column. This month I'm sharing three ways that you can incorporate watercolor and stencils into your mixed media projects and there are three mini tutorials to go with it! Here's a peek at each of the three projects I'm sharing:
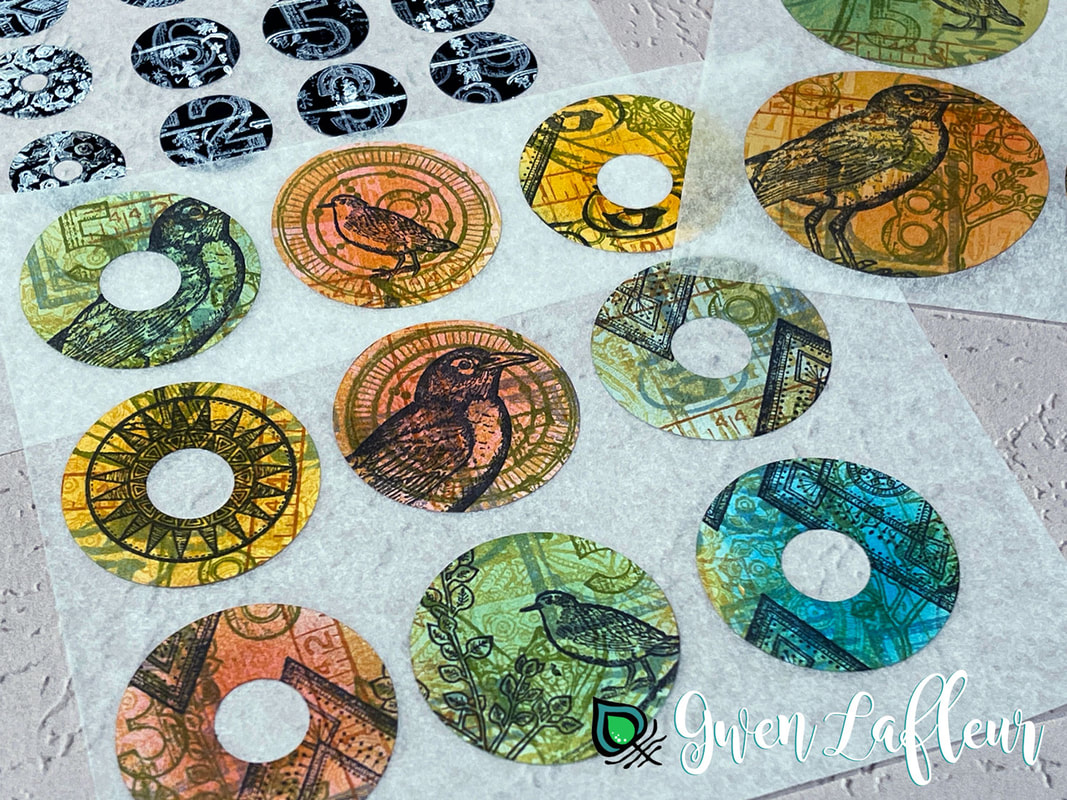
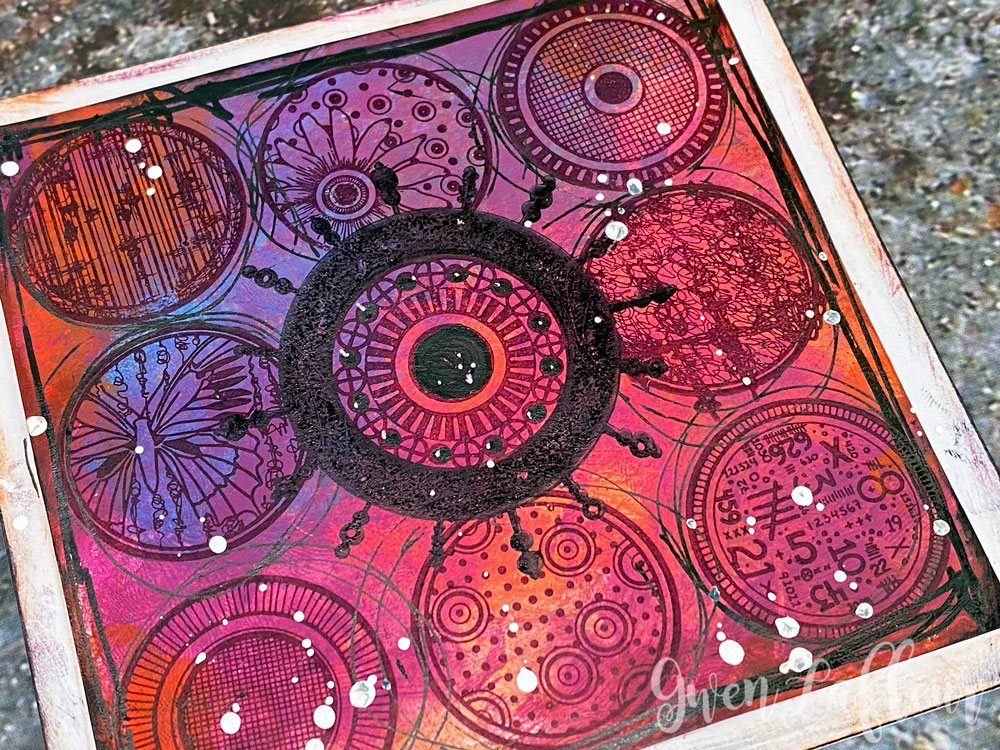
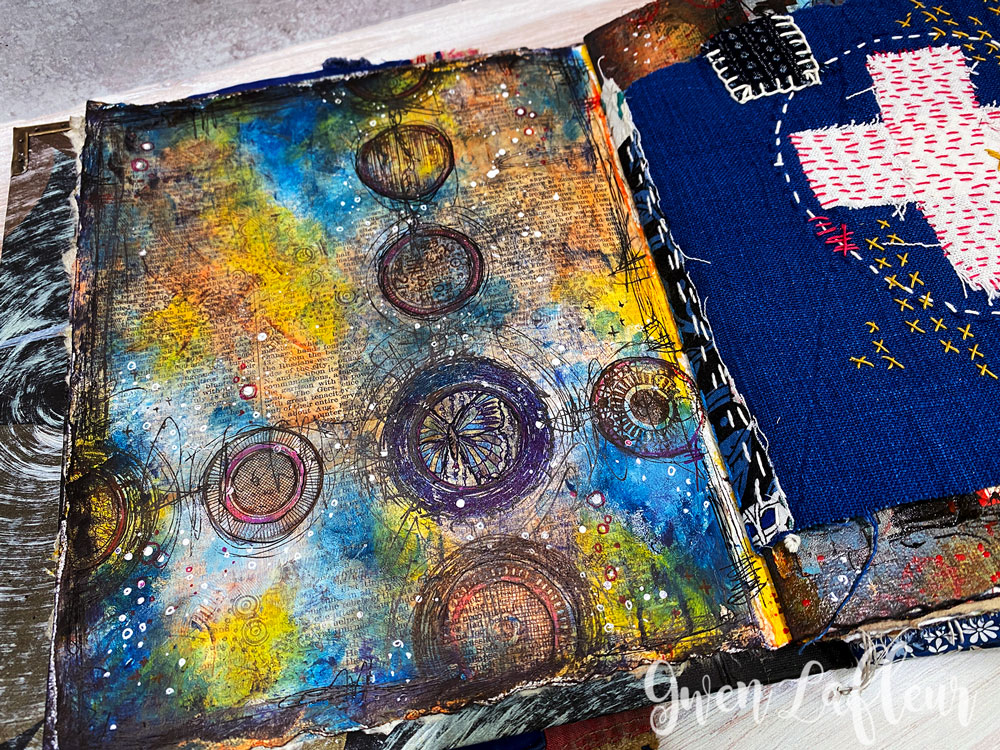
Make sure to head over to StencilGirl Talk to get all of the details, including the step-out instructions for how I used watercolor and stencils to create each of these projects. Products to go with this post... 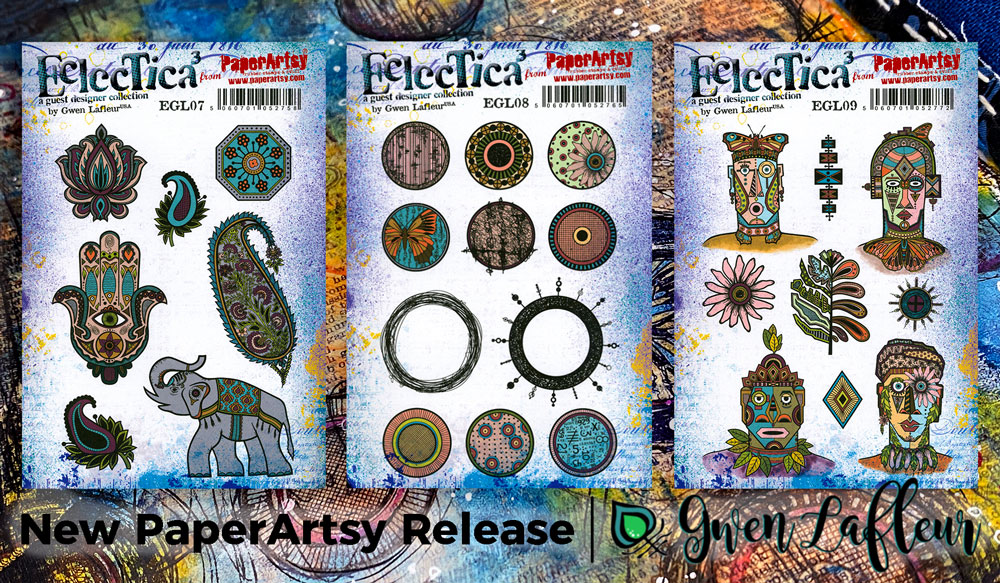 I'm excited to share that today is the big reveal for my next three rubber stamp sets designed for PaperArtsy. These sets continue the trend of 100% hand-drawn designs that mesh together influences from my travels and many cultures around the world. Below you can see each of the new sets (which are also now available in my shop,) as well as a few samples using them. First up, EGL07 - the one I call my India set. 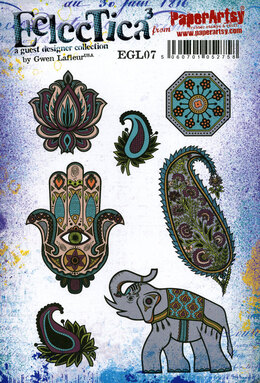 I love the motifs here... the lotus, hamsa, and elephant are all more detailed versions of some of my hand carved stamps. The paisleys and the octagon were drawn based on vintage Indian textile patterns. I love to combine these with my other stamps, but for the release I've done a few projects that just use this collection. First up, a stamped background that could go onto a scrapbook layout, an art journal spread, or be done on a smaller scale for card and tags.  I've also made four little stamped spreads in one of my mini art journals (this one measures 3" x 3", so the double spreads are 6" wide by 3" tall.) 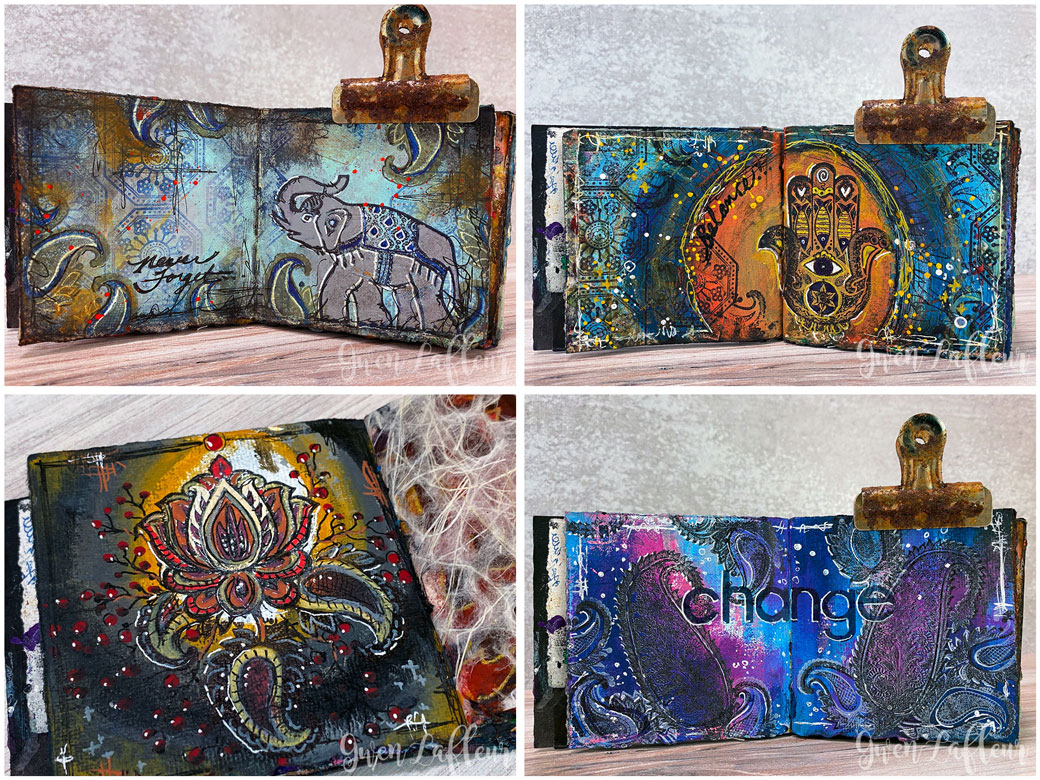 Next up is EGL08, or my Mark Making Circles set. I wanted a bunch of circles that were full of my own hand-drawn images and marks, but I also wanted to be able to layer them so I created two frames that will fit around all nine of the smaller circles. (I snip the centers out of my frame stamps so that I can see to position them when stamping around the pattered circles.) You can see more images of these art journal spreads on the official PaperArtsy release blog post. 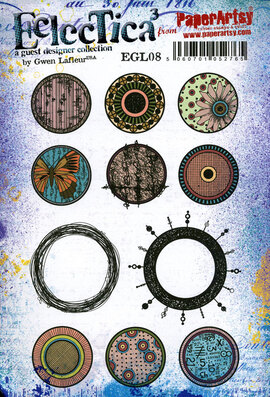 For my Mark Making Circles set, I made a quick and easy card, stamping 9 of the 10 images in the set onto painted cardstock. Then I used acrylic and dye inks on collage for the background and repeated the circles to make a cruciform shape as the focal point. I love the versatility of this set.
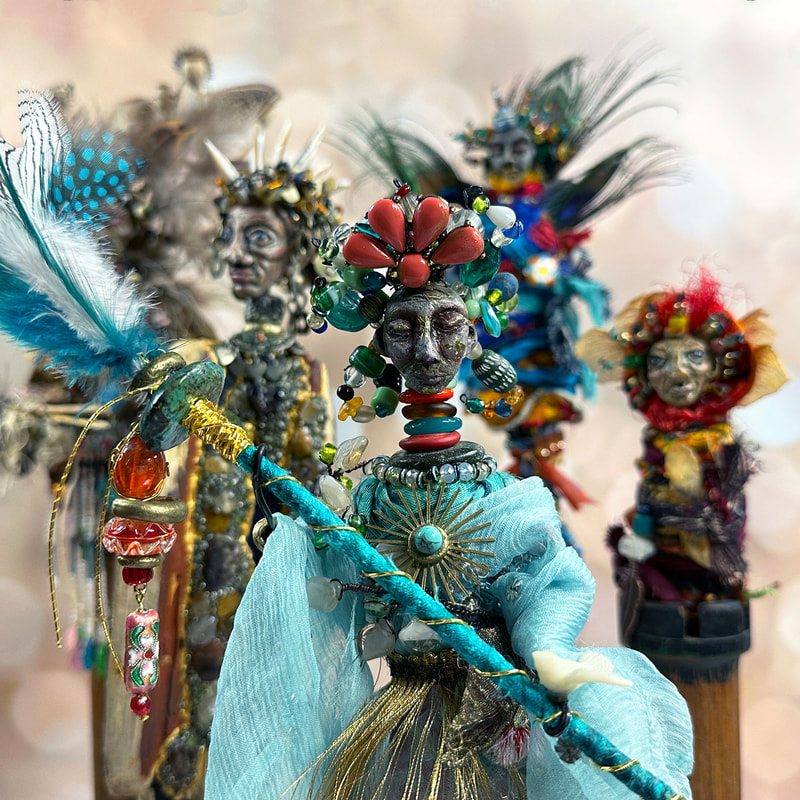
The last set is probably my favorite of all of my sets so far... it's a bit of an odd duck, and a total and complete mix of many different influences combined with a large dash of whimsy. EGL09 is the one I call my "Tribal Faces" set. 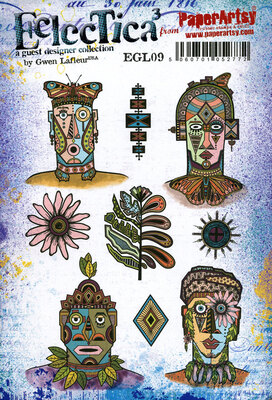 I made a very quick card with a watercolored background and some marks to show how you can stamp these without doing detailed coloring and still get cool results. 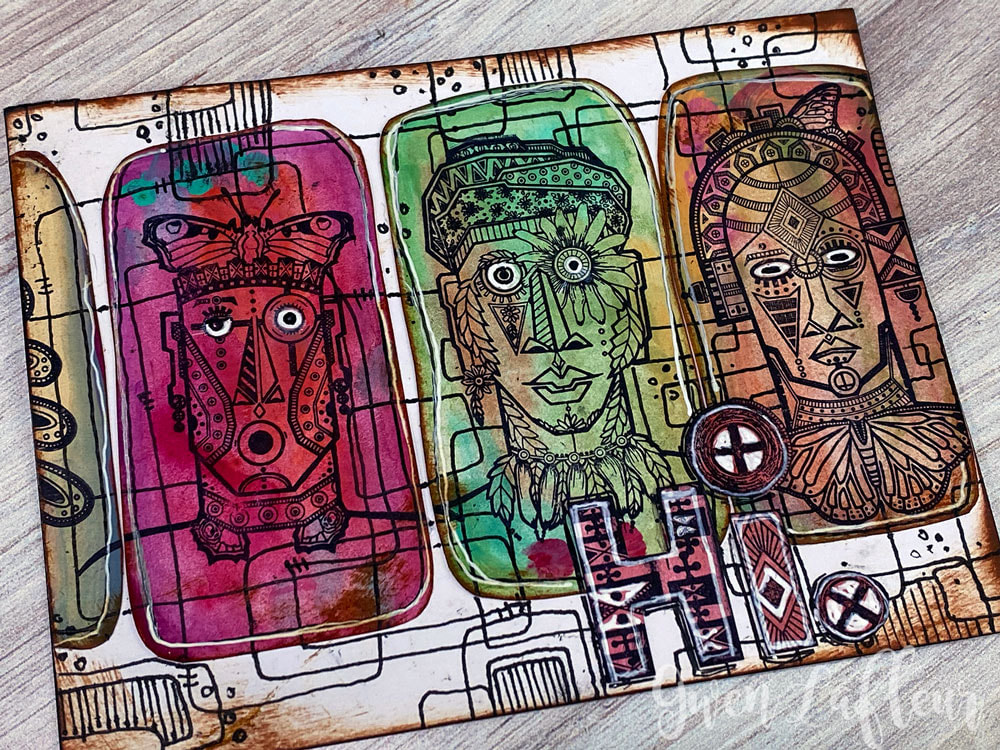 I also made a set of accordion art dolls using all of the different elements in the set - not just the faces. To complete the look, I gave them all Ikat printed robes that I drew and colored based on Uzbek chapins and textiles. (I call this piece, "The Usual Suspects." 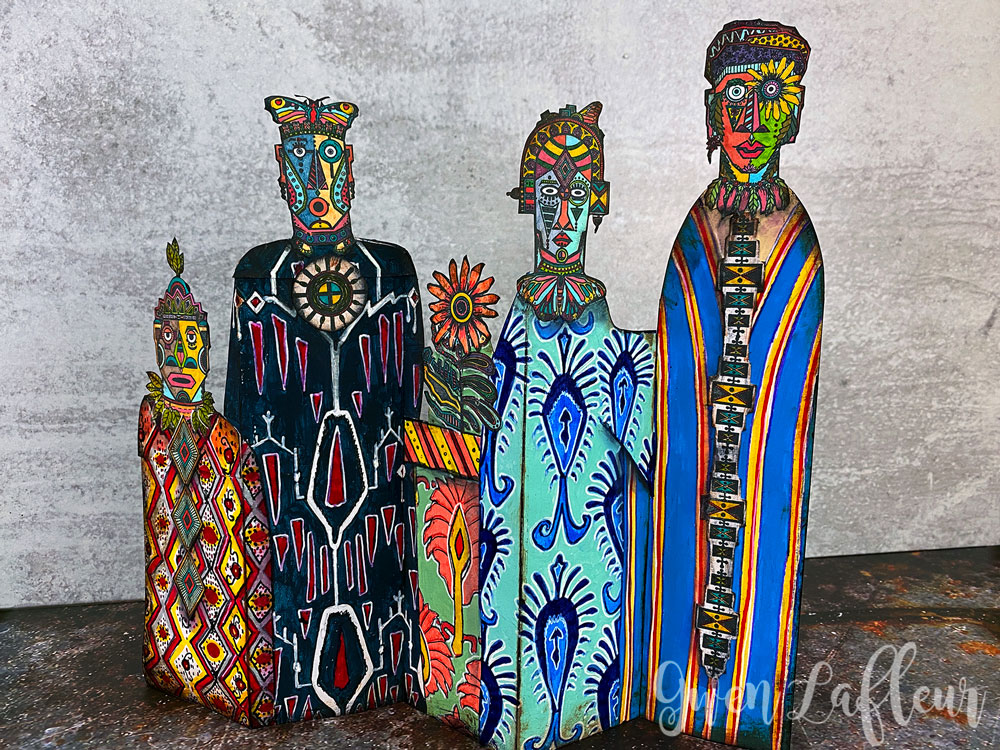 I also did one more mixed media piece that uses all three sets together:  You can see a short tutorial for the above piece on the PaperArtsy blog as well as more photos of the finished project. I hope you like these new stamps as much as I do. And keep an eye open for an announcement tomorrow for a brand new live online class featuring one of these sets. You might also like... 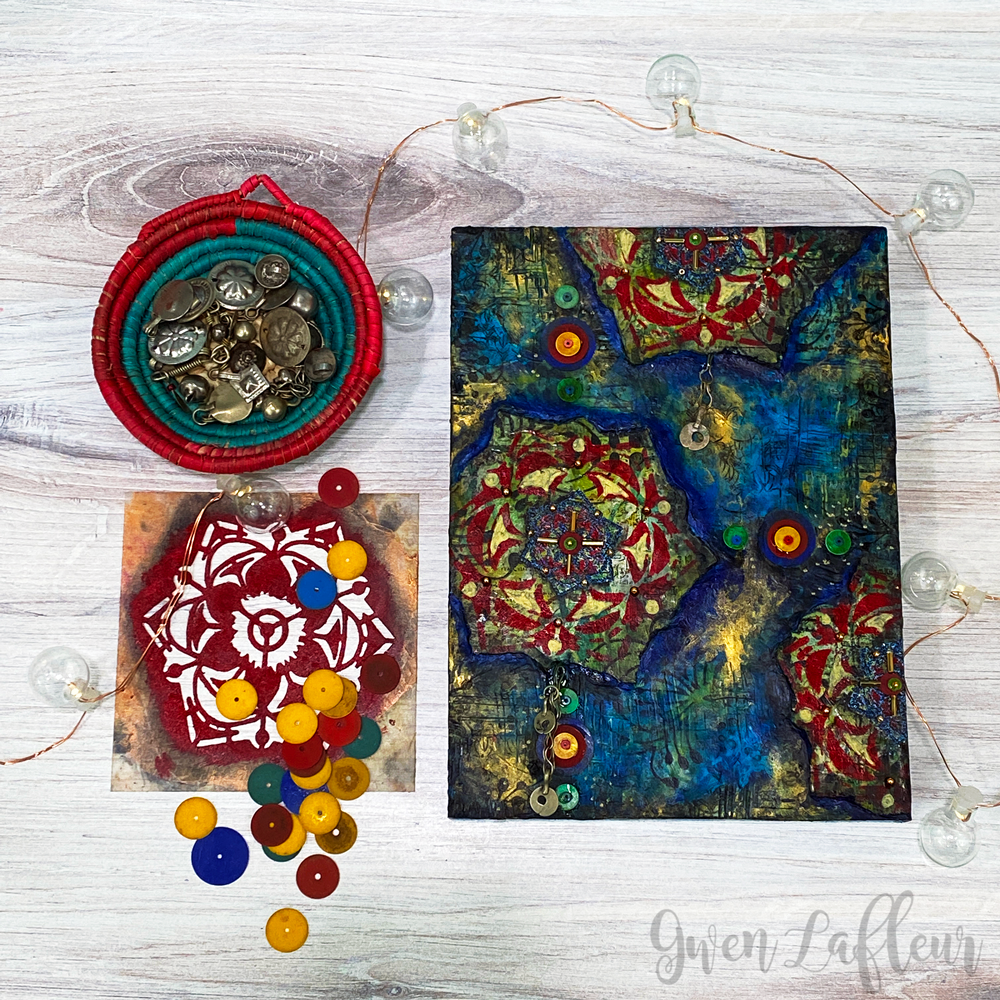 Just popping in to let you know that my quarterly column on the StencilGirl blog is up! Today I'm sharing part of the process for making this mixed media piece, which includes stencils, stamps, heat embossing, and water-soluble cold wax mixed with acrylic paint and water-soluble wax paints. Head on over to see more photos and get details on how it all came together. The original artwork from this post is available for sale in my shop. Products from this Project... |
Categories
All
Archives
August 2023
|

 RSS Feed